This post contains Affiliate Links, marked with a *. This means that if you purchase the product, I will receive a small amount of commission. This does not affect your purchase price and I will not receive any of your details.
It’s no secret that most of us if we had our way would consign uPVC doors to the anals of “bad home ideas”. Don’t get me wrong, practical they may be but my goodness, does it have to be SO hard to find a good-looking one?
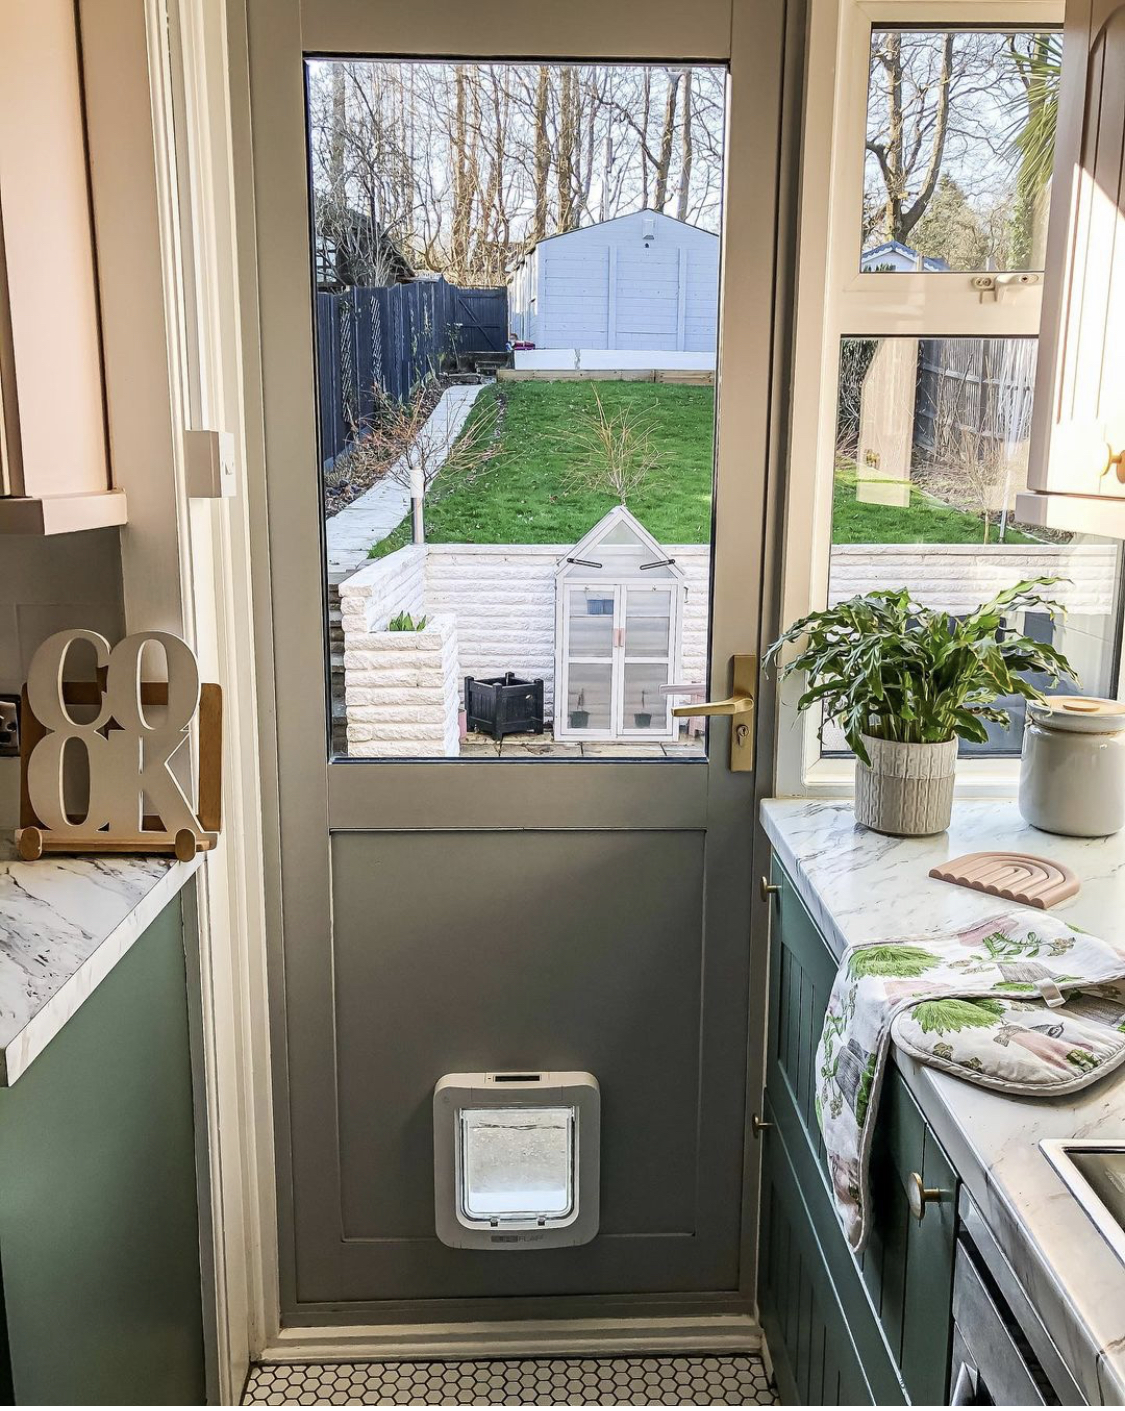
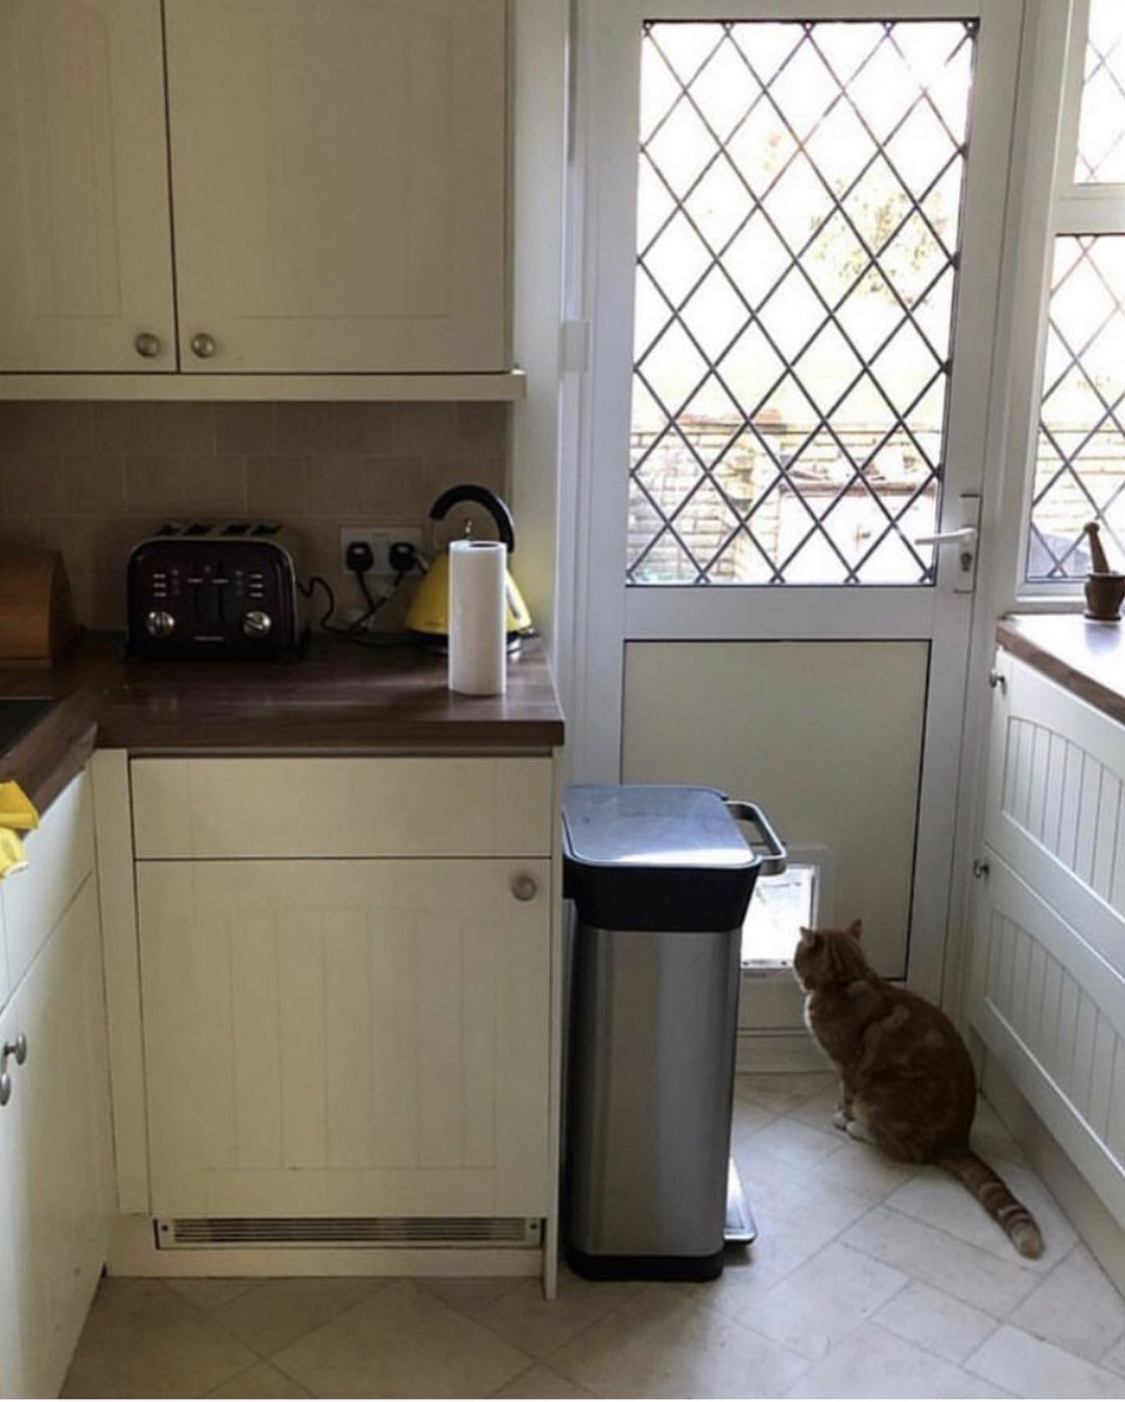
We’re lucky enough to have a wooden front door (although that in itself presents its own set of issues) but the door leading from our compact kitchen out into the back garden was long the bane of my life. A luscious two-tone colour with leaded glass windows is about as un-sexy as it gets and I can only assume the tonal colour difference was perhaps a lazy update when a cat flap was installed.
Thankfully though there are some very clever ways to improve the overall appearance of uPVC doors which most of us can do with very little know-how and very little money. I’ll start though with the one that would need a bit of financial investment but arguably has the biggest impact.
Changing The Glass
As you can see from our old door we were *blessed* with leaded windows. It’s a feature across our 1930’s estate and whilst some houses have moved away from the “help I’m in jail” look, many houses including ours still have it as a questionable feature. Maybe it’s a marmite thing but I properly hate leaded windows, they’re restrictive in so many ways not least in letting light in and enjoying a view.
When I did my stealth kitchen makeover a couple of years ago, I knew that replacing the doors was a pointless solution having not enough time and also knowing that at some point we’ll be extending so this is only a temporary solution. However, having a local glazier company replace the leaded glass with plain glass took just a couple of hours and cost around £300 (we have another kitchen window that they did too) and HONESTLY I can’t tell you how much of a massive improvement just that alone turned out to be.
Our garden may currently be quite the blank canvas but it just feels so lovely to look out over it whilst I’m cooking and it was definitely worth it.
Paint The Door
Now painting uPVC doors is nothing new and sooo many people I know have already tackled theirs. It couldn’t be easier – mine is painted in the Al Fresco range from Frenchic*, colour Swanky Pants. All I did was wash the door down with some sugar soap or you could use the product Elbow Grease to make sure any residual dirt has disappeared and then I went directly on with two coats of paint. I didn’t sand the door and I didn’t use a primer. The paint has held up brilliantly – its been two years now and no scuffs or touch ups required.
You can also use the paint on composite doors* and paint externally too as I’ve done with the back of our kitchen door.
Spray The Handle (or replace it)
When I painted the door I actually left the handle for a while because our original thought had been to replace it. Then it turned out to be quite an old fixture and wasn’t as straightforward as just swapping like for like. So I painted it the same colour as the door itself and this was fine for a while but with such a high traffic area as a handle it quickly started chipping and became discoloured. My mistake was no prep and no sealing.
I decided to give it a little bit of bling by spraying it gold to match our cupboard and drawer handles. So I lightly sanded the old paint off using a 120 grit sandpaper before cleaning the handle with Elbow Grease. The next step was priming with Johnstone’s Any Surface primer* (one coat, brushed on).
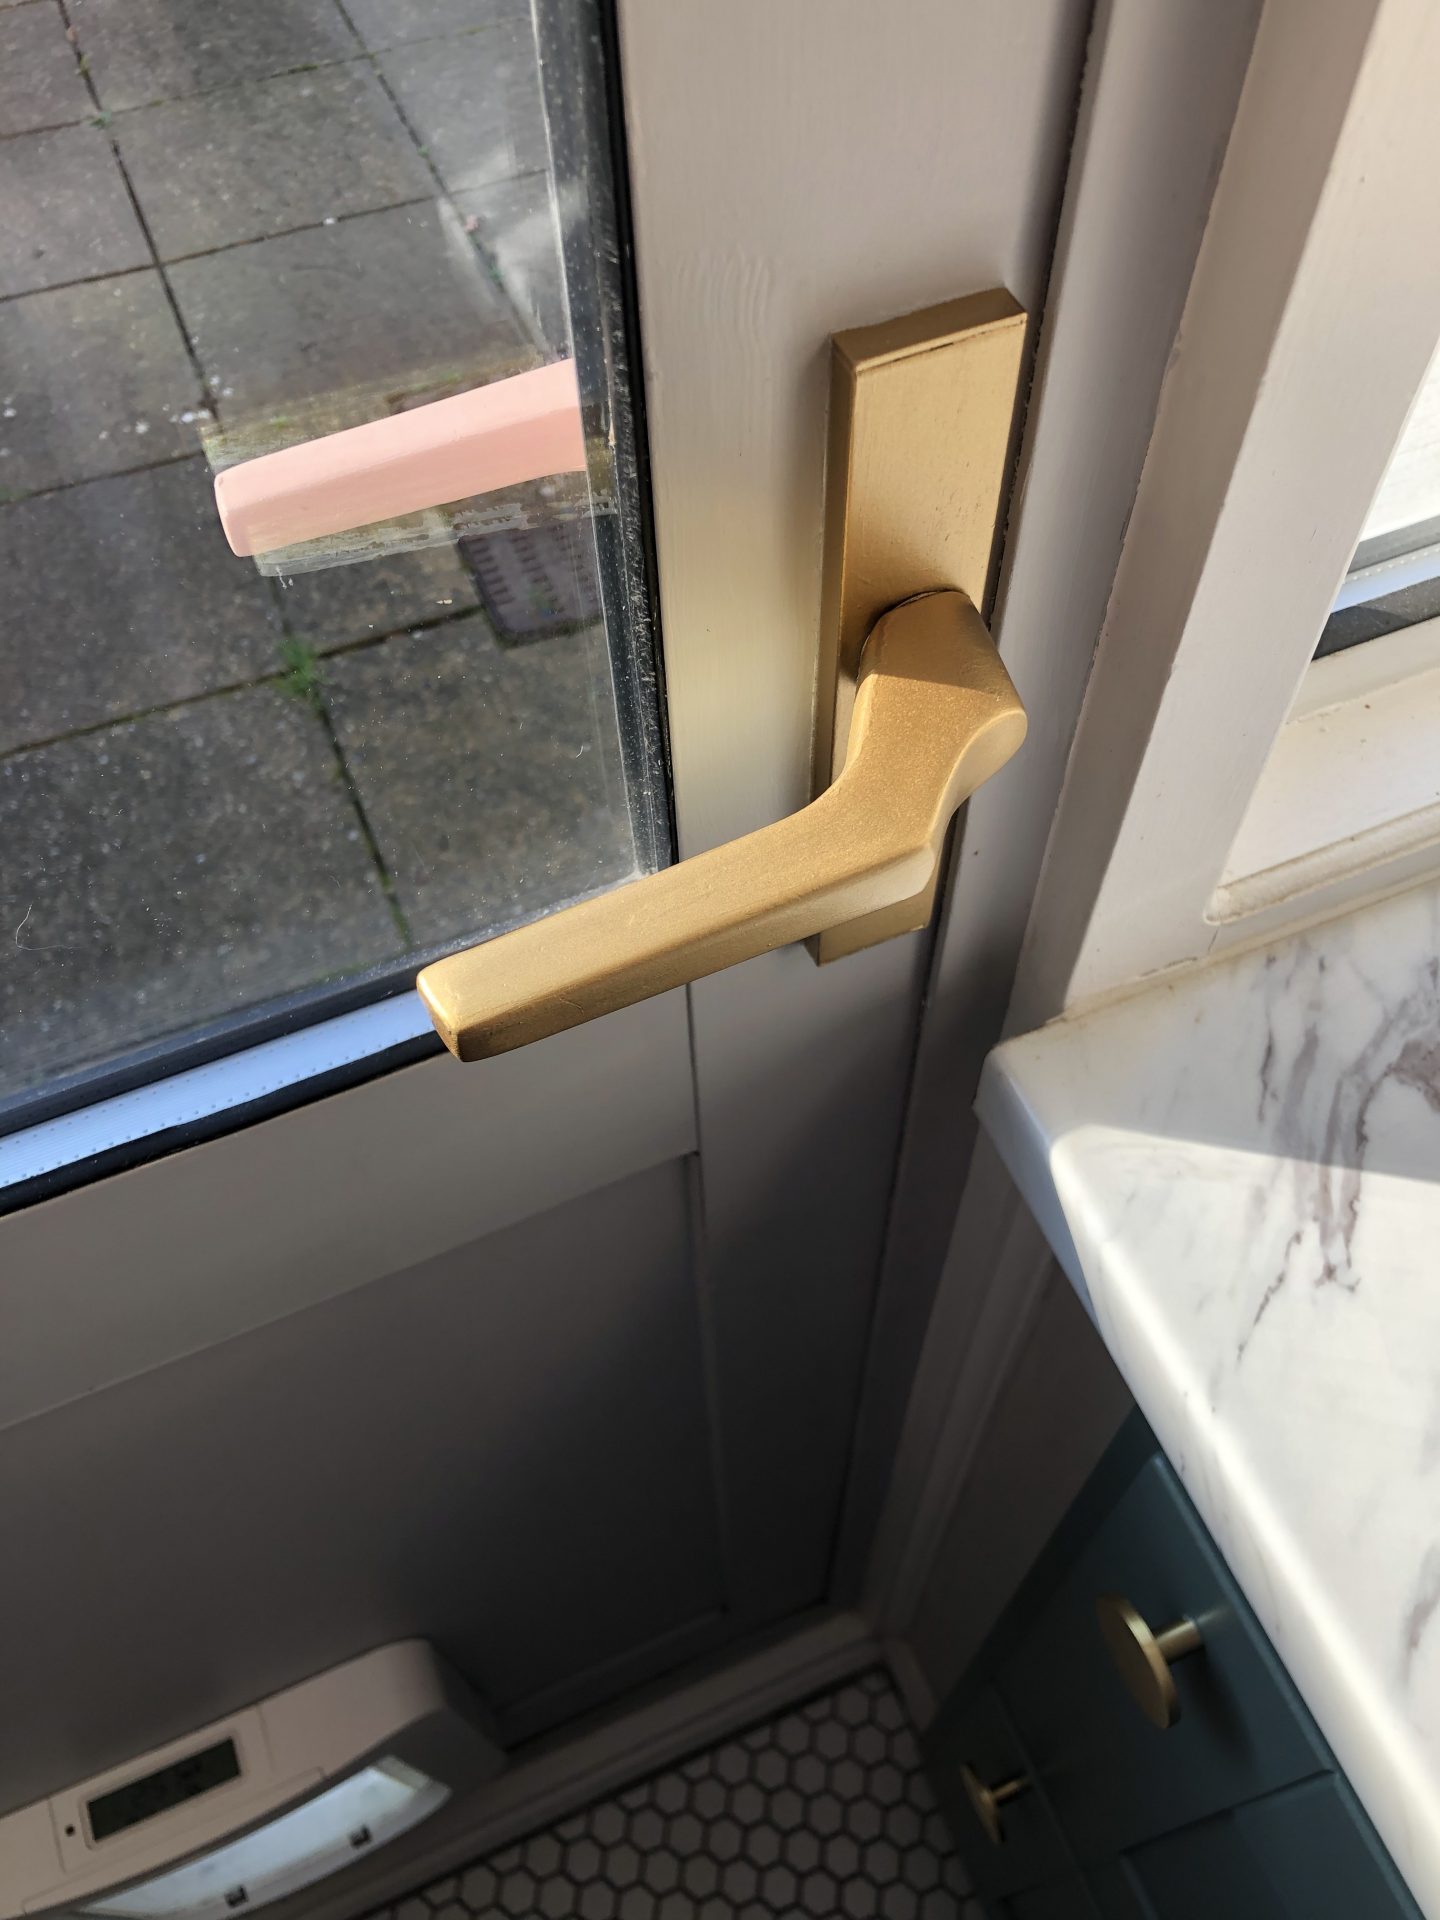
This provided a great base for the spray colour and for this I used Rustoleum Brilliant Gold*, in light even coats until it was all covered. Finally I finished off with the Rustoleum clear spray sealant* to protect the handle and so far so good – it has only been a couple of weeks but it’s looking perfect now so I’m optimistic that it will last well.
I’ll update this post if there are any changes to that but I hope this has helped give you some ideas for your own glow-up projects!
Follow me on Facebook | Instagram | Pinterest | Twitter


Nice and informative post.