I’m no stranger to renovating fireplaces. We were fortunate to have a fireplace both in our living room and dining room when we moved in and I was overjoyed as they’re such a fabulous feature.
Whilst our living room fireplace has had a full-scale makeover, the dining room one has now had a couple of temporary new looks as we plan to extend from this room in future. It can be SO easy to give a fireplace a whole new look, well away from the dated one you may have inherited.
Sounds familiar? Then I have good news! You’re in the right place as this will show you how simple it is to paint a wooden fireplace surround to achieve an effortless finish that will elevate the overall look of your design scheme. But first, why should you bother?
Why Paint A Fireplace Surround?
As our homes are the biggest financial load we ever have to bear, it stands to reason that they should feel worth every single penny. But that doesn’t have to mean a head-to-toes revamp or extensive renovations.
Something as simple as painting your fireplace surround with a fresh lick of paint can banish that dreary, outdated feeling from a room – and you can do this for a fraction of the cost of replacing it.
Besides this key motivation, is a multitude of reasons why switching up the colour of your fireplace surround might take your fancy, but here are just a few to ponder over:
- Creates a chic focal point
- Draws attention to beautiful tiling
- Modernises antique fireplaces
- Builds depth and character
- Helps maintain a cohesive look
- Conceals imperfections
Where To Start With Painting Your Fireplace Surround
On Selecting The Right Paint For Your Fireplace
This part is absolutely crucial. If you want the job done to a good standard, choosing the right type of paint is a must. And this calls for careful consideration.
Usually, this means weighing up the spec on the side of the can, checking the paint will adhere well to the surface, looking up its eco credentials and (the fun bit!) exploring the repertoire of shades and hues available to you.
For DIYers looking for a reliable paint with a little finesse, an interior wood paint with an eggshell finish will do just perfectly for a wooden surround (we’re focusing on wood because they’re much easier to paint!). The light sheen will help to conceal any marks and scuffs, which is useful for areas where you might be making frequent arrangements. If you end up painting the fireplace itself, you will need heat-resistant paint.
On Picking Out Your Colour Scheme
No matter how big or small your fireplace surround may be, refreshing the colour can completely transform how you perceive a room, allowing you to live your life at home to its fullest potential. From calm neutrals to more courageous choices, here are a few colour pointers.
Stay Neutral
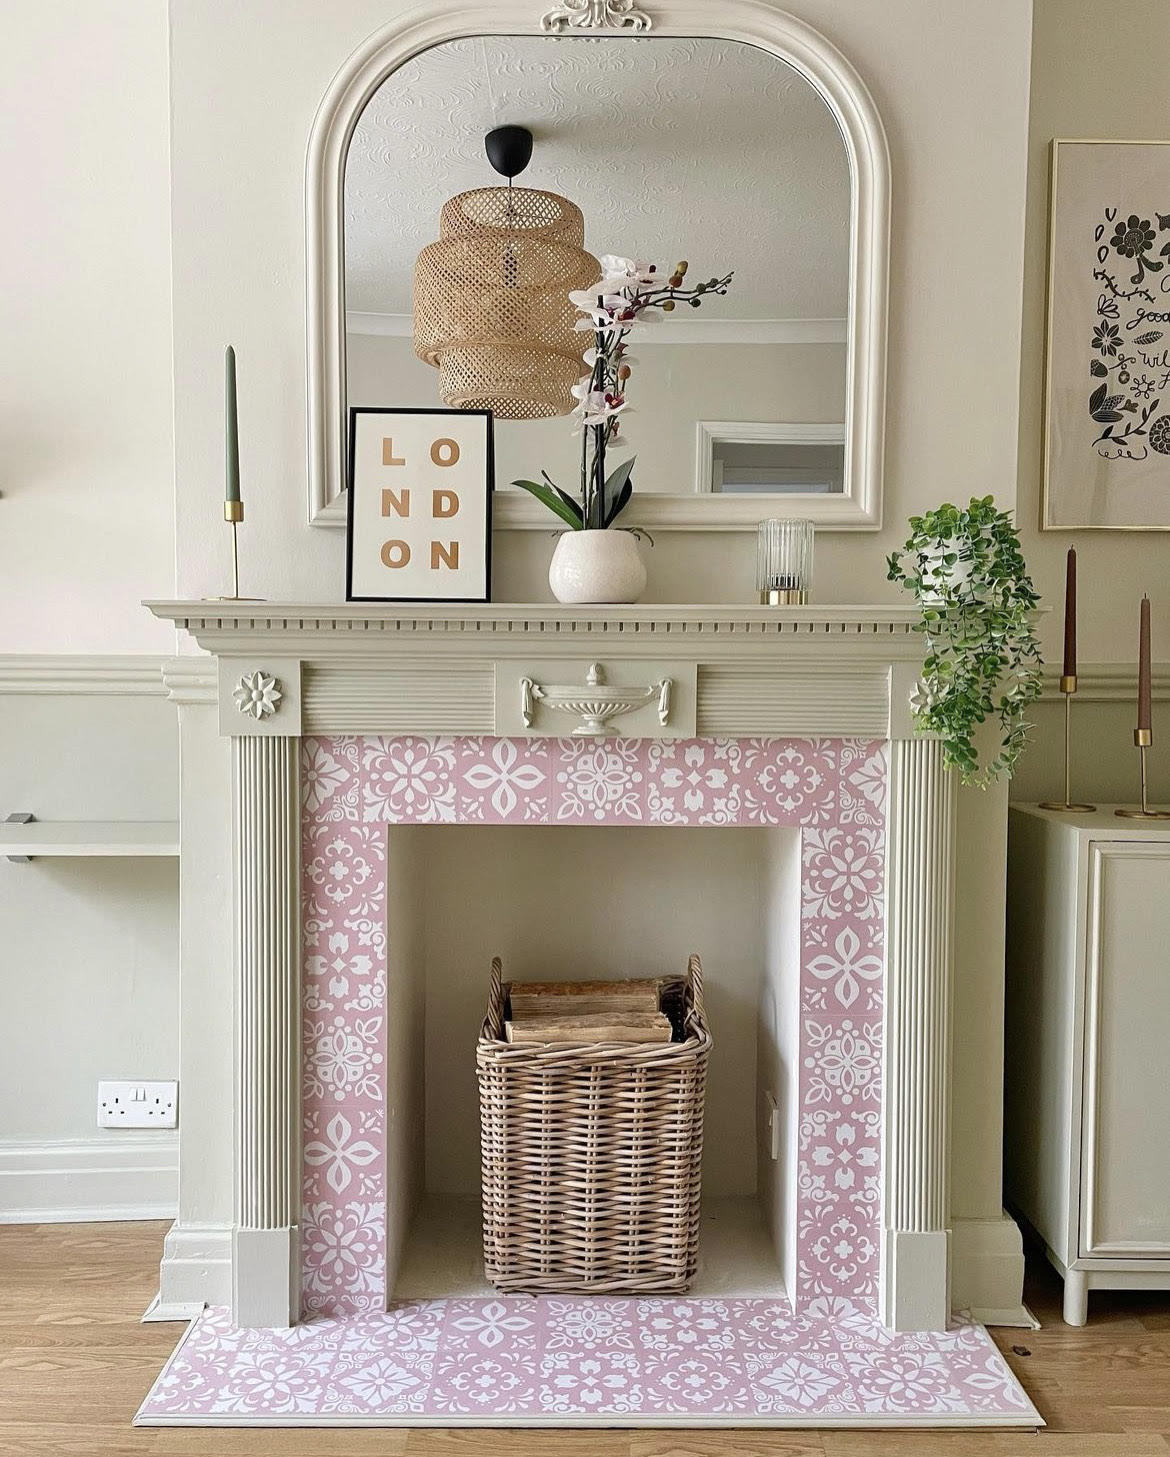
There’s something so relaxed and wholesome about a neutral palette matched up with a fireplace. Ideal for minimalist and pared-back designs, beiges and creams will cast a spell of calm over the space. And it works so well with fireplace tiling!
Try Monochrome
Sometimes the fireplace doesn’t have to be the centre of attention. If you want to create a more subdued and subtle effect, paint the surround with a darker or monochrome shade to allow it to seamlessly flow into the background and add a layer of depth.
Contrast, contrast, contrast
Bold isn’t for everyone, but when it is, it can work as an absolute treat. Whether it’s a vibrant royal blue or even a yellow, adding a pop of colour into the room with your fireplace can instantly modernise its feel and tie everything together.
Don’t let anything hold you back from picking your dream shade; you have the whole colour wheel at your disposal – all it takes is finding the ideal pairings. And there’s plenty more inspiration where that came from. Check out this post on Instagram fireplace inspiration to get your creative juices flowing.
How To Paint A Fireplace Surround In 7 Simple Steps
Gather Your Tools And Materials
- Wood paint and primer
- Paint brushes and/or mini rollers
- Sandpaper and/or sanding blocks
- Painter’s tape
- Dust cloth
- Sugar soap
- Dust sheets and protective equipment, including overalls
- Screwdriver (to remove your fireplace surround)
- Spirit level (to put it back on correctly)
Remove The Surround
After you’ve got your equipment ready, the first thing to ask is, can you take off your fireplace surround? If you have a reproduction fireplace, you will likely be able to. Check the sides of the fireplace for some small metal fastenings that screw into the wall; there should be at least 4.
By yourself or with the help of a friend (recommended), unscrew the surround and move it to be lying flat on a dust sheet. This will make it much easier to paint.
If you’re unable to remove the surround, this is your cue to mask up. Tear off lengths of your painter’s tape of about 10cm and apply them to the wall around your surround, aiming as closely as possible and ensuring you stick them down in a straight line.
Clean And Sand Down The Surface
You should be all prepped to start sanding down the surround so the paint will take beautifully to the surface. Use a little sugar soap and a cloth beforehand to give it a good clean.
Then you can get to sanding it, working carefully into bevels and corners. Any stuck hairs, dust and scratched edges will ruin your painting efforts, so don’t forget to dust and clean off the surface once it’s nice and smooth.
Prime Away
The next step is to get priming. Open the can and give it a good stir and dip in your paintbrush or roller. Start applying the paint in the more intricate or decorative areas of the surround in a thin layer.
When you’re finished with that, you can use a slightly larger brush to evenly cover the flat areas. Then leave it to dry for as long as it needs as per the tin’s instructions.
Apply The Paint
Grab your eggshell wood paint and stir it well. Then you can get to applying the first coat.
A good rule of thumb is to work slowly and consistently and as methodically as you can, aiming for thin, even coats. As you did with the primer, cut in the carved or ornate areas using a small paintbrush and really work the paint into each of the nooks and crannies.
When you’re happy you achieved an even first coat, let the paint dry for as long as it requires and then rinse and repeat with your second coat. While you’re waiting for the first coat to dry, you might want to put your brushes and rollers in a plastic bag to keep them from drying out in the meantime.
Clear Up
While you’re waiting for the paint to dry, you can start to clear up. Collect your tools and dust sheets and clean them up to be put away. Wash your paintbrushes and peel away the tape from the walls. Once your second coat of paint is dry, you can then attach the surround back onto your fireplace if you decided to remove it.
Step Back And Admire
Woah, that was a lot of information! I hope that this handy guide has given you everything you need to know about how to paint a fireplace surround like a pro.
Whatever your colour preference, your sleek new fireplace surround is now getting all the positive attention it deserves. All that’s left is to style it with some classy decorations.
Post in collaboration.
Follow me on Facebook | Instagram | Pinterest | Twitter


I especially appreciate the emphasis on selecting the right type of paint and color scheme. It’s crucial to choose a paint that will adhere well to the surface and complement the overall design scheme of the room. The suggestions for neutral tones, monochrome options, and bold contrasts are excellent ideas to consider based on individual preferences and existing decor.