This is the first blog post I’ve written in a little while. Like I’m sure everyone else is feeling, it’s impossible to describe the last couple of weeks, I still half expect to wake up from it all thinking its been one of my very vivid yet random dreams. I find it hard to write when I’m confused about things but it’s time to get back on it and I thought I’d start with a couple of easy little DIY updates I’ve made to the bedroom in case anyone is seeking inspiration.
Living in the loft
We’re really fortunate that the previous owners built a loft conversion along with en-suite and when we moved in back in 2014, there was no question that this would be our main bedroom. It’s so calming to be at the top of the house and with windows on both sides it’s always flooded with light no matter what the weather does outside.
We do have plans to reconfigure this room eventually (that word again!), taking up the carpet and creating a walk-storage/dressing area under the eaves and moving our bed to one of the full-height walls. Until then which is a long way off, over the years I’ve been doing little updates to it which has really transformed the space.
Painting The Bedroom
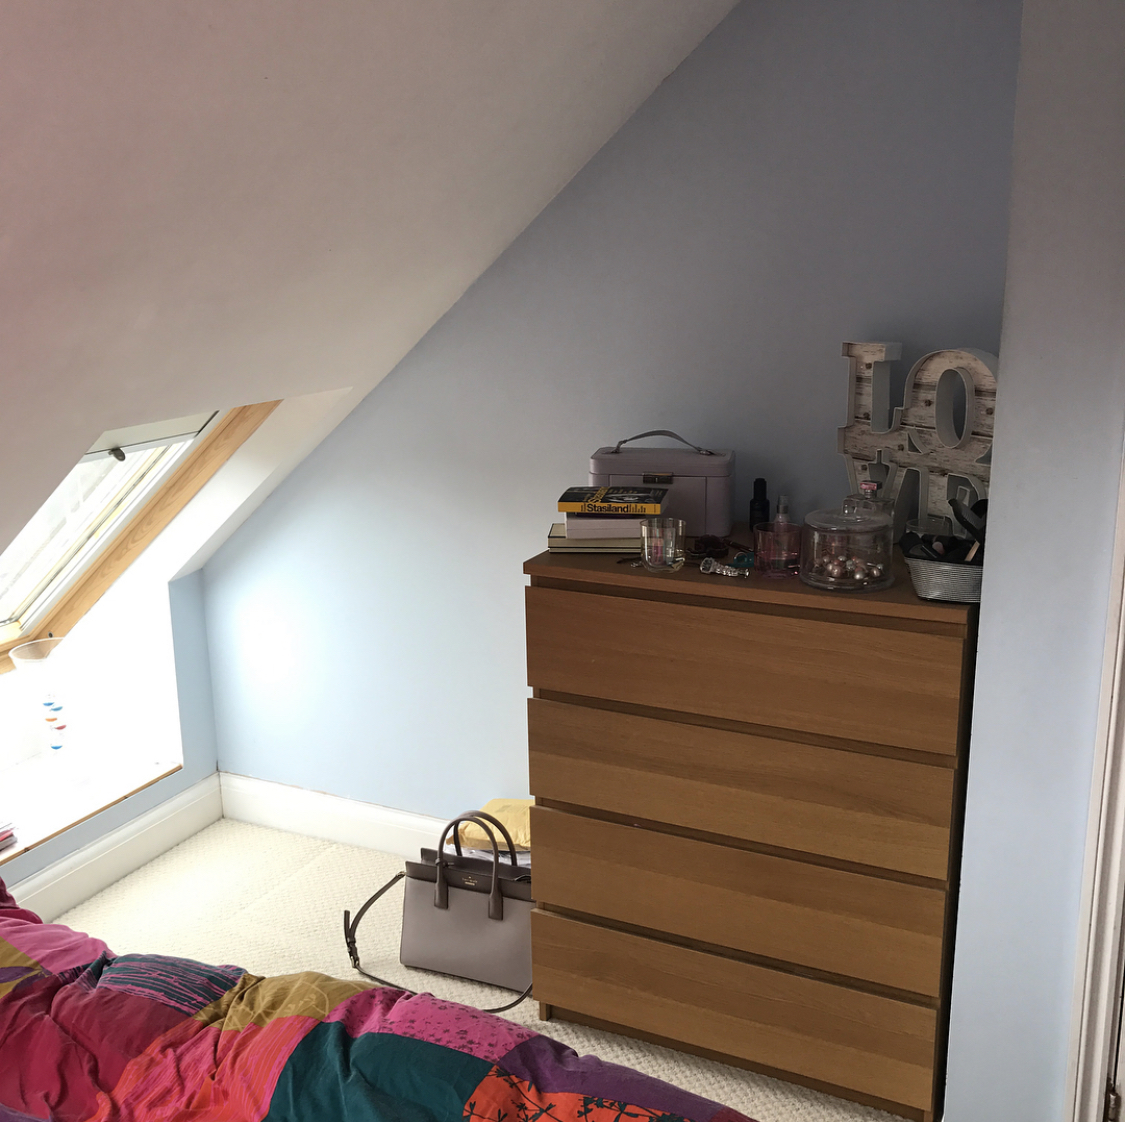
I can’t remember if it was 2016 or 2017 when I decided the piercing baby blue walls we’d inherited had to go. Blue isn’t my favourite colour at the best of times and this was just horrible. Coupled with all our mismatched furniture it meant the bedroom wasn’t a very relaxing place to be.
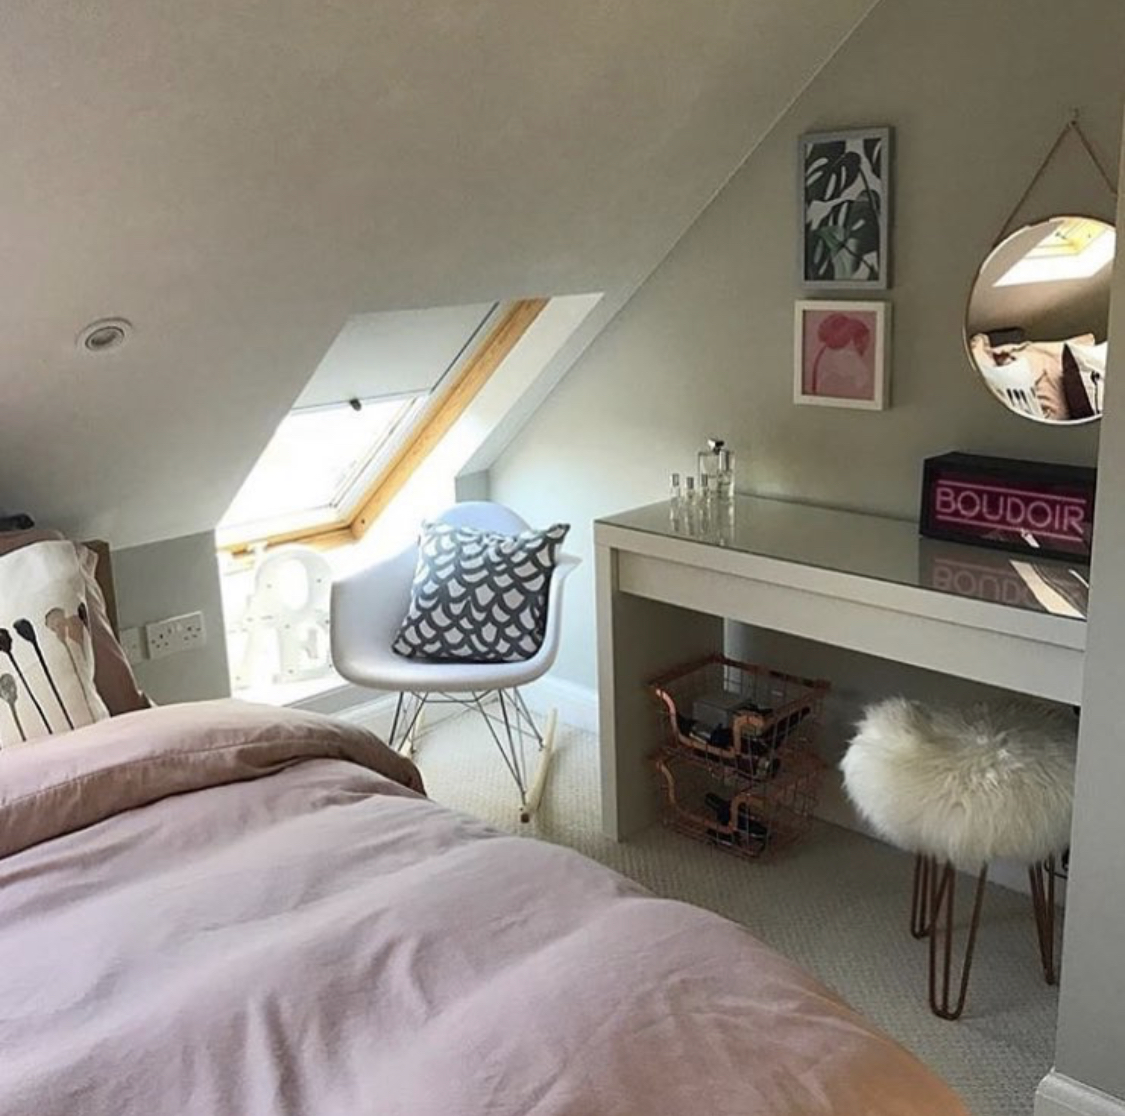
I painted the walls in Silver Thistle Down from Valspar, a soft grey that I find really restful and provides a great neutral backdrop. We rearranged a bit of furniture and bought a dressing table from IKEA to go in one of the nooks and ever since then I’ve really enjoyed spending more time up here. Just making those couple of basic adjustments had a much bigger impact on the room, again the power of paint is a marvel.
The 2020 Update
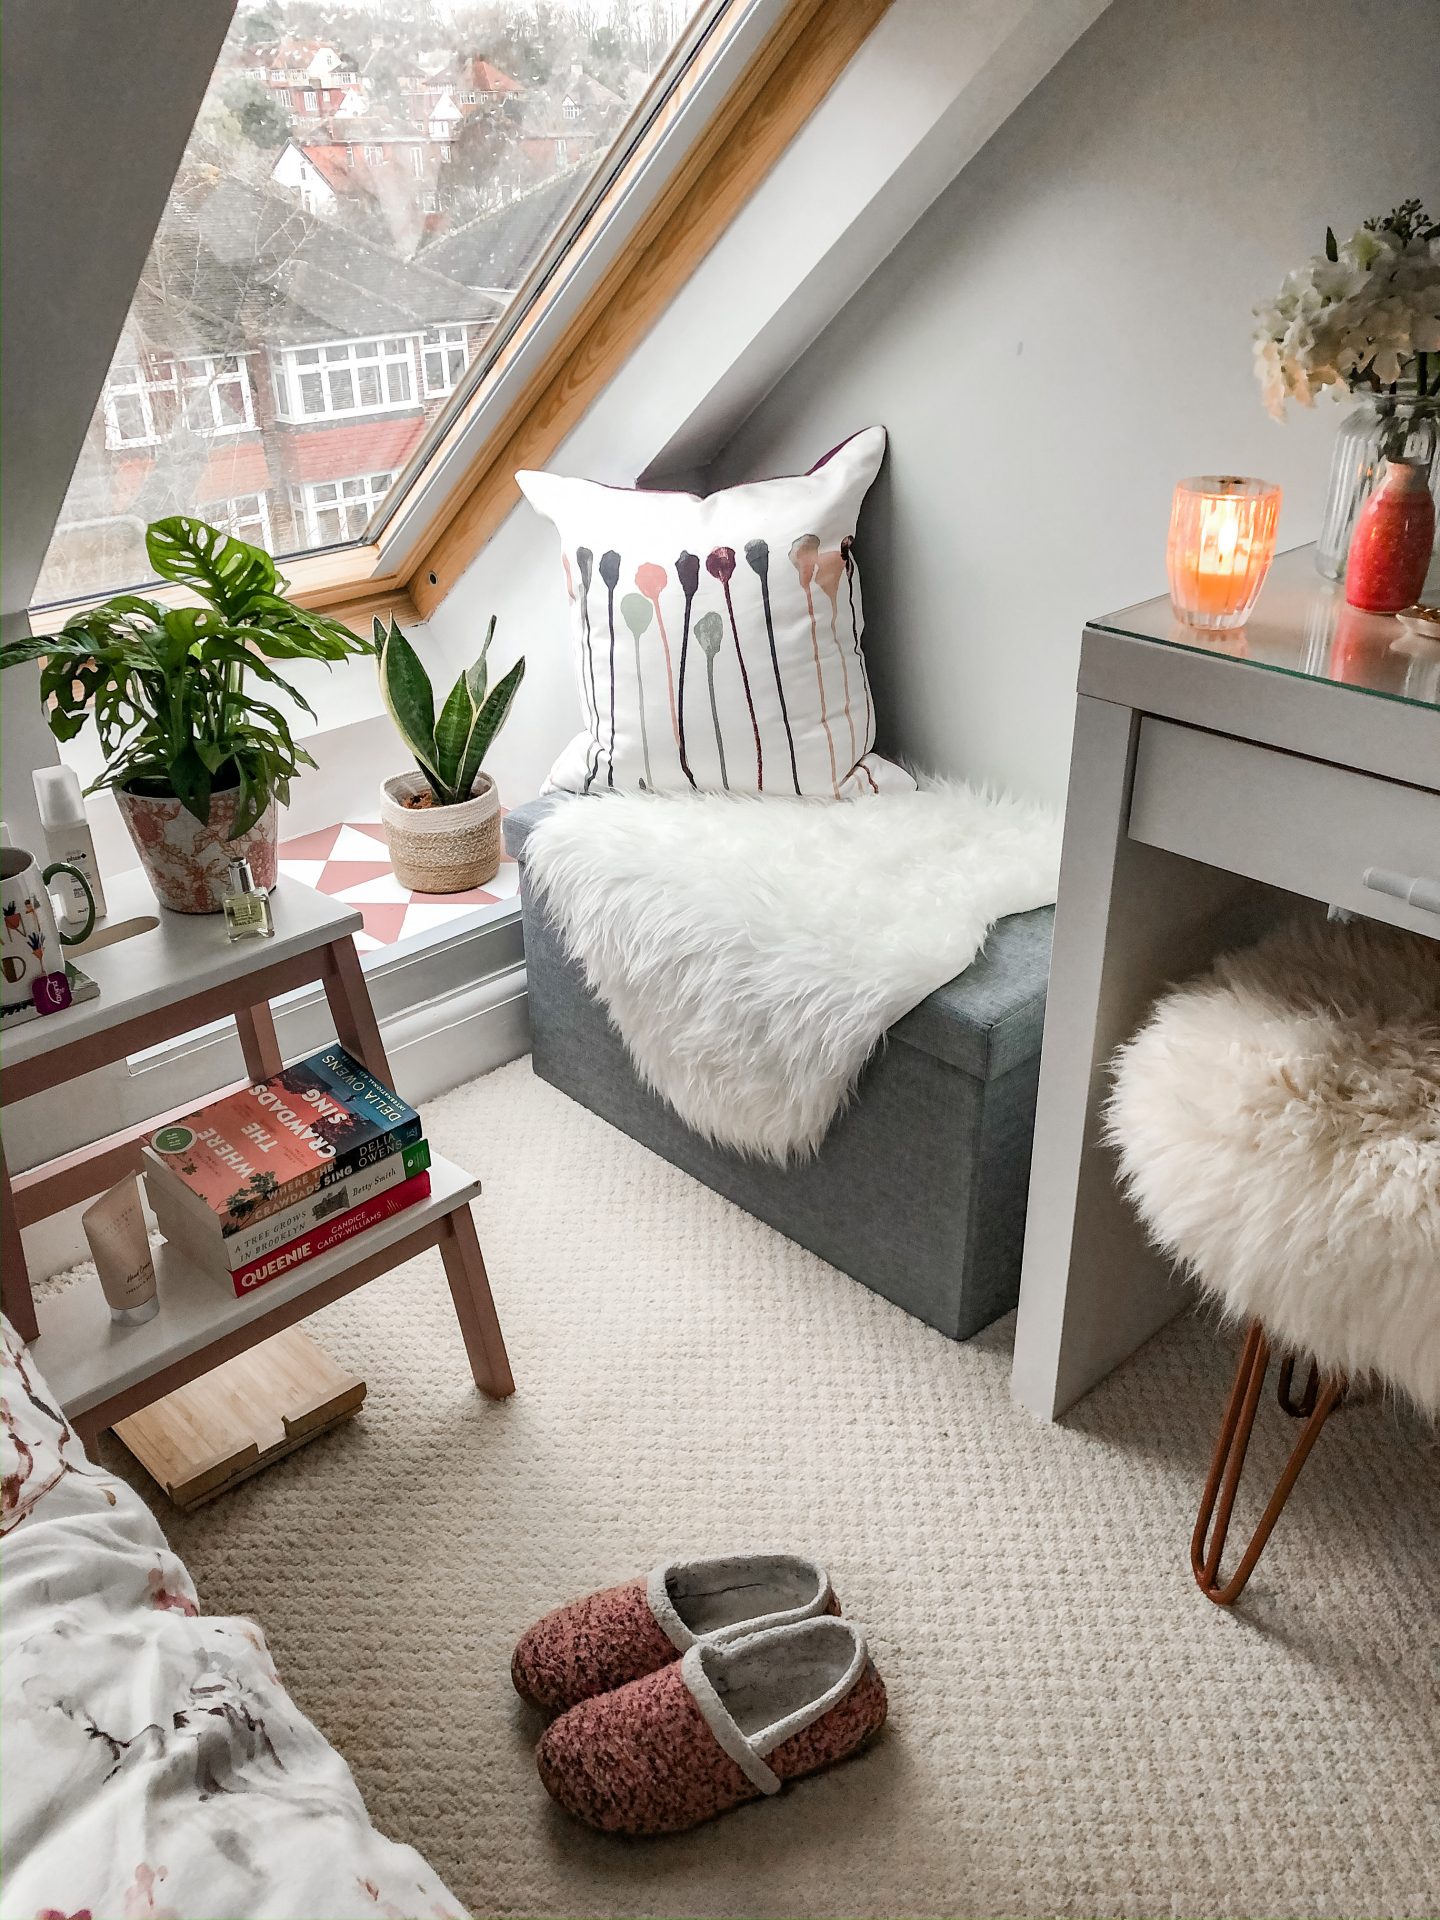
As much as I love the bedroom since painting it, we still had this awkward little corner that I didn’t really know what to do with. As you can see, we have a low velux window and this funny little shelf window ledge. A combination of this plus the sloping ceiling means I’ve never had a bedside table on my side of the bed because we couldn’t find anything small enough. There are plug sockets and switches that can’t be blocked with a simple shelf attached to the wall and most other units were just too bulky.
- Creating A Bedside Table
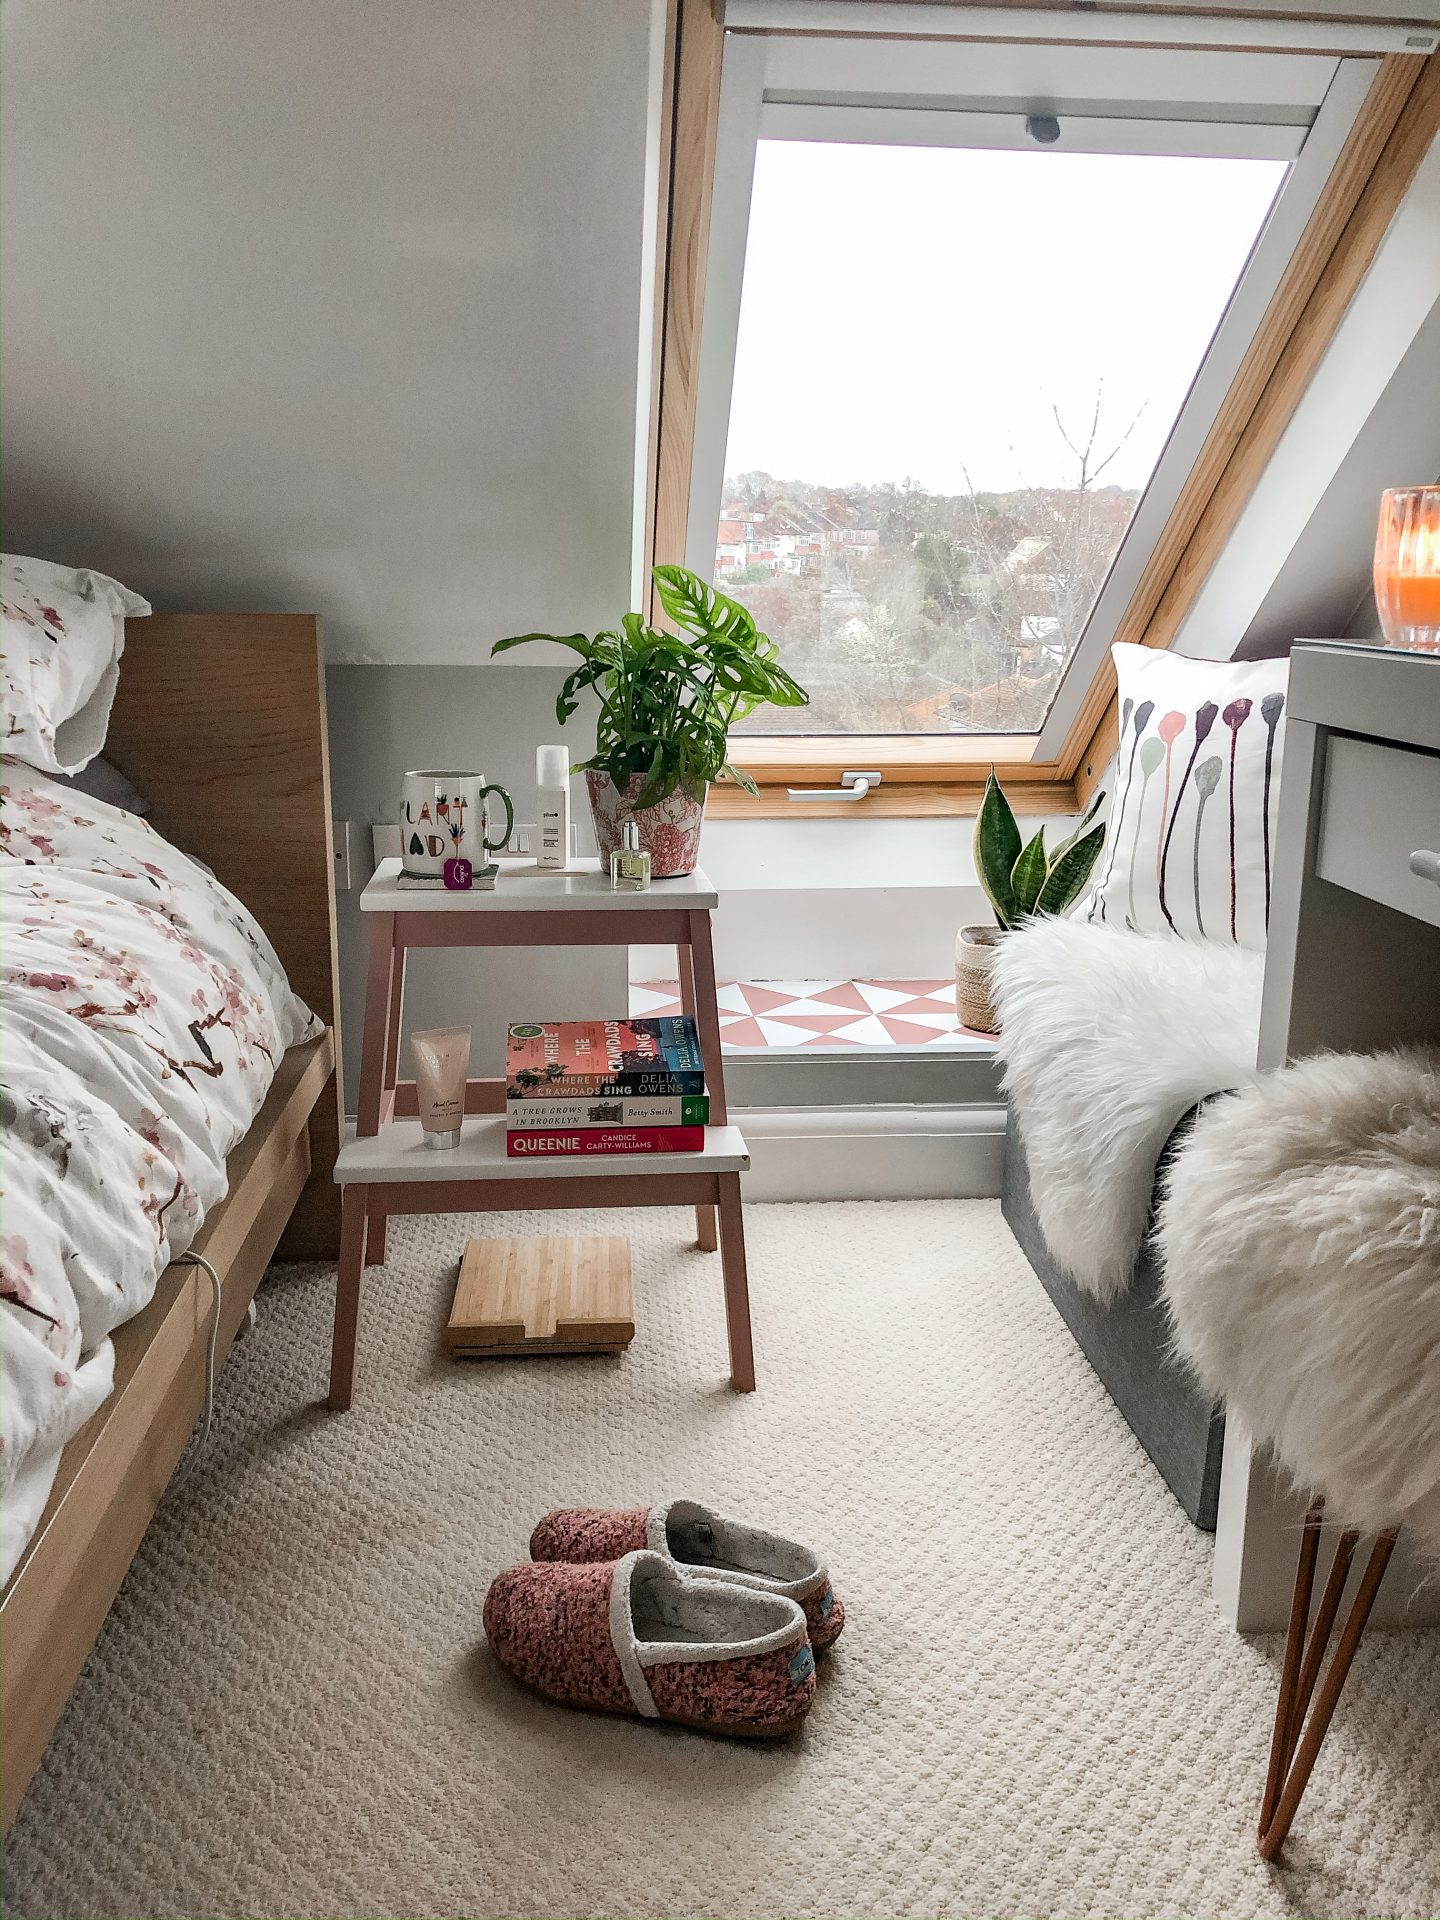
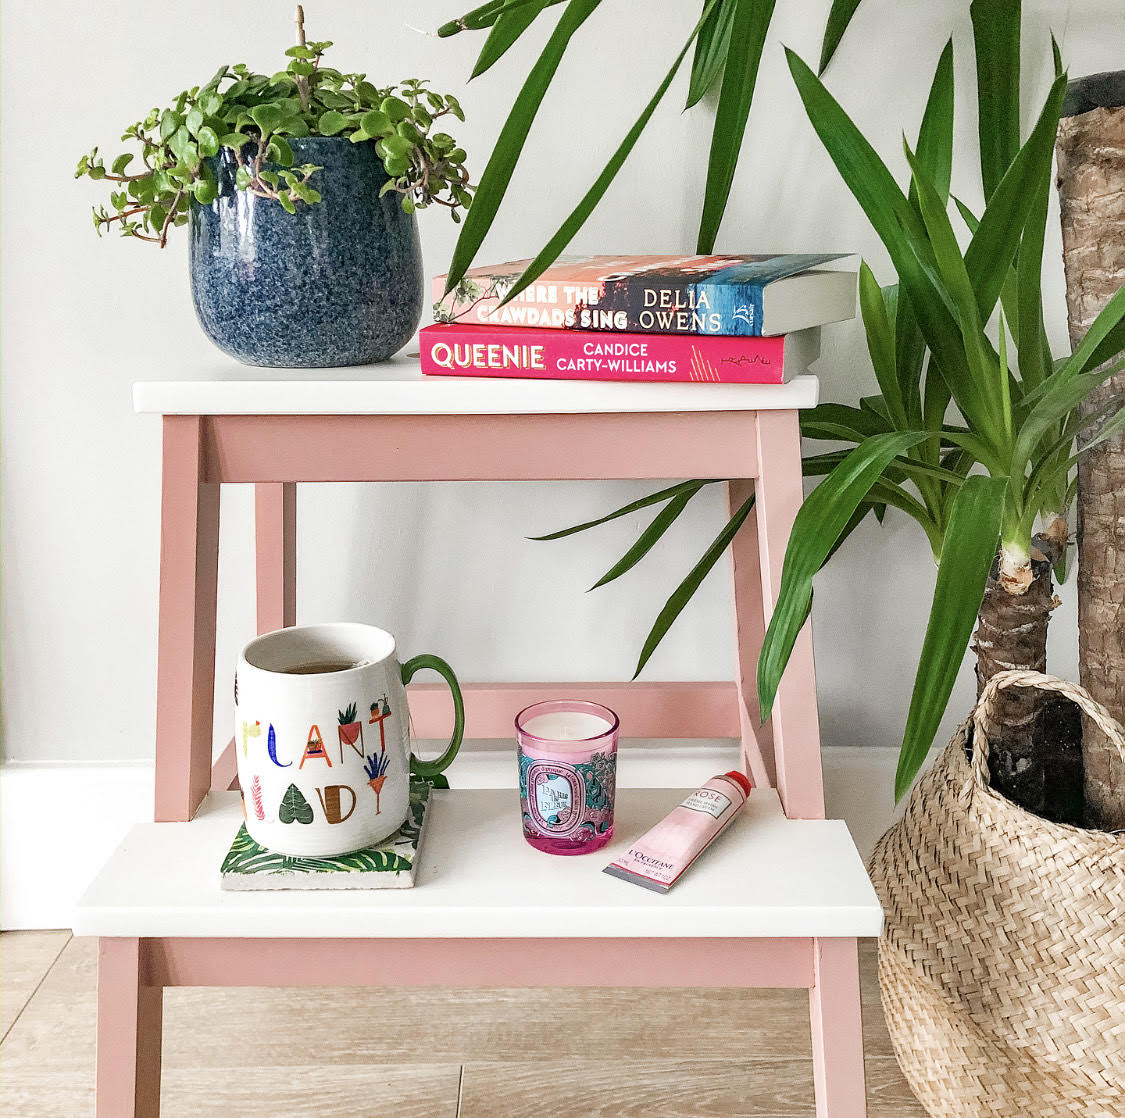
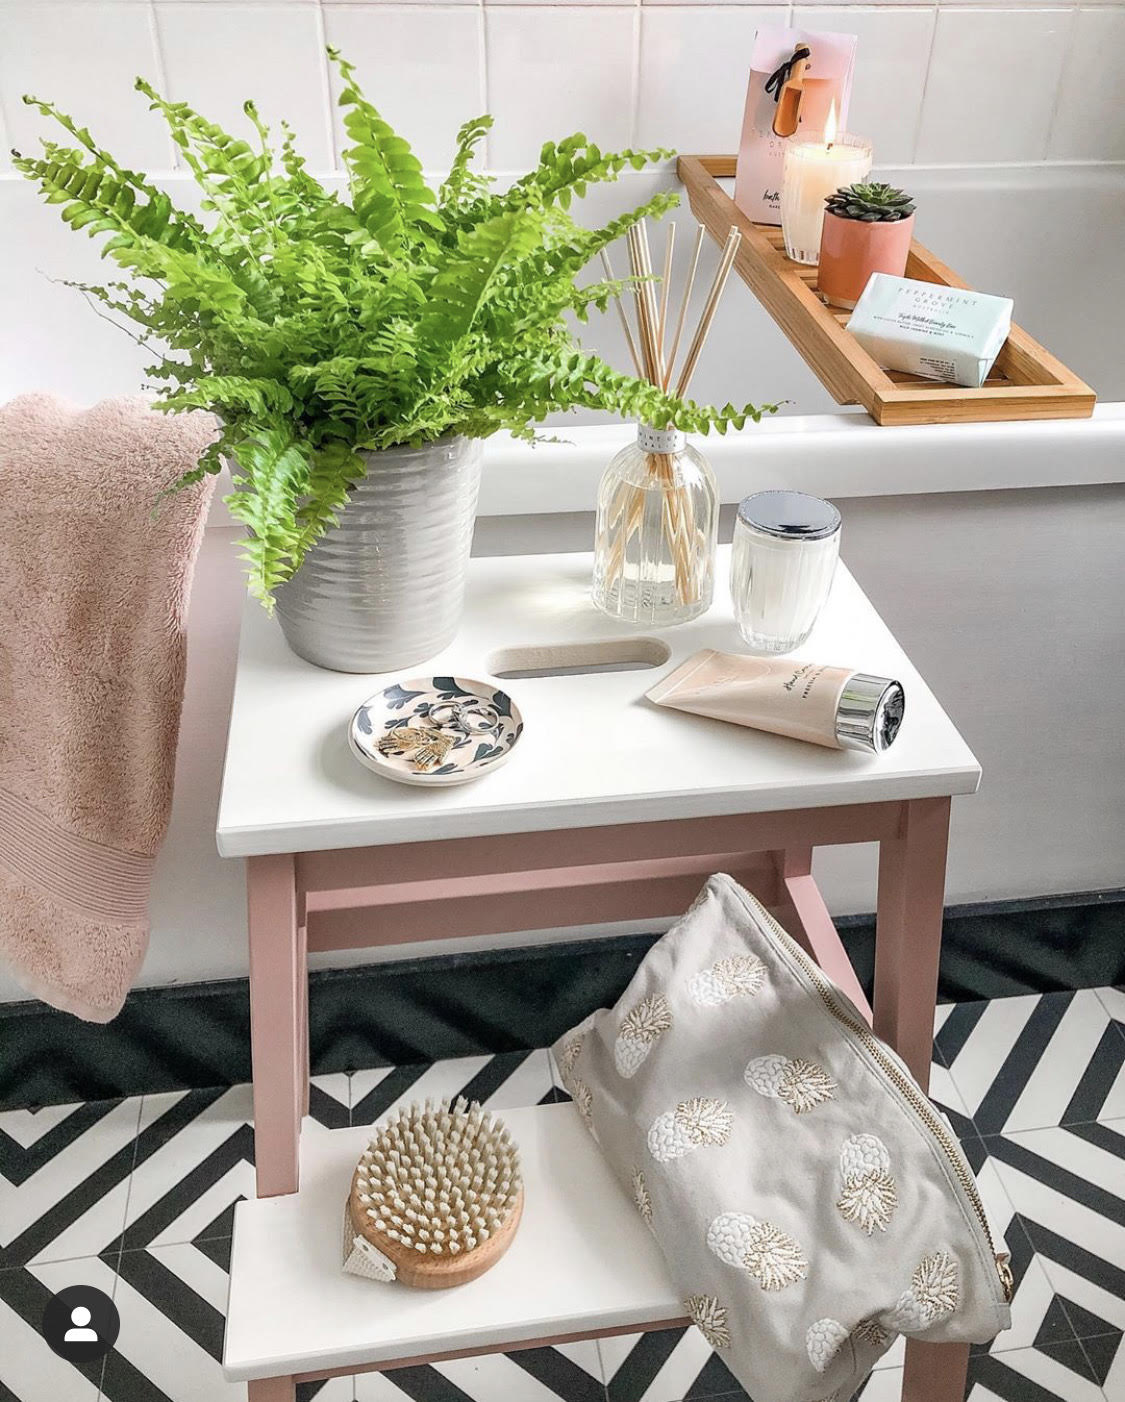
Scattered throughout Insta as the perfect photo prop, I’d forever been spotting the little IKEA Bekvam step-stool and thought at £25 it could be a potential solution for my bedside table. I don’t actually need a drawer, just a shelf for my books, a glass of water/tea, hand cream and that’s about it. Besides, if it didn’t work out, I knew I’d find plenty of other projects for the little steps.
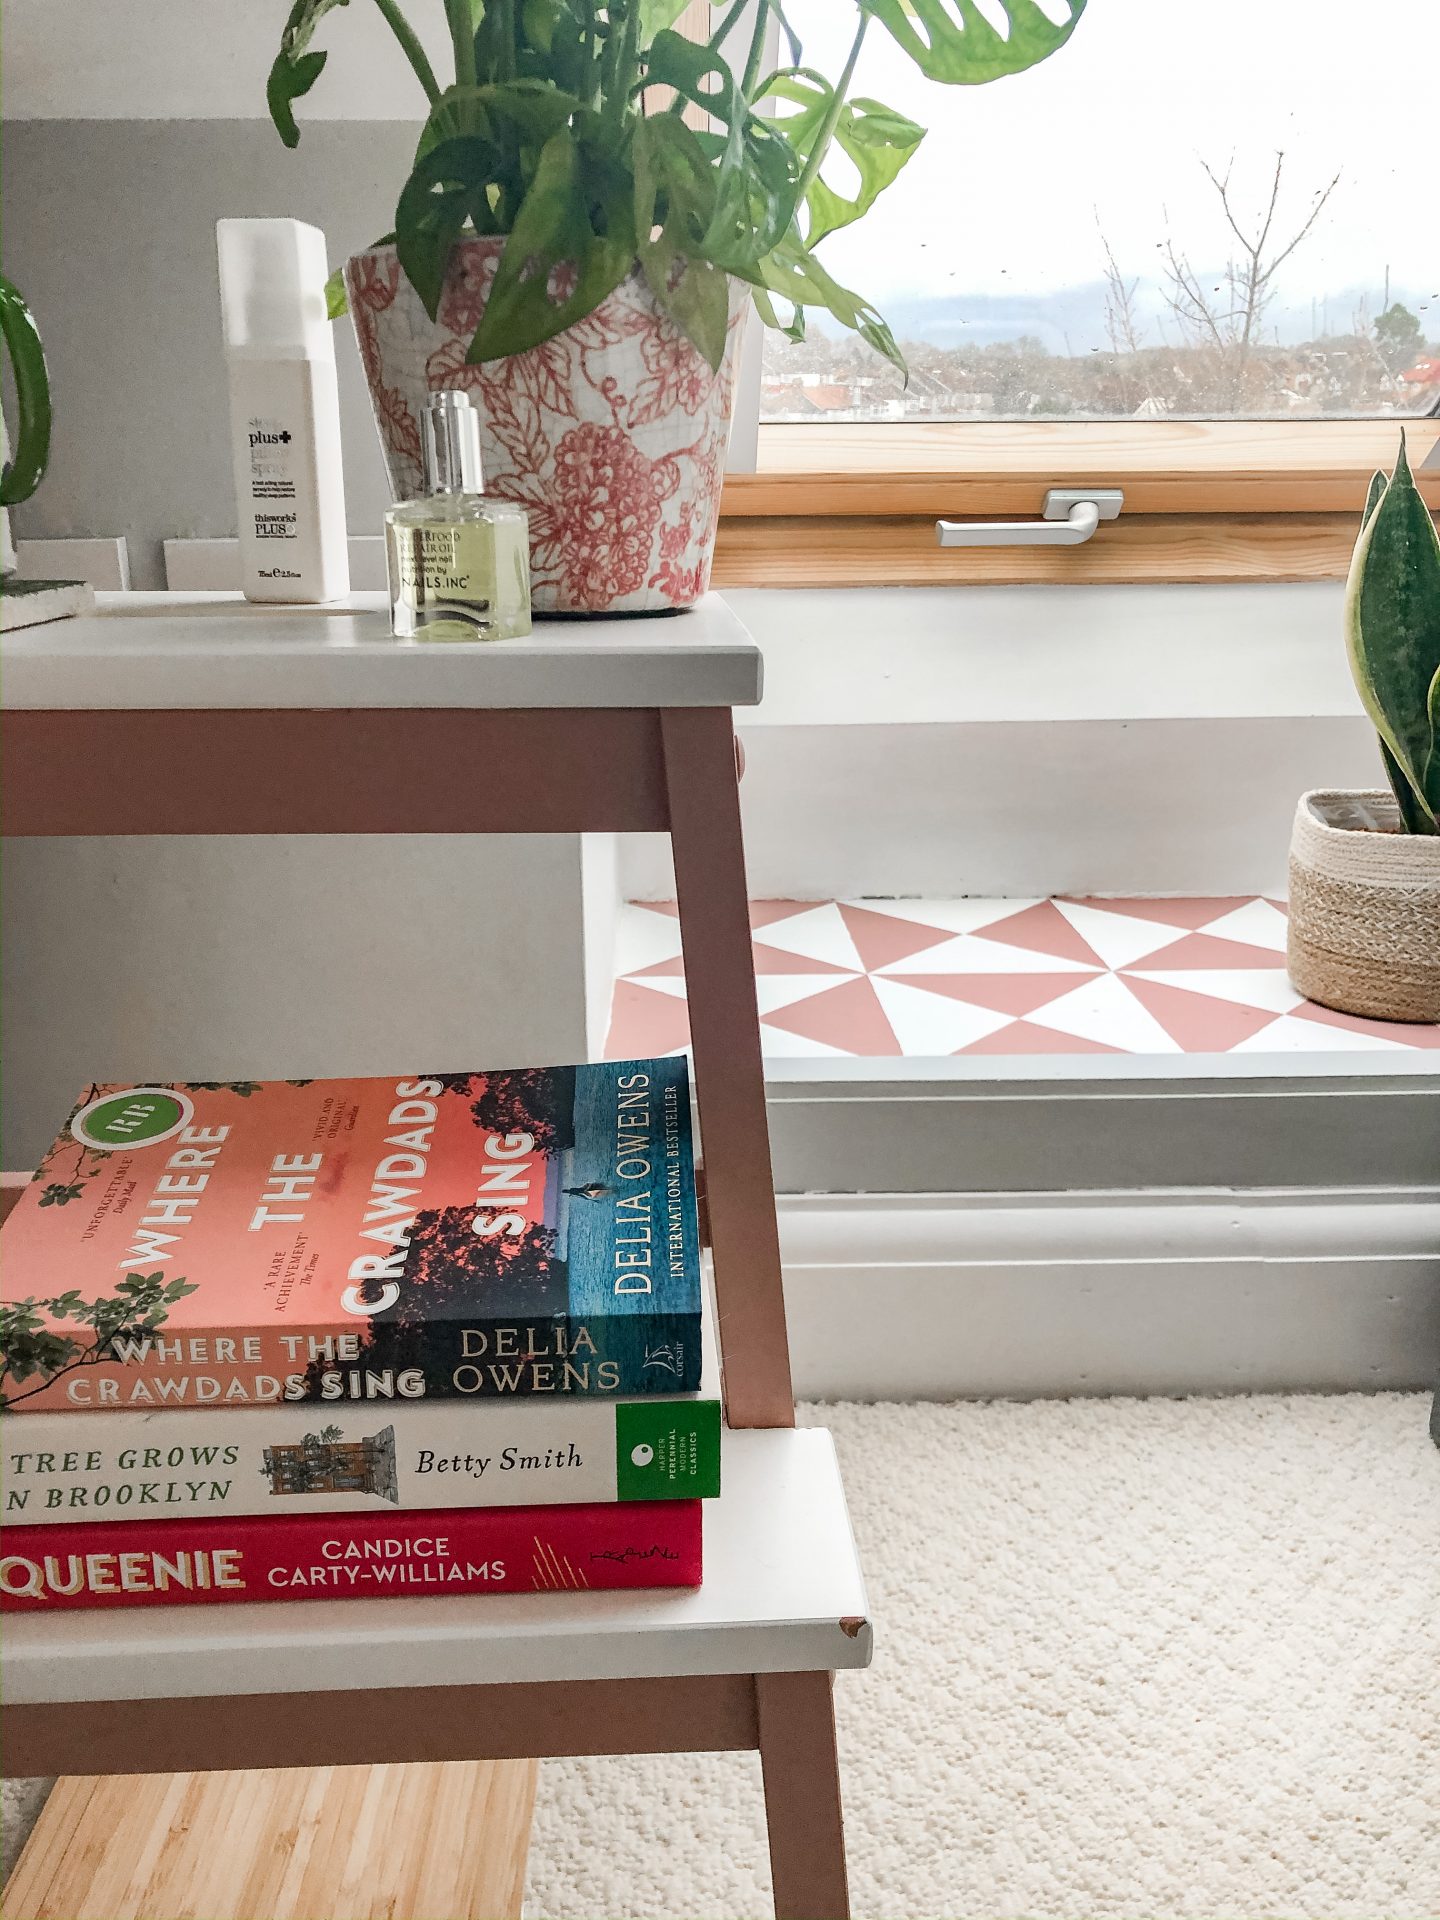
This was one of those projects that I wondered why it took me so long to do – Mr D popped out to get some IKEA bits and then I sat with the steps in their box untouched for about another 6 weeks before I eventually got round to putting it together. Of course, this is me and I couldn’t possibly leave it plain white, so armed with my trusty Frenchic paint I decided to paint the legs in Dusky Blush and it’s now the perfect little bedside table and also photo prop too! If you’re looking for something similar for a small space, I can’t recommend this enough. Storage only leads to too much stuff so I’m happy not to have any drawers I can fill with things I don’t need and at such a great price you can’t go wrong.
- Creating A Cosy Reading Nook
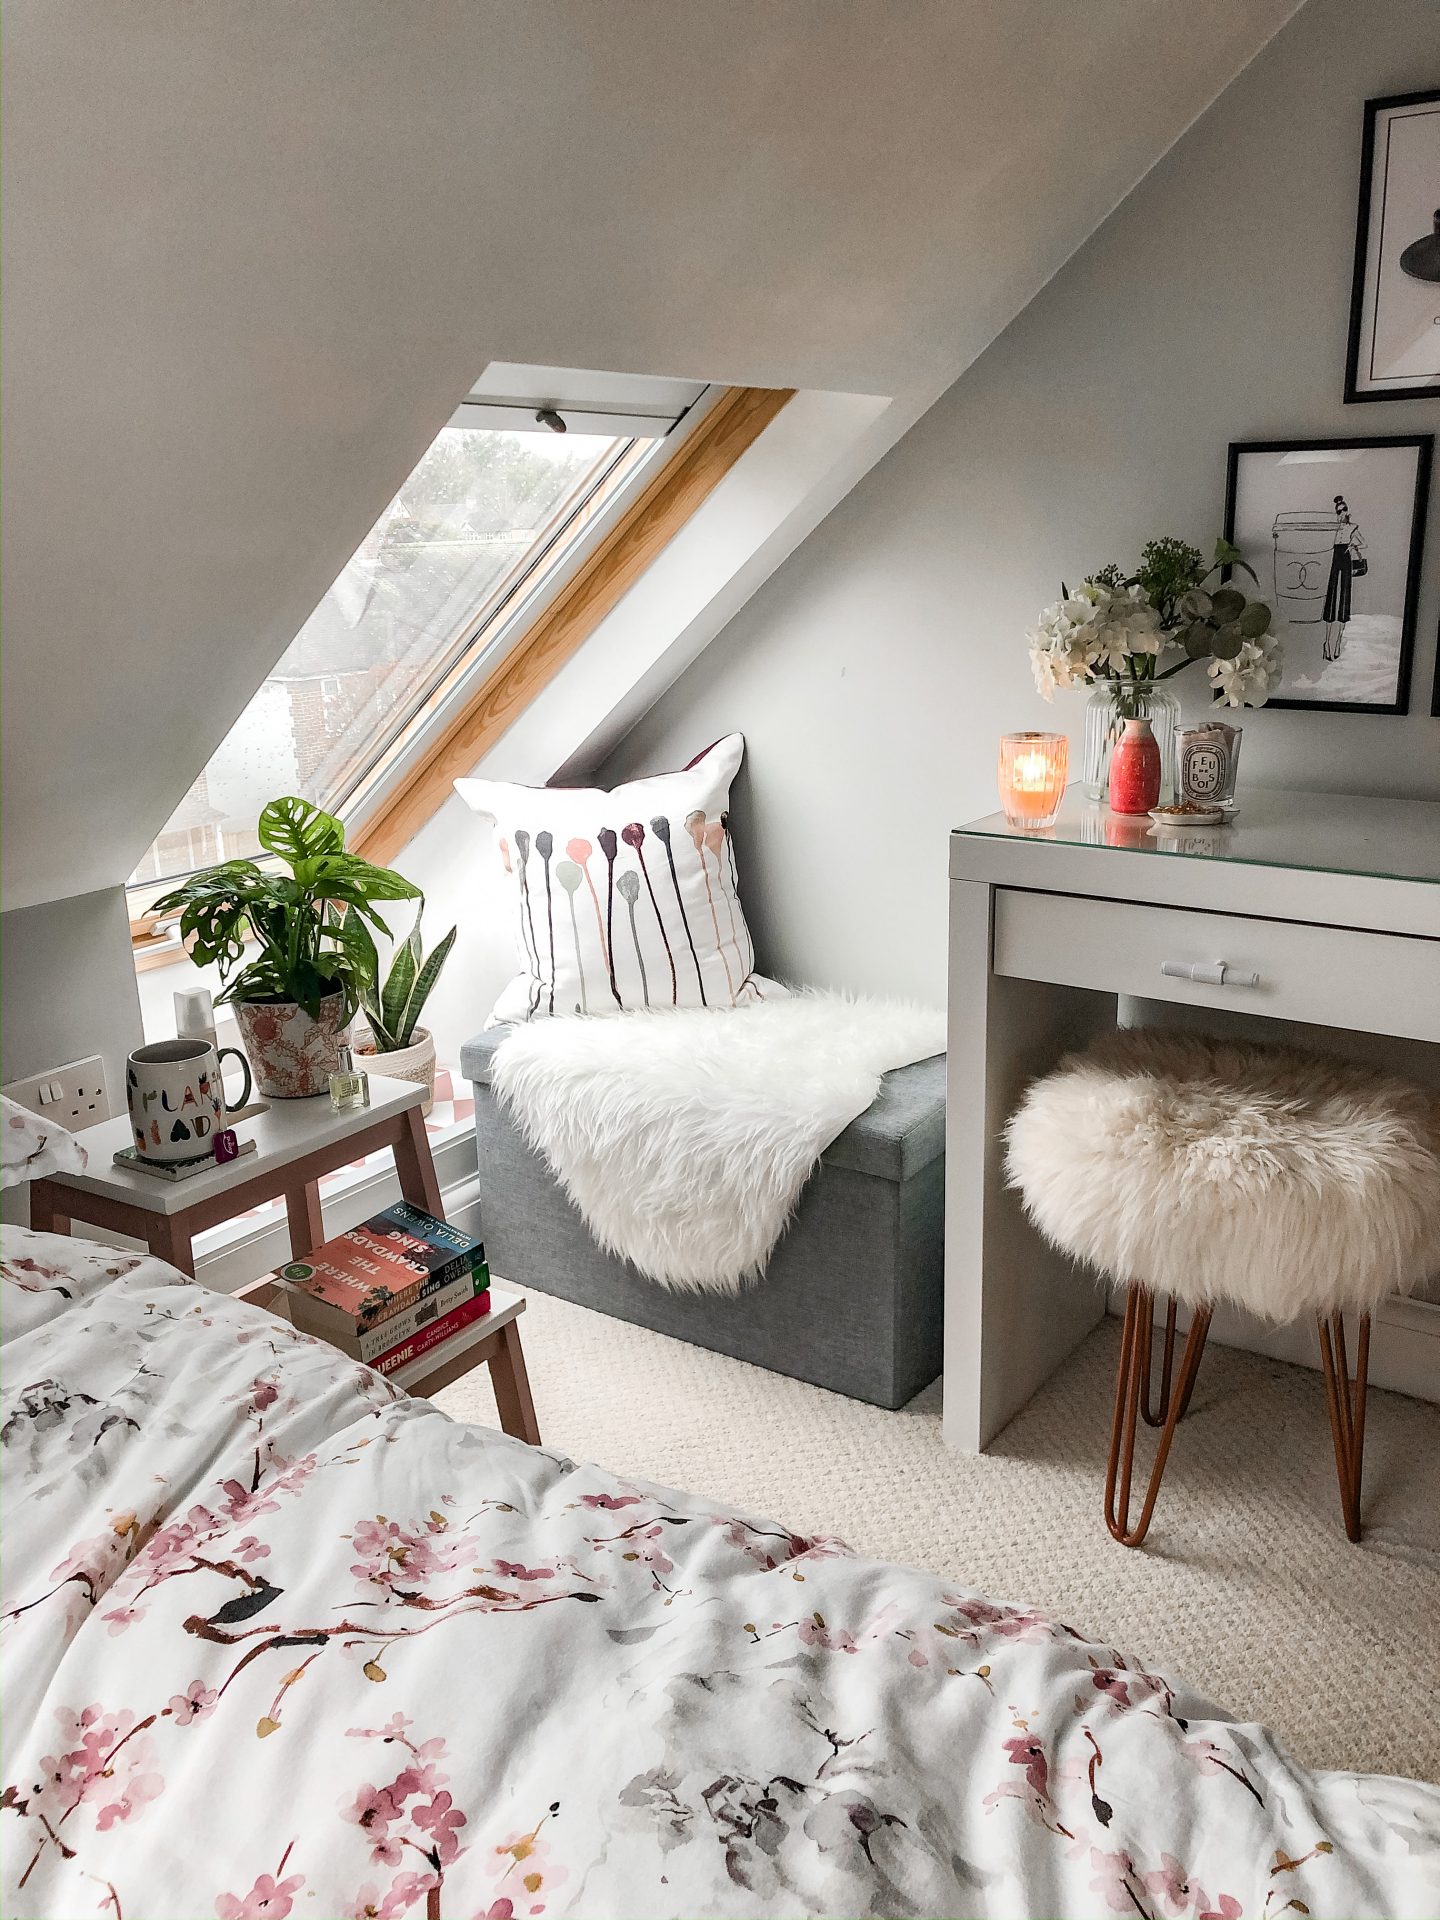
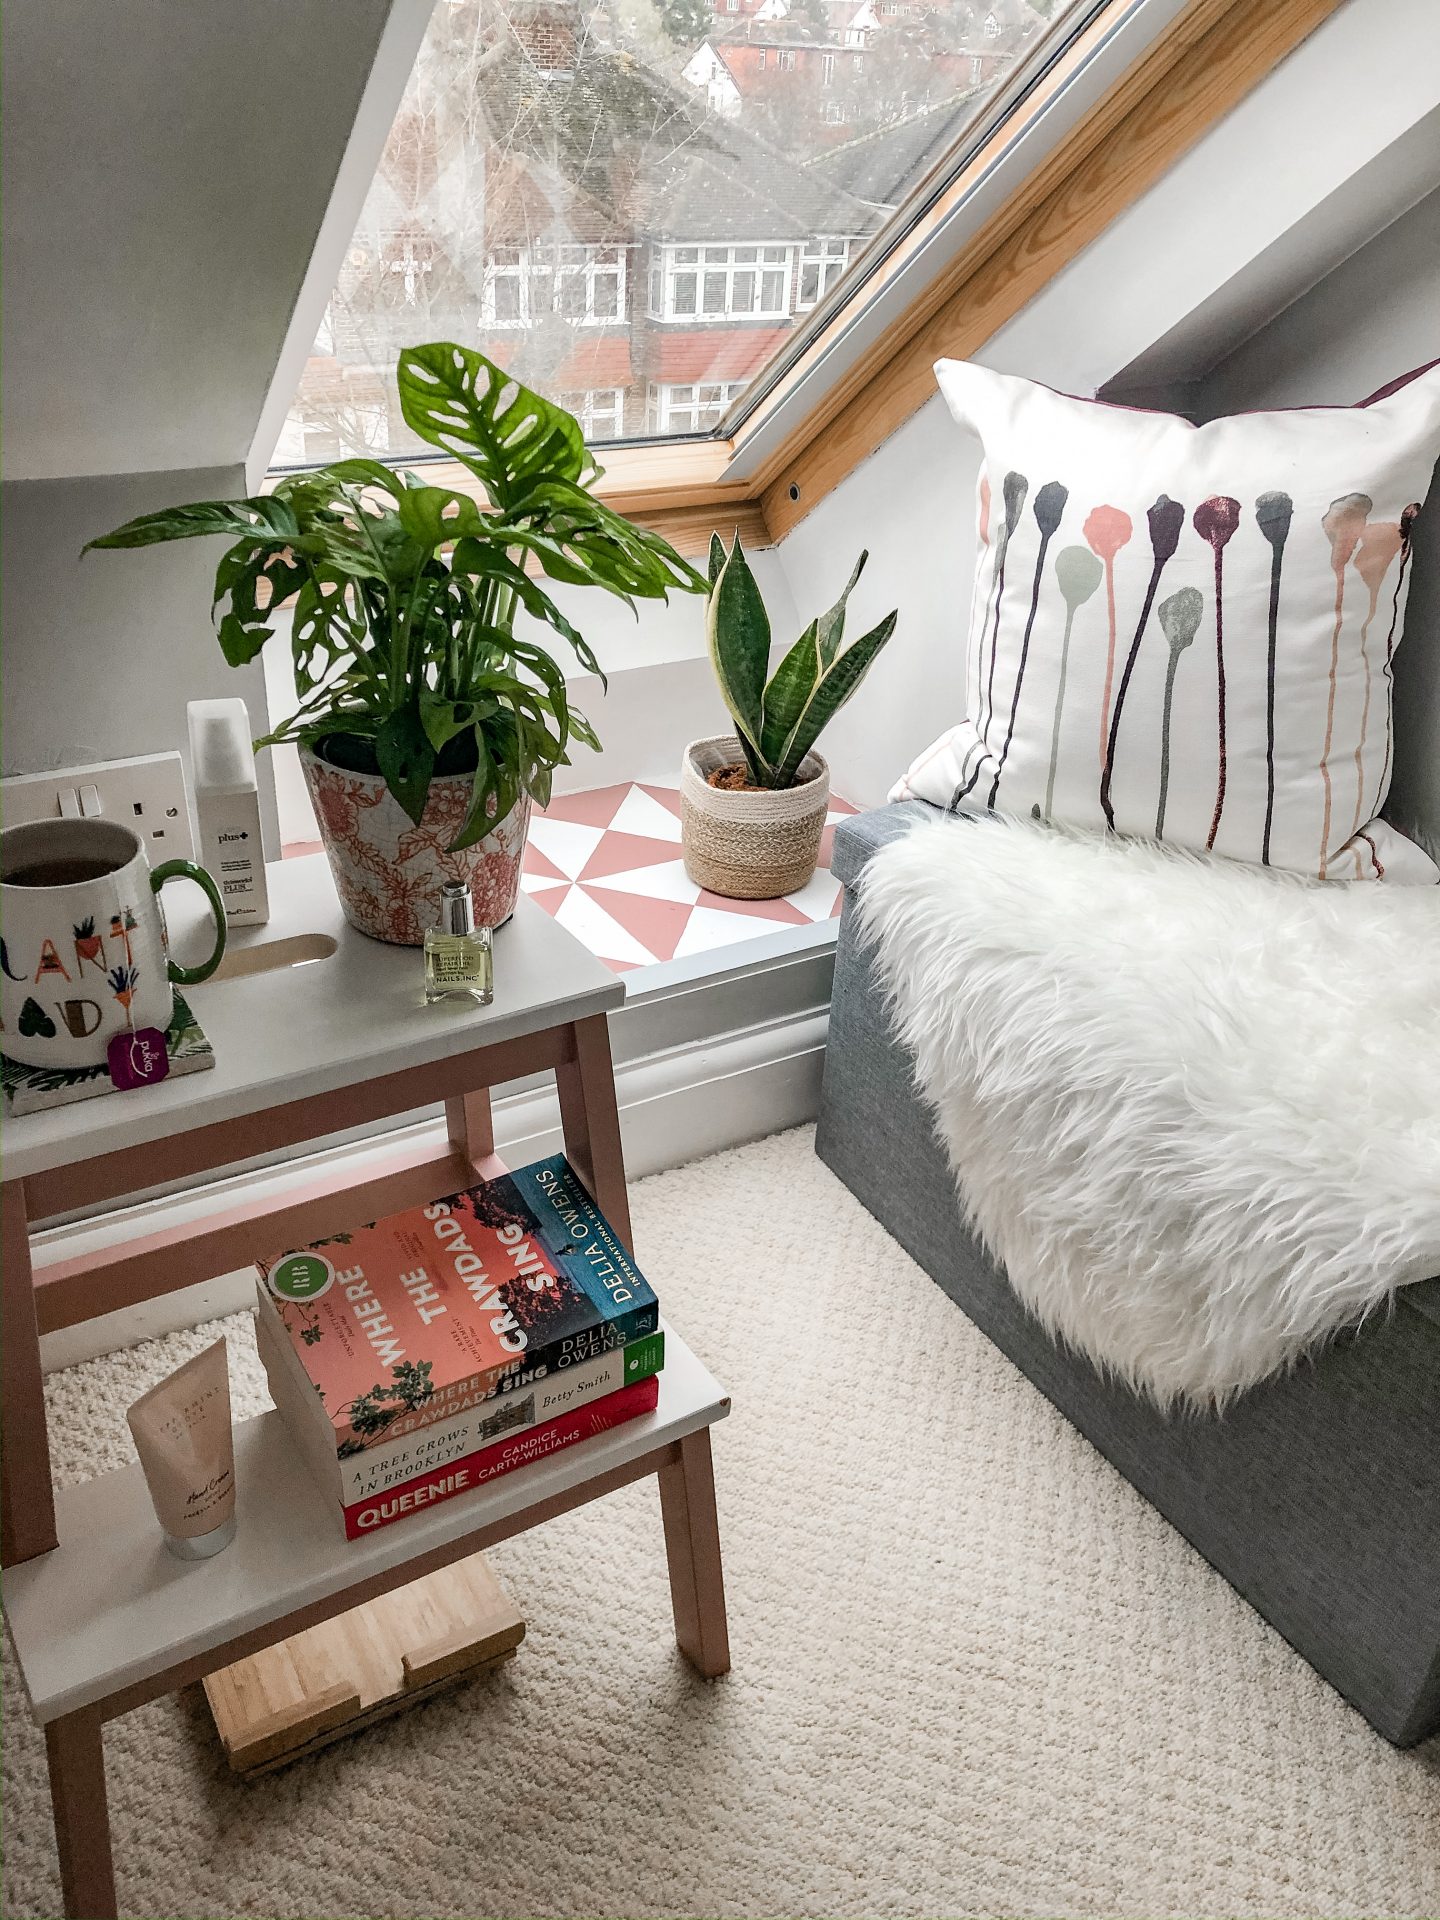
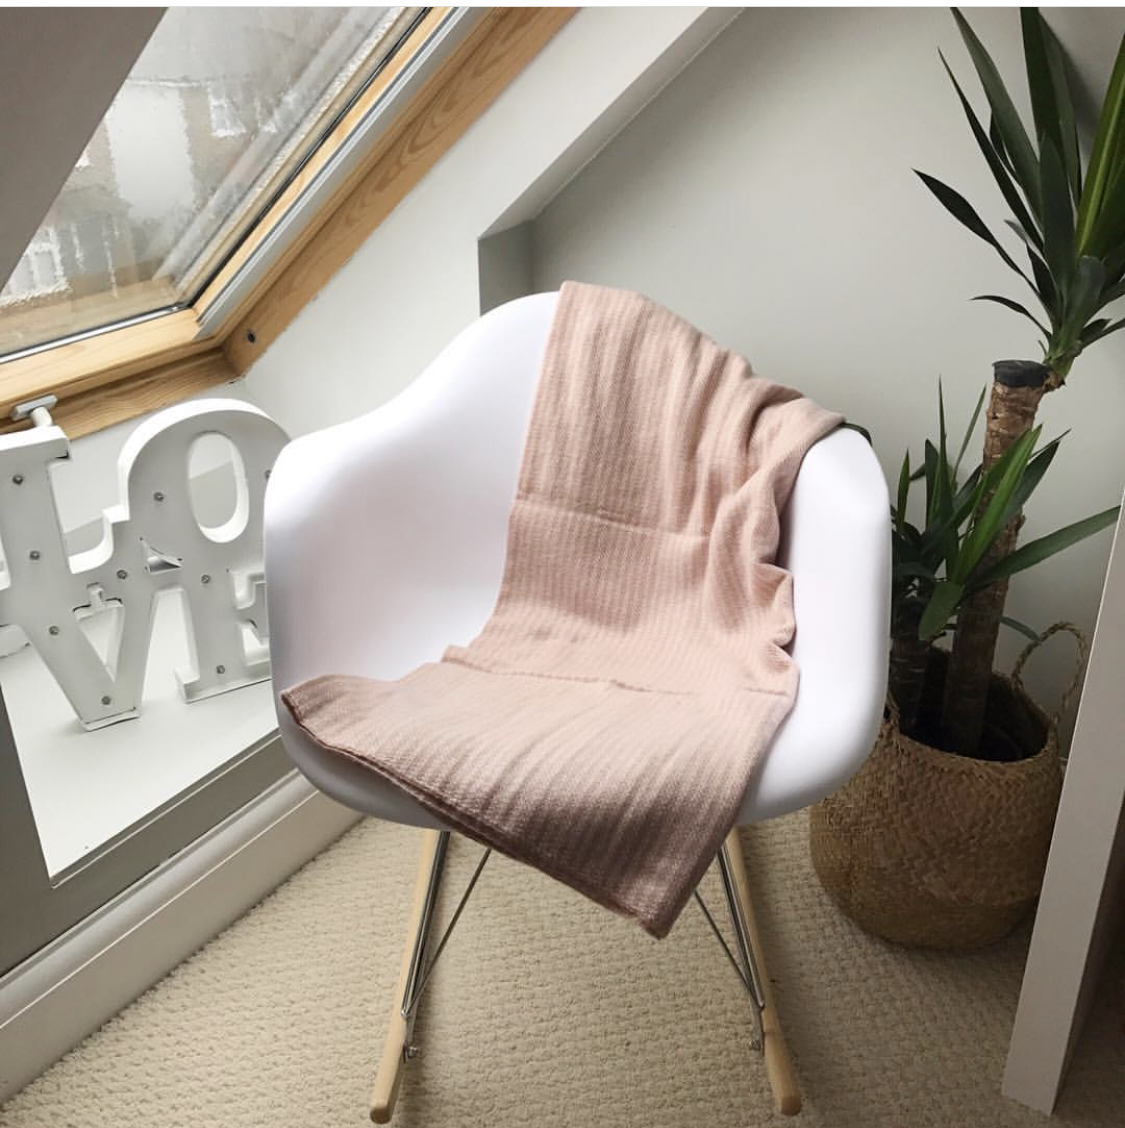
Once the stool was in place, the corner felt a little cluttered with the faux Eames-style rocker I had there originally, so I moved this out to a different corner of the bedroom and replaced it with a little ottoman storage unit we keep all our bedding in. Chucked a faux sheepskin and a cushion from somewhere else in the house and job done – a new little seating area/cosy reading nook right by the window and perfect for these extended stay at home times (check out my current book recommendations).
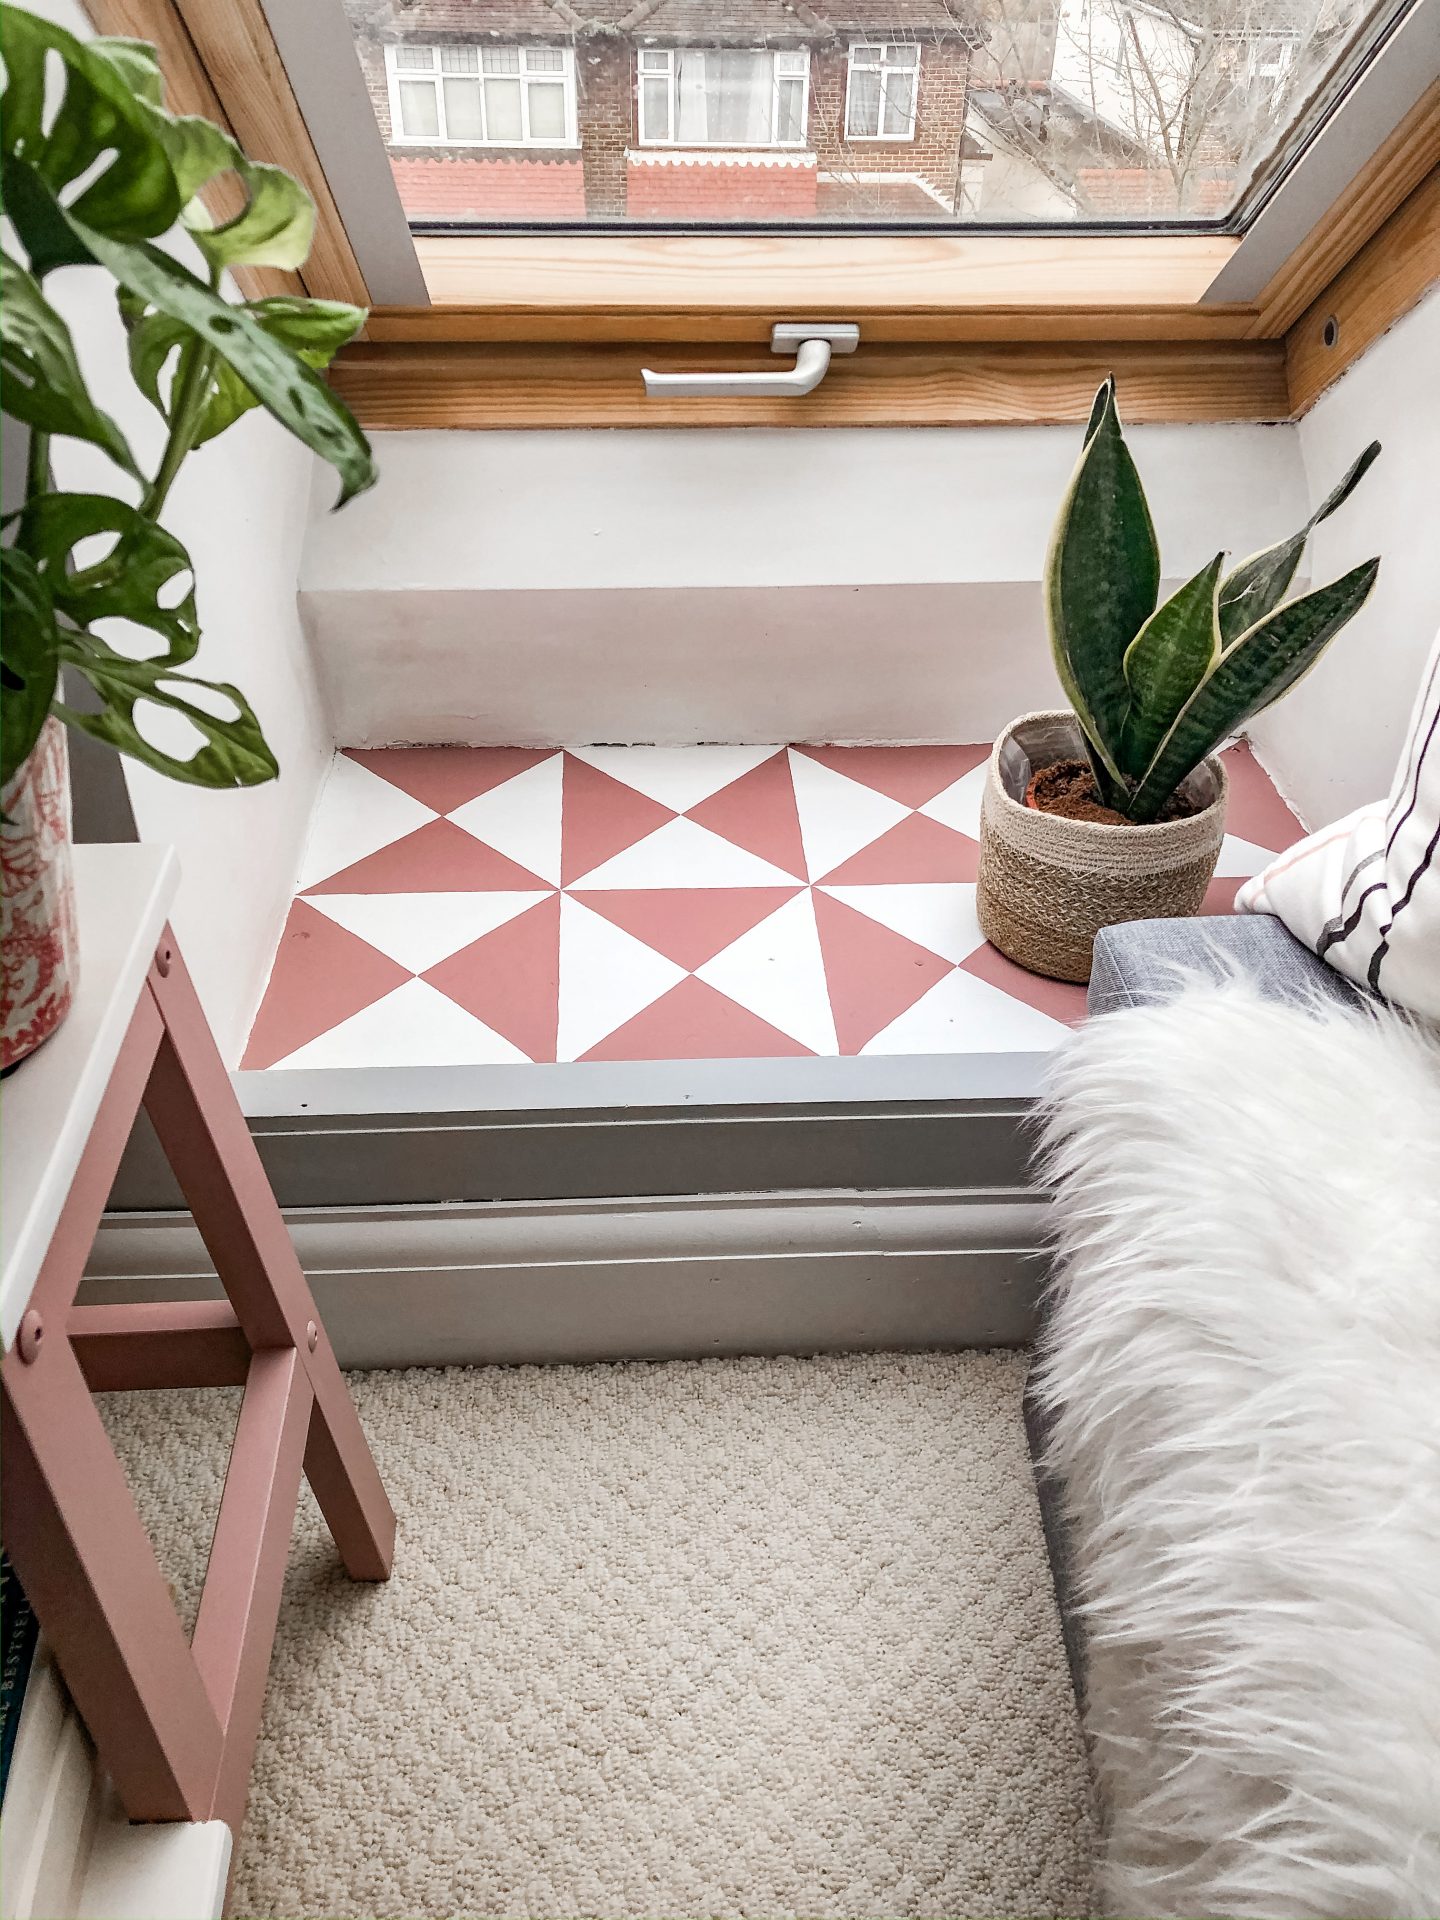
- Faux Tiling The Window Shelf
This is probably the part of this little bedroom refresh I’ve been most pleased with. I’ve never known what to do with this weird little window ledge – according to some, it may be building regulations that the lower Velux is needed in case of fire which would make sense if a) we didn’t have two sets of other windows in the room both of which drop onto other rooves in the house so much more safe and b) the lower Velux didn’t illicit a fall from 3 stories up and certainly injury if not worse. IMHO it’s just completely pointless but there we go.

Mostly it’s been hidden behind the chair I had in the corner and because I couldn’t really get to the window I never bothered opening the blind and it was just a bit of wasted space. Suddenly after 6 years of wondering what to do, I had the idea to paint it with a faux tile effect – if not to give it a purpose, at the very least jazzing it up.
I decided to base the pattern around some tiles I’ve been sent to tile the fireplace in the living room and thought I’d recreate the effect on this shelf. It was so easy to do so here are the steps:
- I gave the shelf two coats of plain white paint that I had lying around to act as the base for the colour
- Once that had dried, I used a pencil and ruler to measure the space and mark out my pattern. I settled on a 2 by 4 (ie 2 horizontal rows and 4 vertical rows), marking out the triangles and writing p in the triangles that I’d be painting so I didn’t get confused. Yes, I did opt to paint free hand, the reason being that if I’d used masking tape I’d forever be sticking into newly painted sections and taking much longer
- I used two craft brushes, both small but one especially tiny to do all the edges of my triangles and then just filled them in with the larger brush. The paint is Dusky Blush from Frenchic, to match the legs on the bedside step – I love working with this paint. Coverage is fantastic and it dries so quickly. Two coats of pink done in less than two hours and I can’t believe what a difference its made to the previously unloved corner.
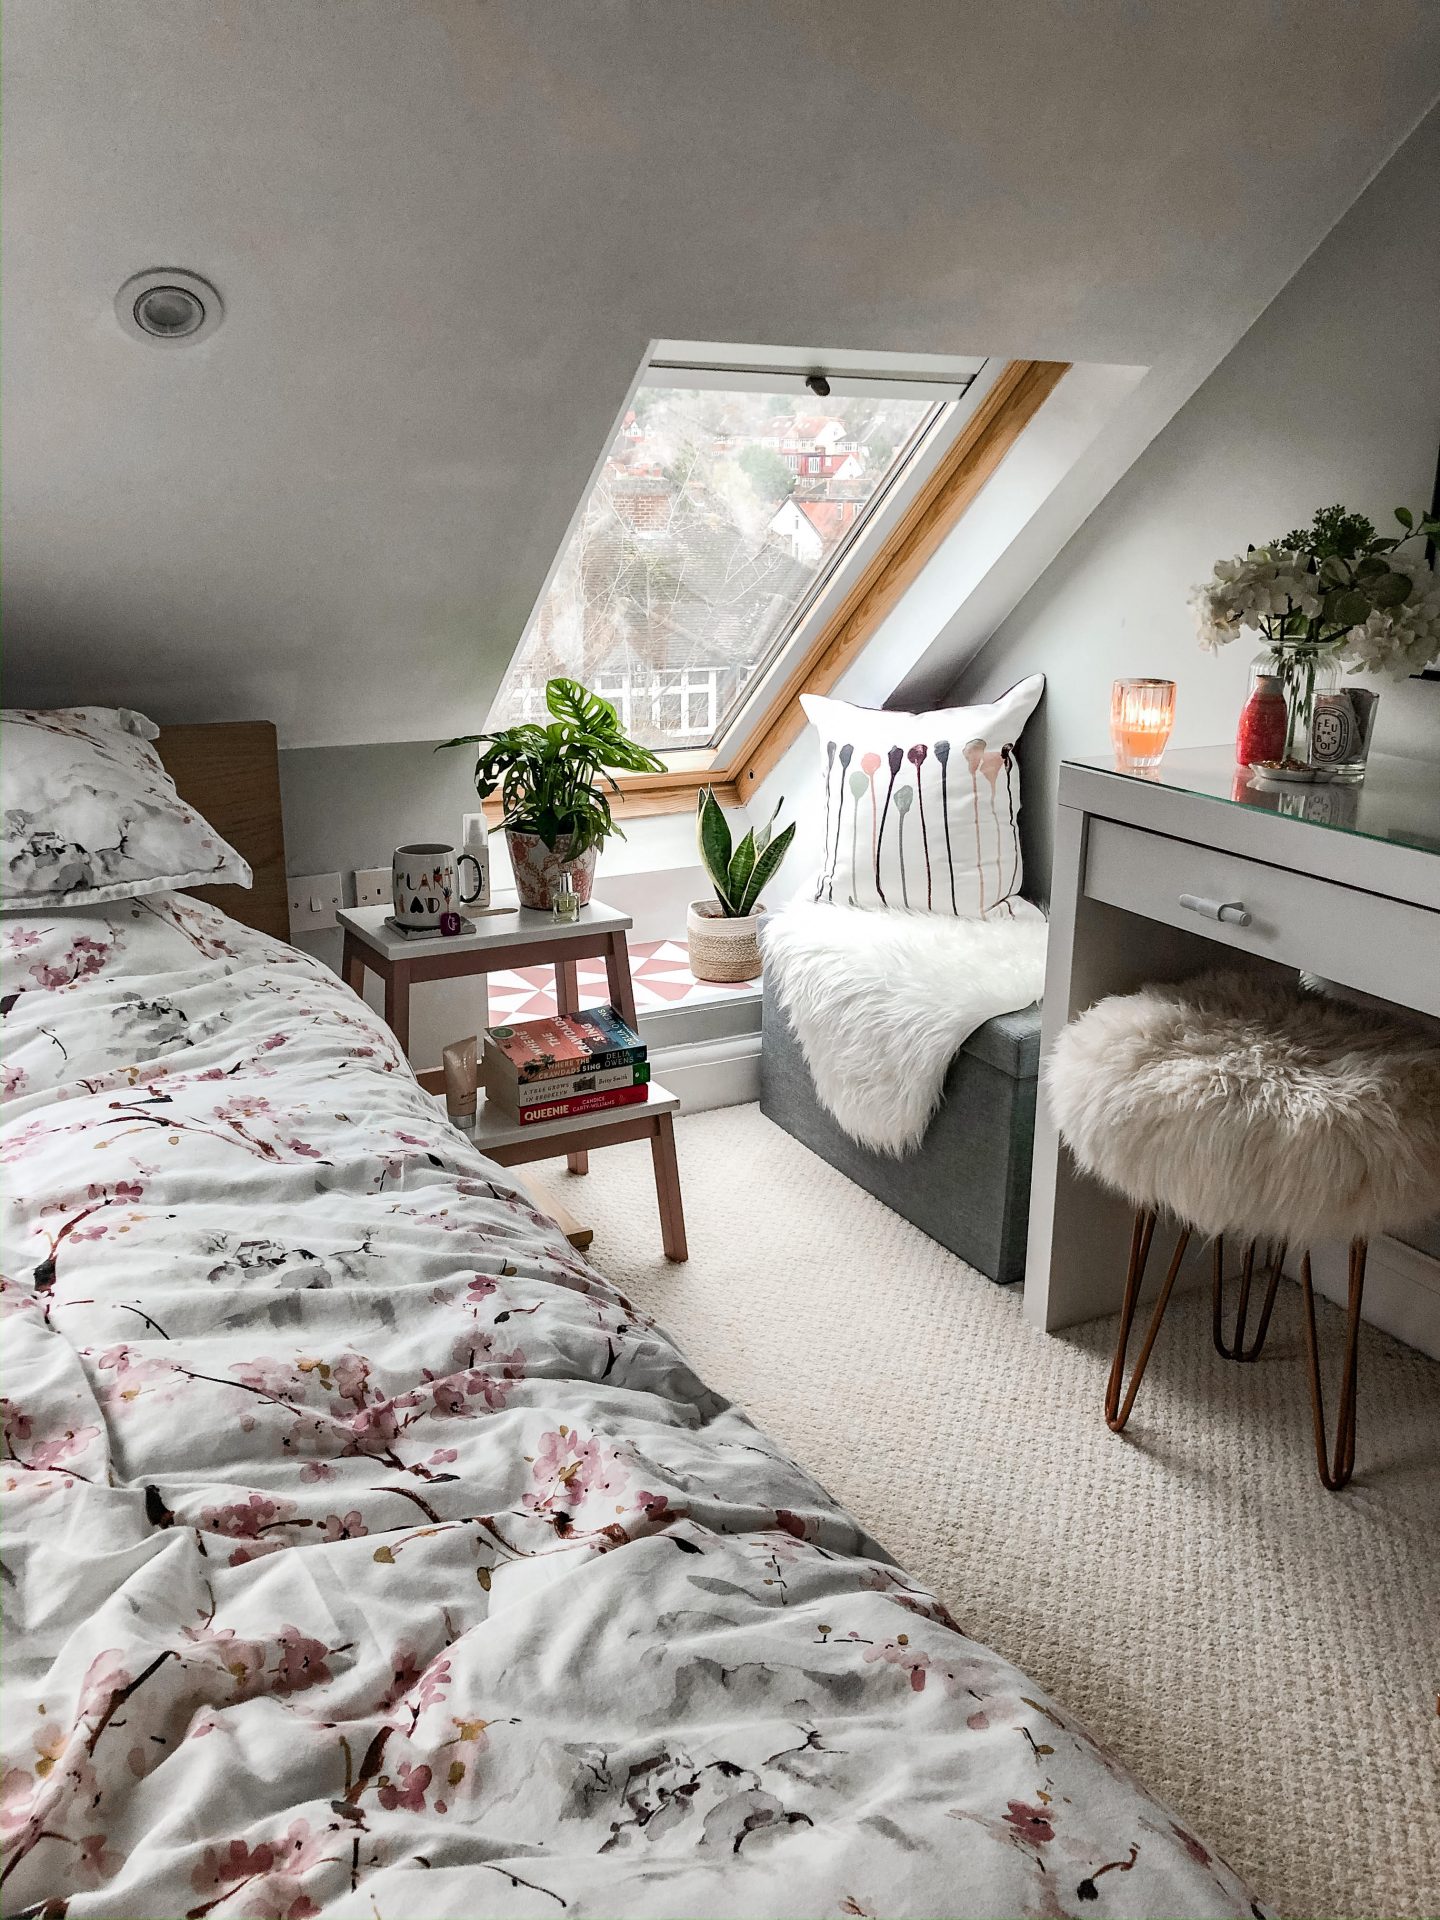
And then we go – a really quick and easy bedroom update which has totally upped the look of this recess for the cost of just the stools. The paints I used were all left over from previous projects and the items simply moved. There’s never been a better time to tackle these little DIY projects and shopping our home, I’m planning to share quite a few more over the coming weeks.
Follow me on Facebook | Instagram | Pinterest | Twitter

