AD – PR Product: Thank you so much to The Hairpin Leg Co. who sent me a set of brass hairpin legs to complete this project.
I always used to marvel at people who seemed to be able to find a broken clothes airer on the street and with no more than a bit of Sellotape and some string turn it into a detached 4-bedroom house. Well, I may be exaggerating but you get the gist. It turns out that I too have found a passion for upcycling/furniture flipping and I can hear Pete taking deep breaths as I brought home my first trash-to-treasure project piece a couple of months ago.
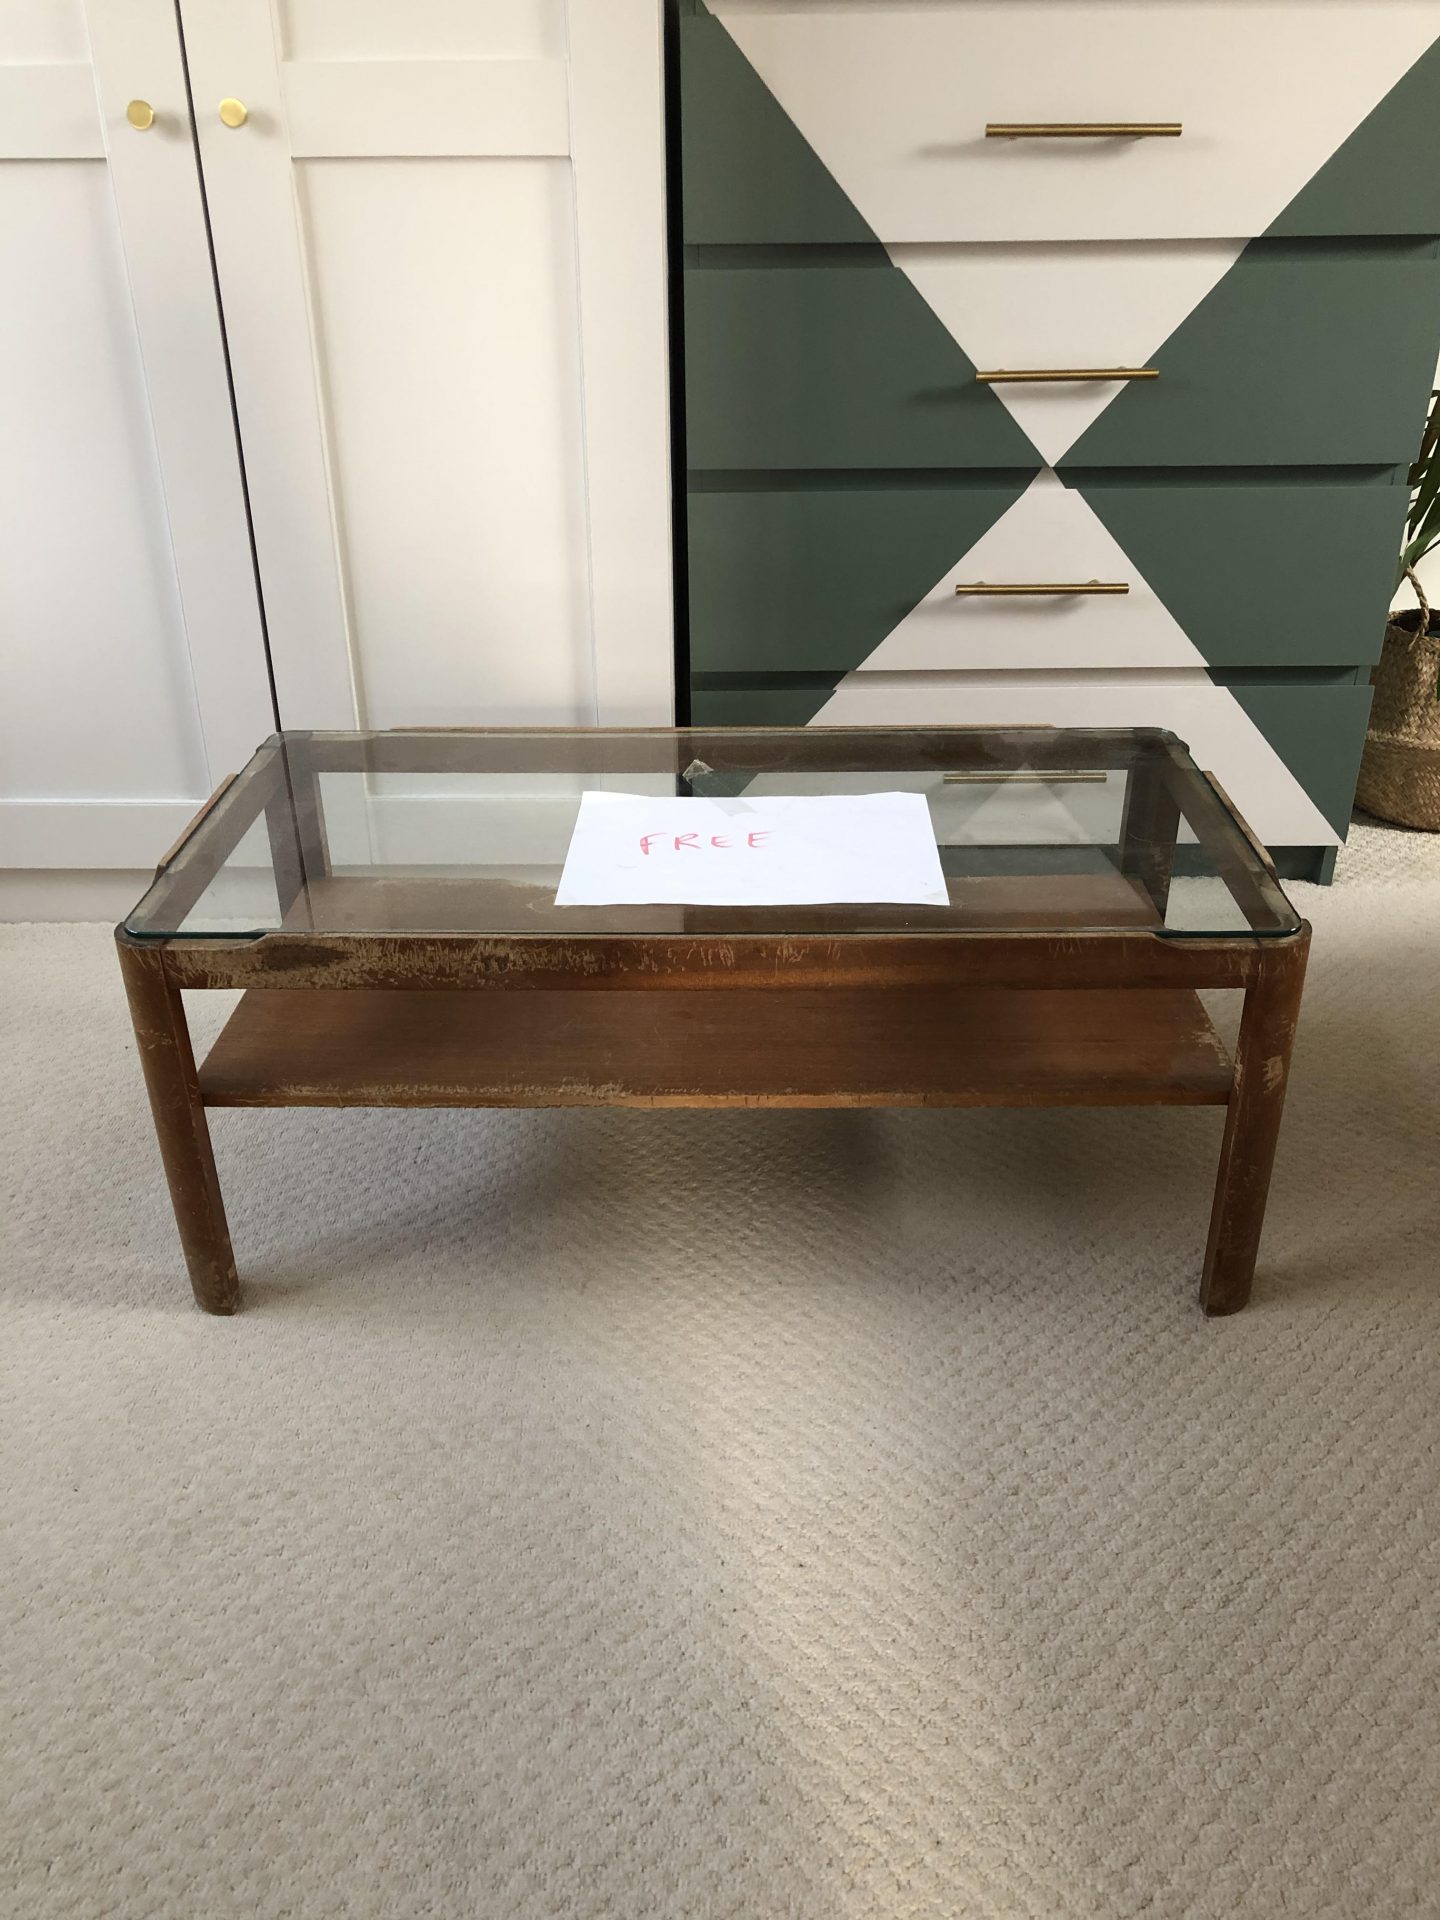
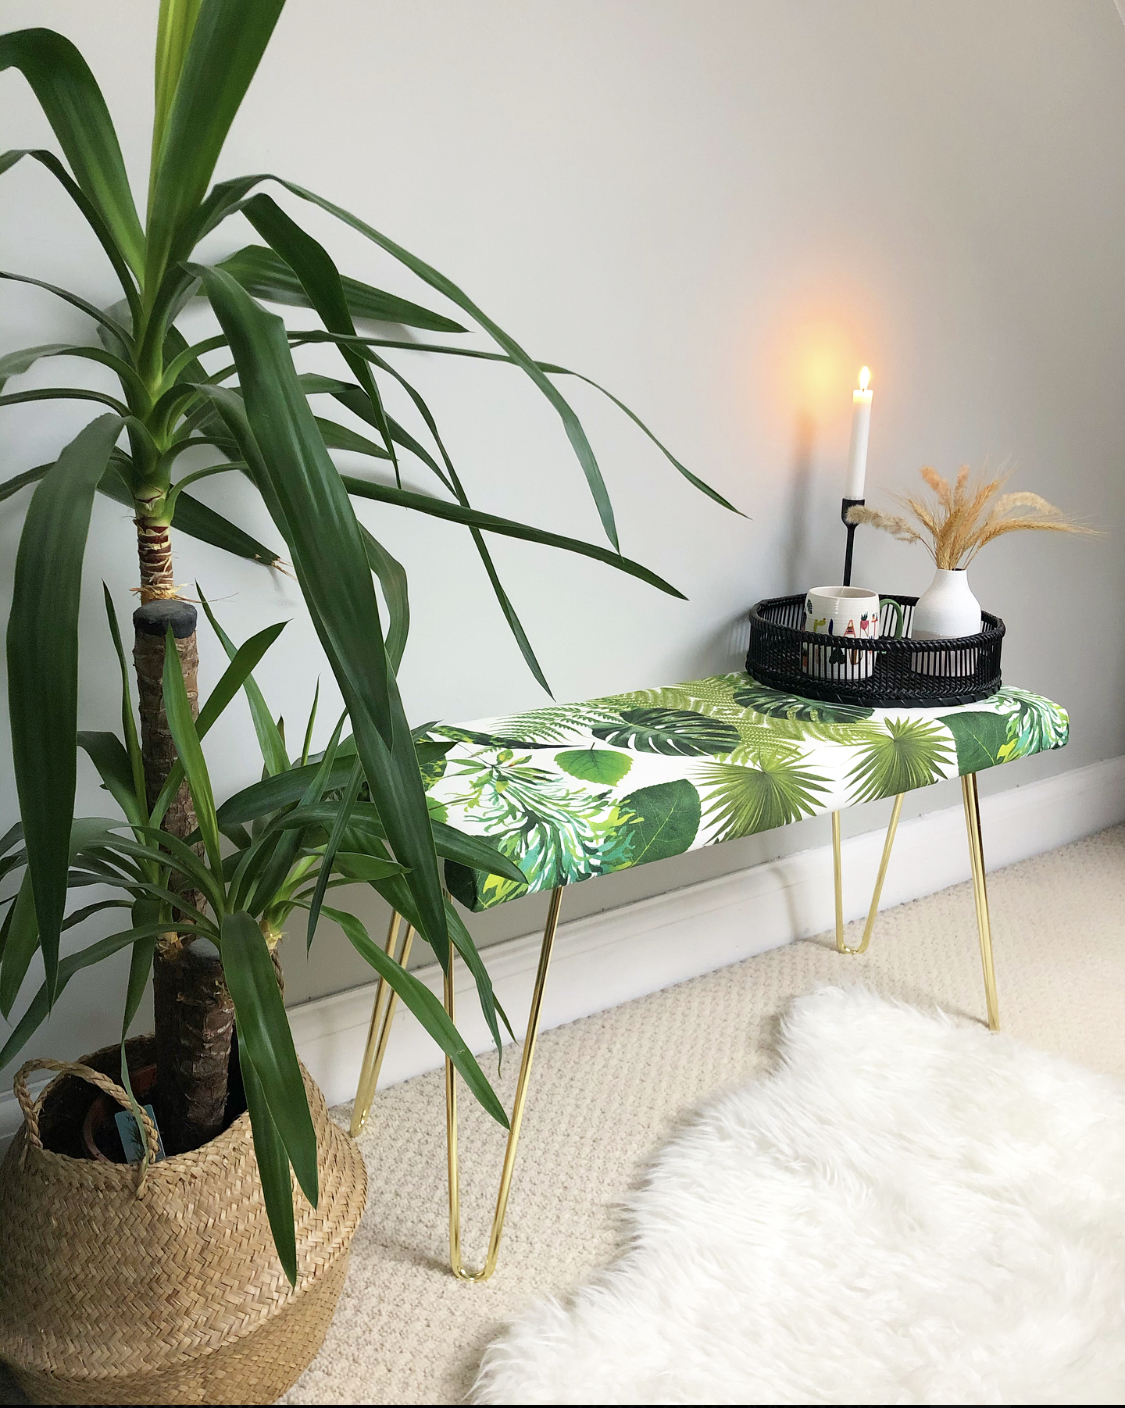
What was someone’s discarded, dog-chewed mid-century coffee table has become my newly upholstered bench (or at least part of the table has) and here’s how I did it in case you fancy a project like this too. Although I did use part of the table as the board for my bench, you could just use MDF or similar.
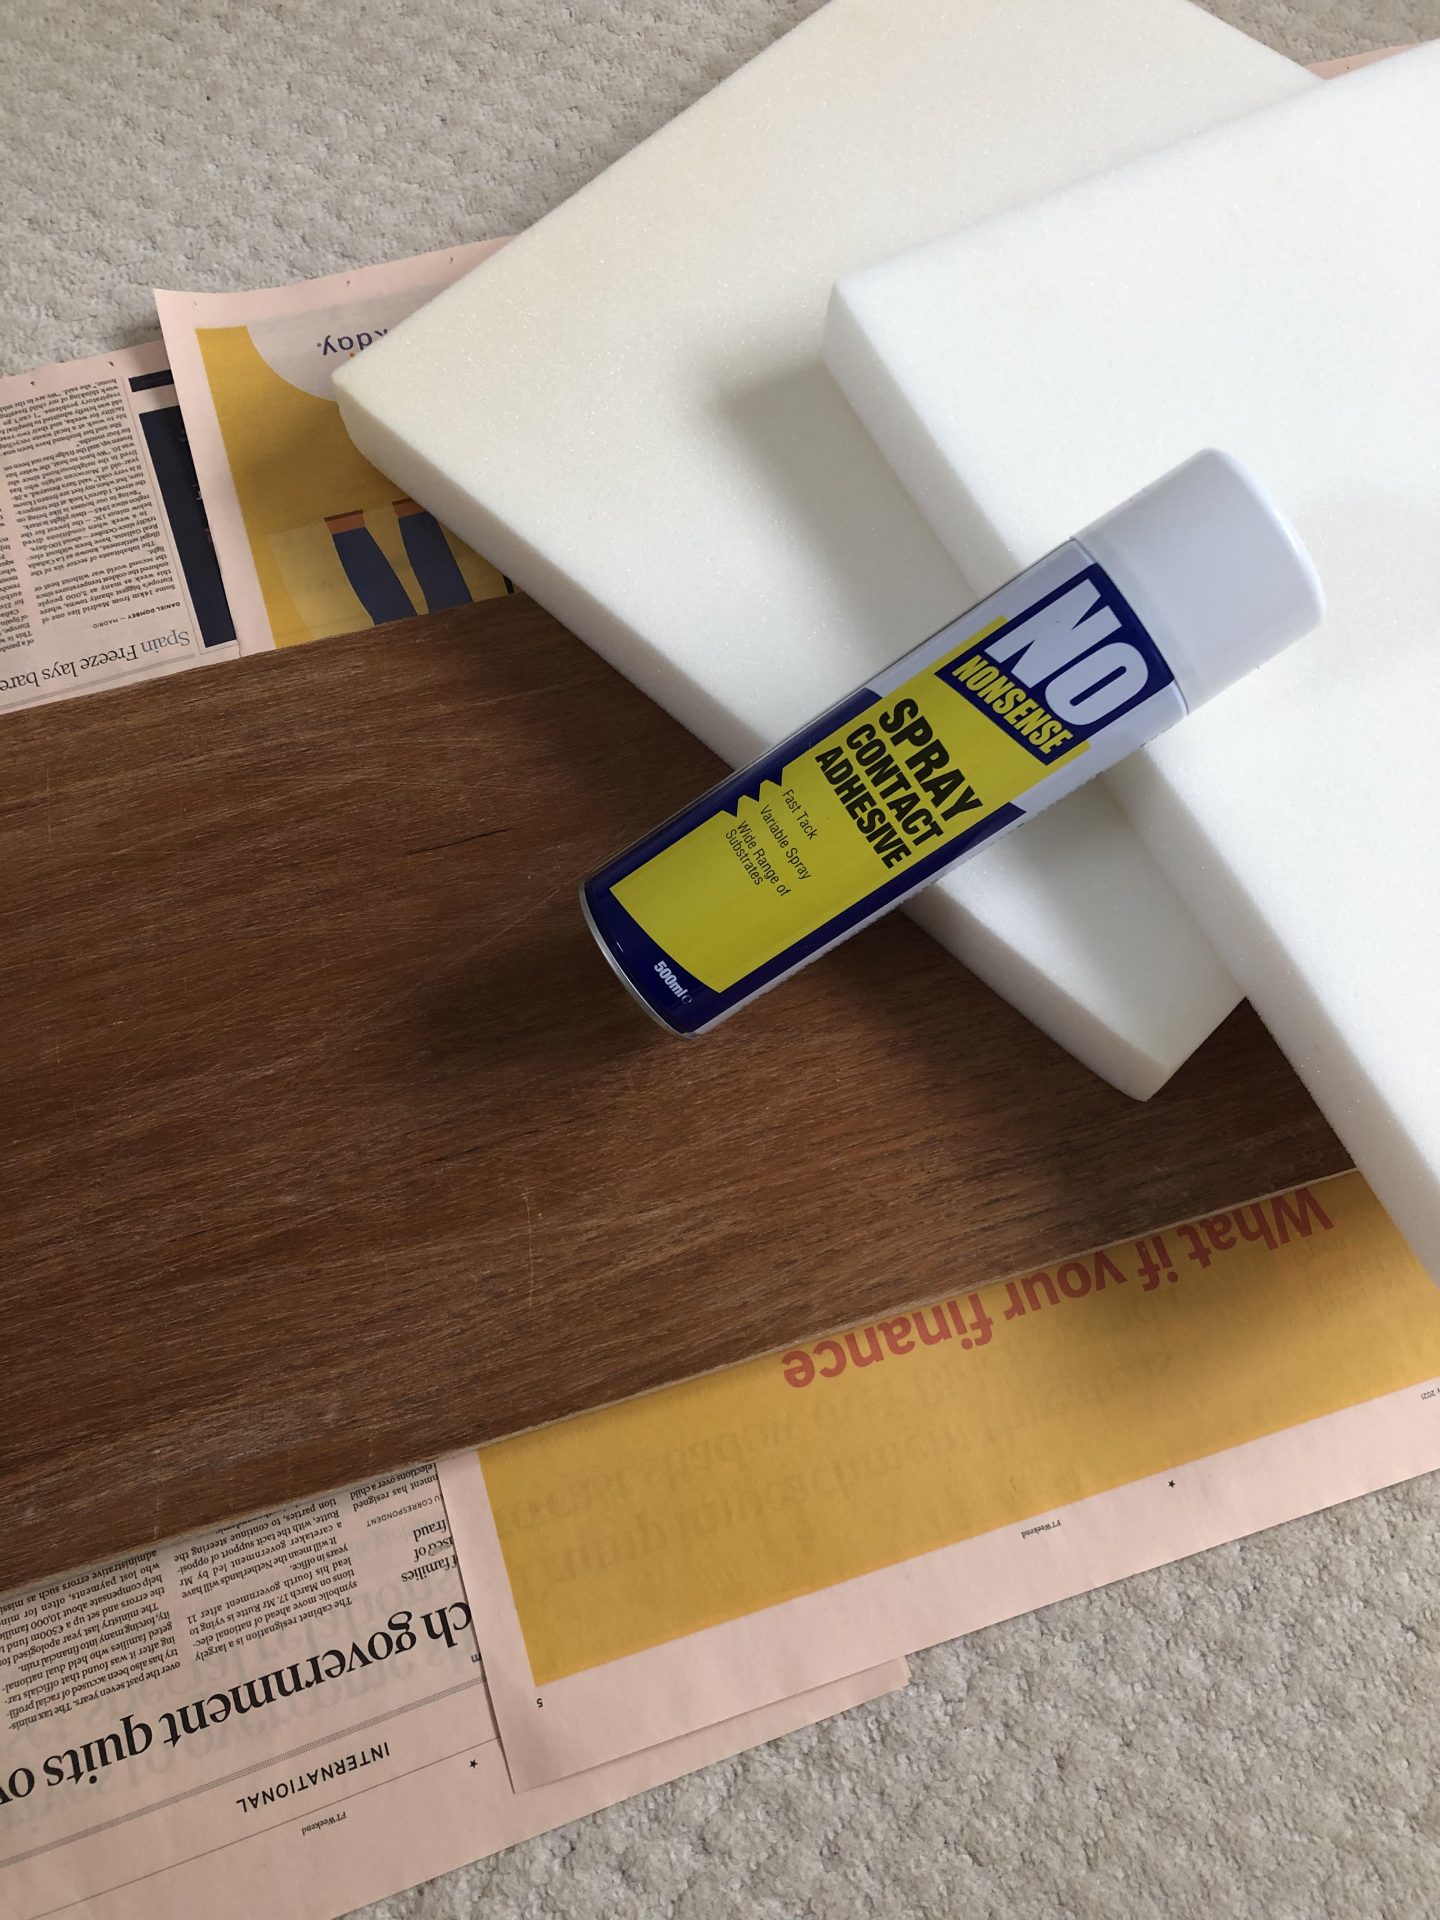
What You’ll Need:
- -Wood/MDF of some sort
- -Foam (I bought this from Hobbycraft)
- -Wadding (I bought this from Hobbycraft)
- -Spray adhesive (I bought this from Screwfix)
- -Tape measure, scissors
- -Staple gun (this is the one I have)
- -Fabric (I bought this from EBay, one metre)
- -Legs (I received these as a PR Product from The Hairpin Leg Co)
Step One – Prepping The Wood
This won’t be necessary if you’re going with a piece of MDF or purpose-bought wood but I thought I’d just share in case you’re recycling. I first of all removed the wooden shelf from underneath the table. The damage was the worst on both long sides, but that was fine because I wanted it to be slightly narrower so I marked a border down each side and Pete made the cuts for me. I then cleaned and lightly sanded the wood, ready for the foam.
Step Two – Adding The Foam
For this, you’ll need the spray adhesive and your foam pads. I actually bought the foam from Hobbycraft back in December, but I’d recommend ordering online where I’ve heard you can get custom fit pieces. I had to get two separate pads as they only had one size but would have preferred one larger bit. I used the spray adhesive to spray directly onto the wood and then held the foam pads down to stick (note: I had originally planned to use my glue gun, not thinking that it could potentially melt the foam…!)
Where I had excess over the edges I then cut this off with – of all things – a bread knife! Seemed to do the trick.
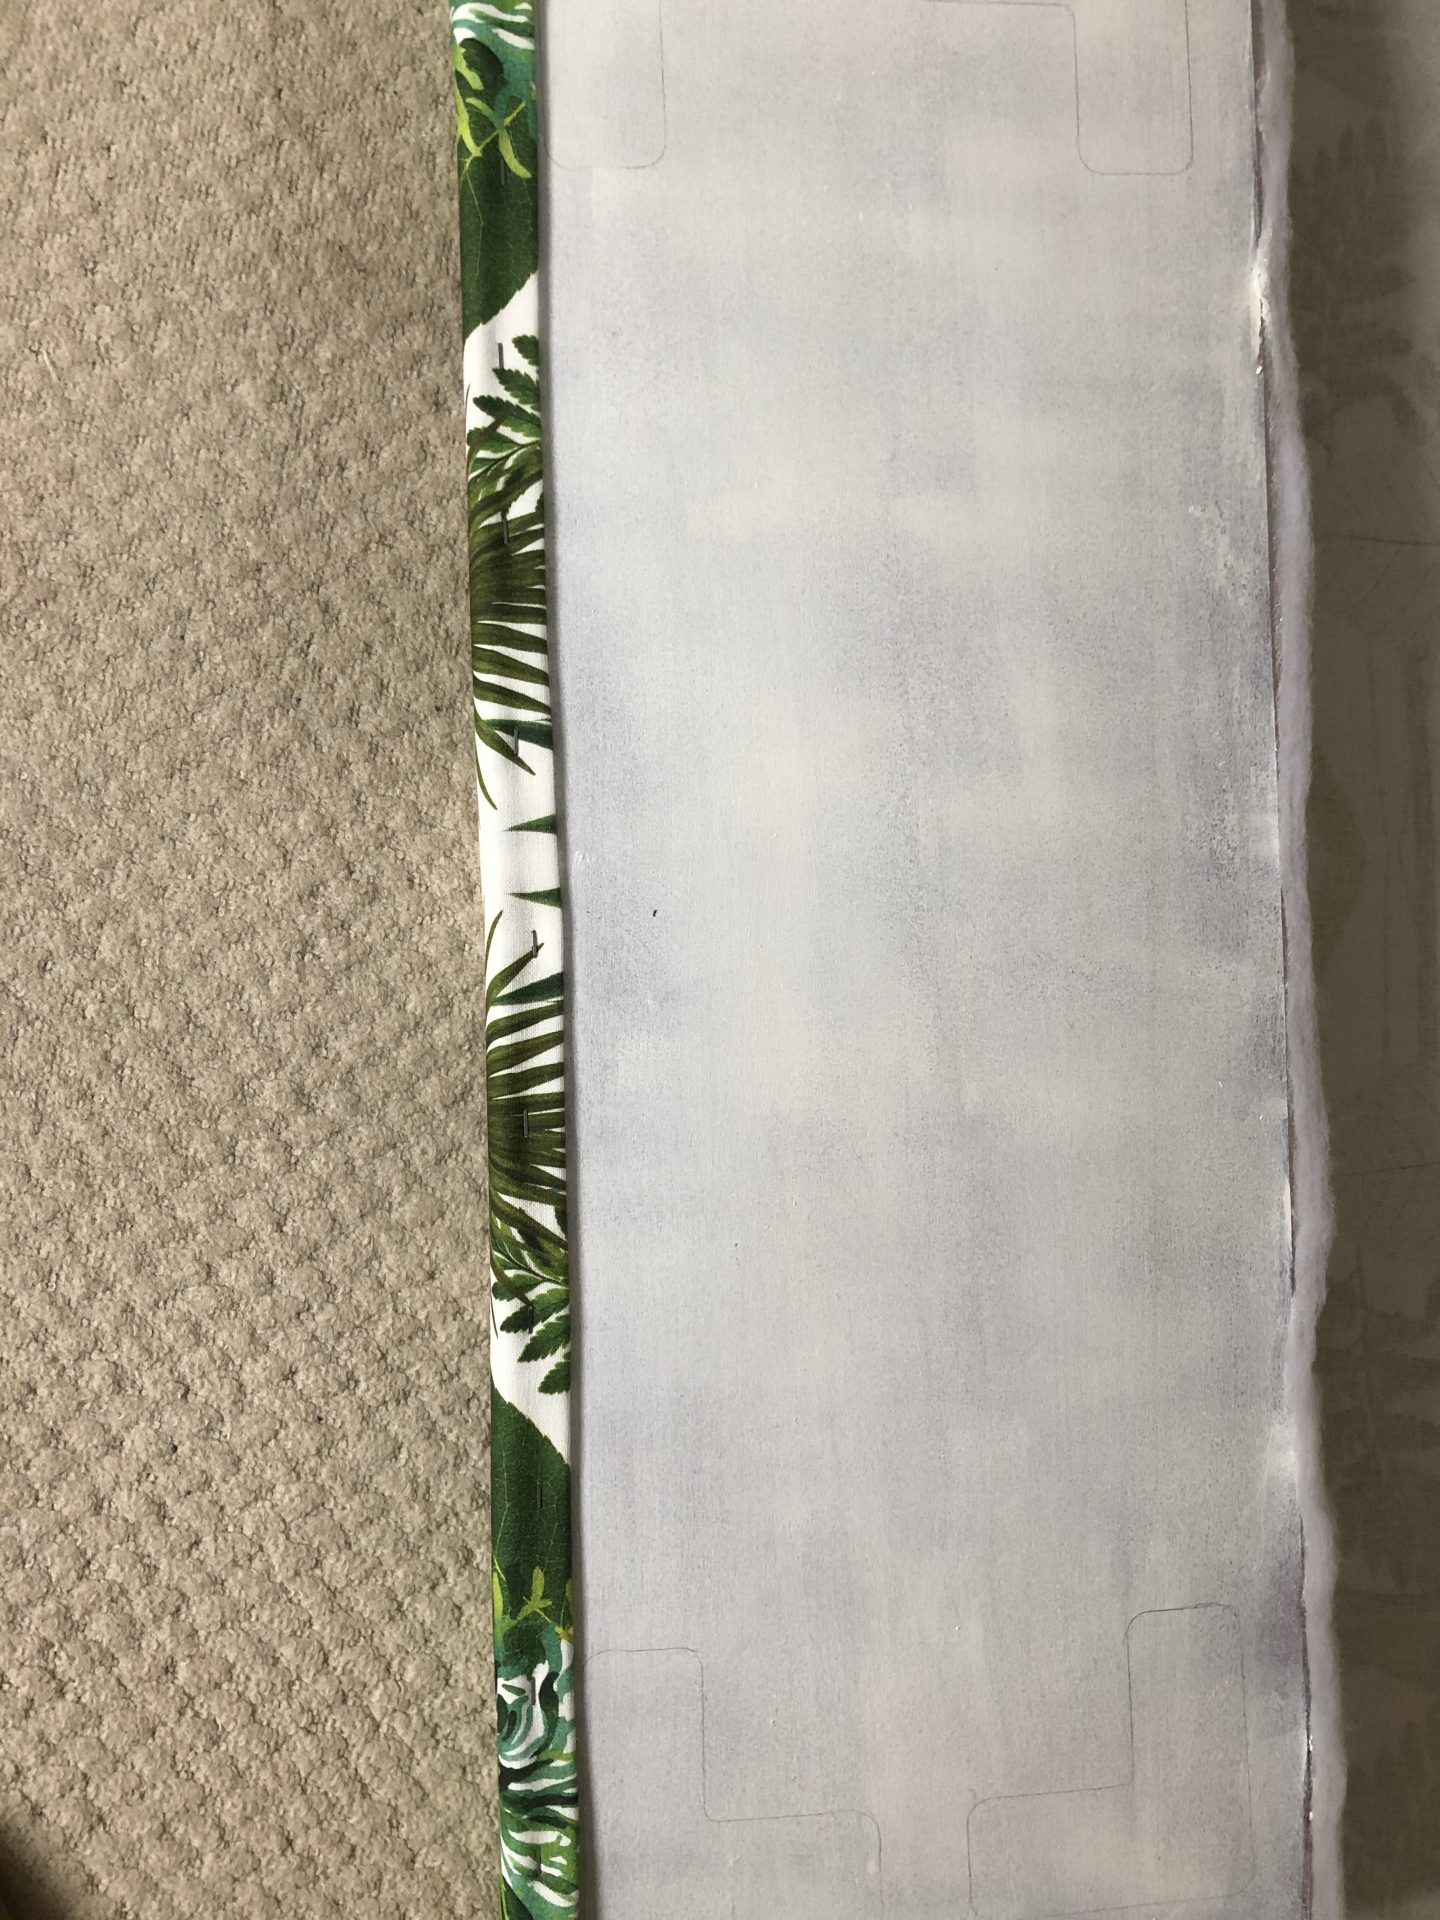
Step Three – Adding The Wadding
This is what you’ll need to make your bench look more of a natural shape and stop it looking as boxy as some foam stuck on some board. I laid it over the top of the bench, then used the spray adhesive to spray onto the sides of the bench and glue it down. Any excess I trimmed off with a pair of scissors.
Step Four – Adding The Fabric
This is the part I was most nervous about because I literally never work with fabric. Textiles was one of my nemesis subjects in school along with pretty much anything artistic like art, pottery, CDT – the list goes on. I even struggled to really understand what type of fabric I could use or what measurements mean – I mean “fat quarter” anyone?! If you’re worried about this element of an upholstery project and need help with your project, find out how much it costs to reupholster.
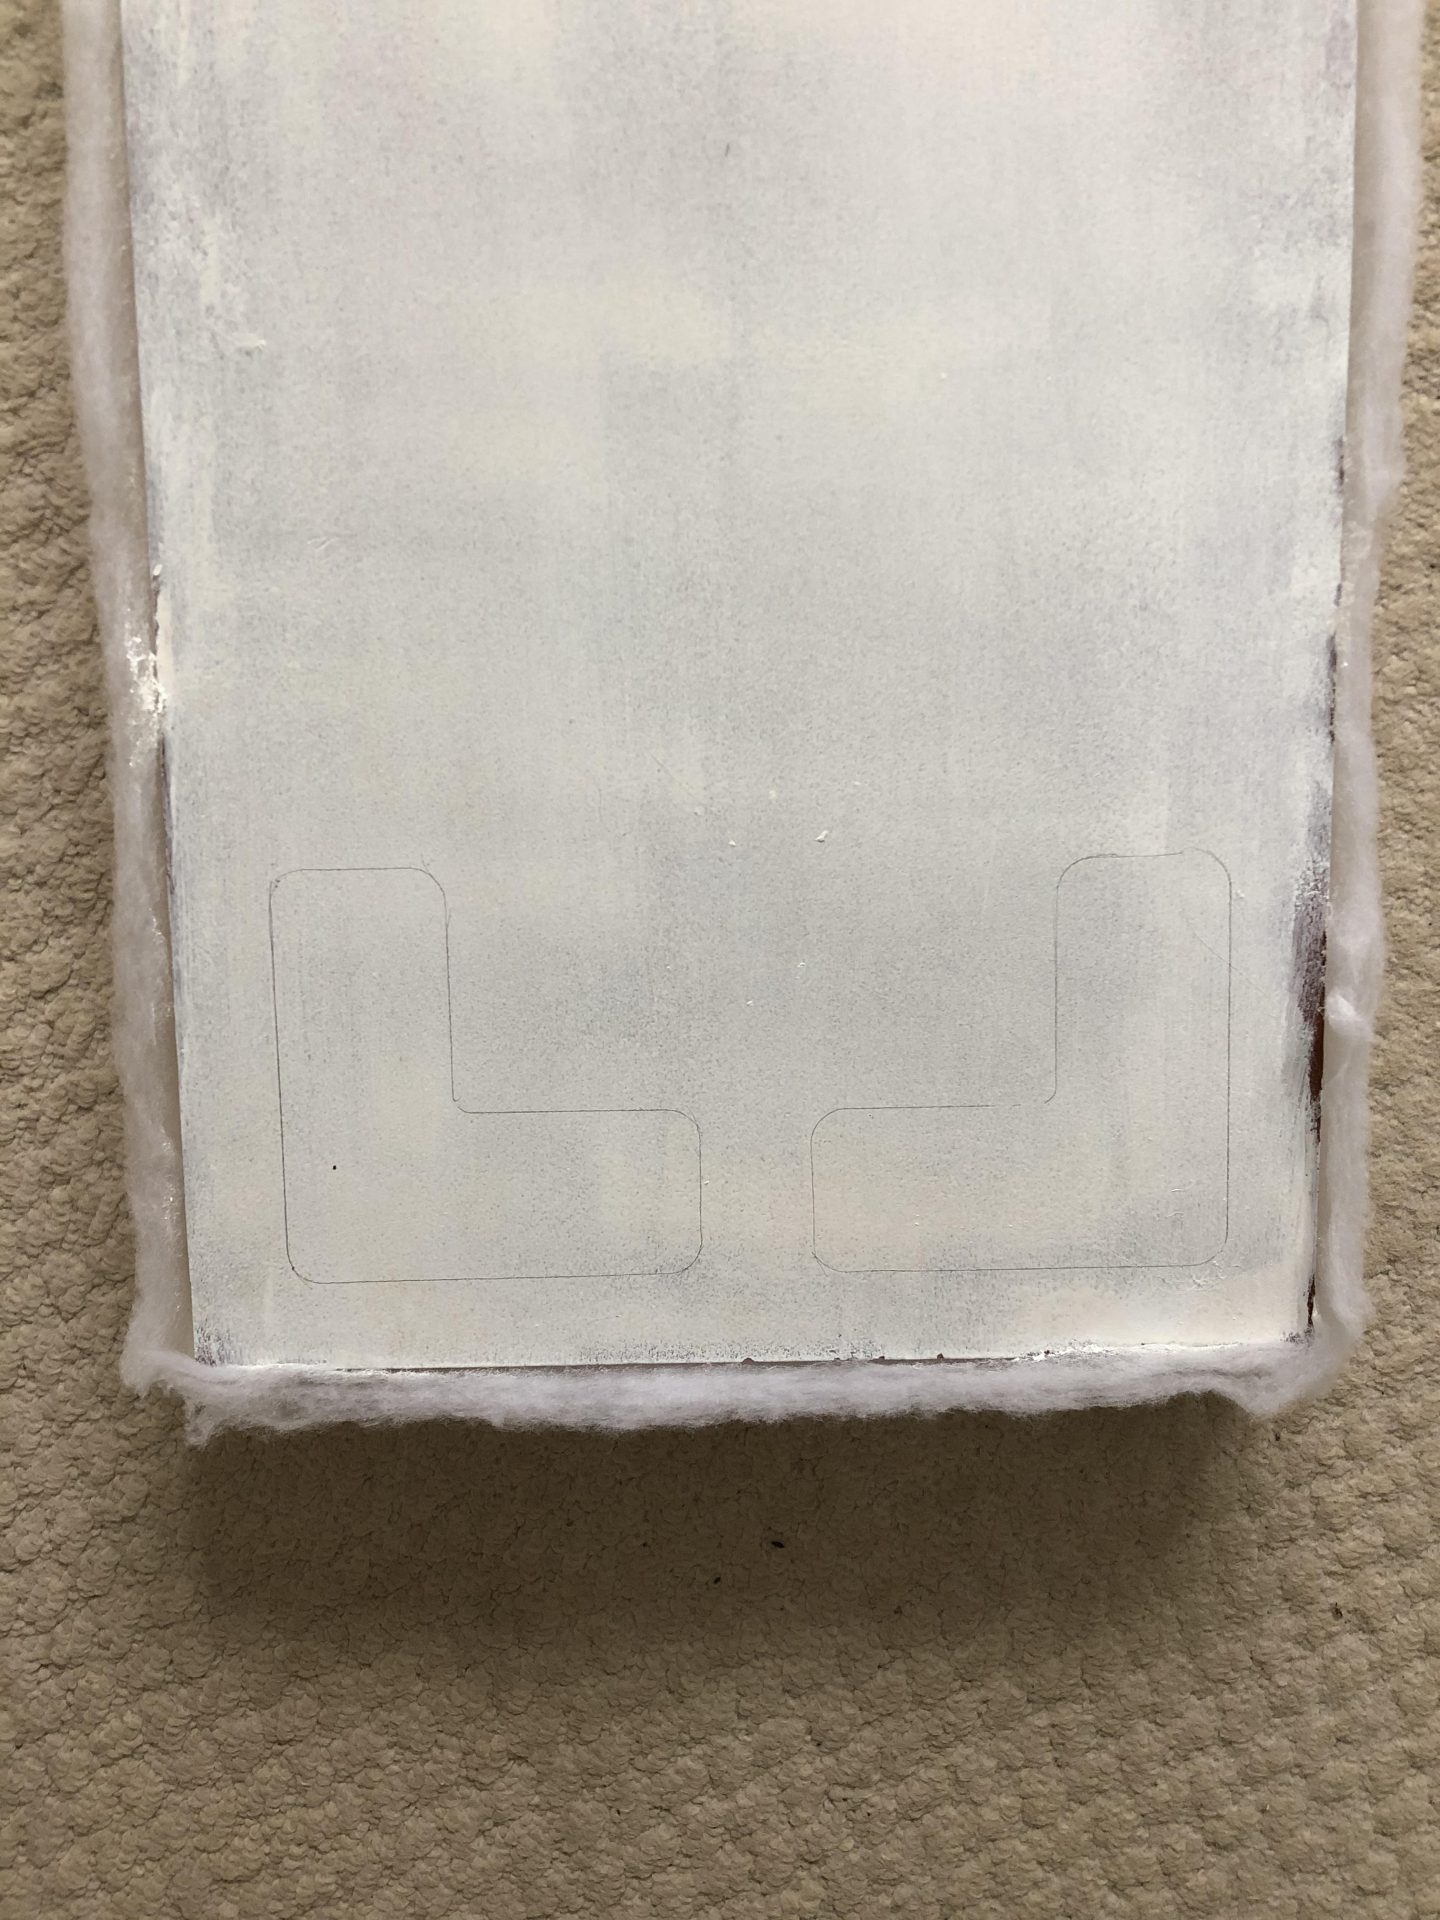
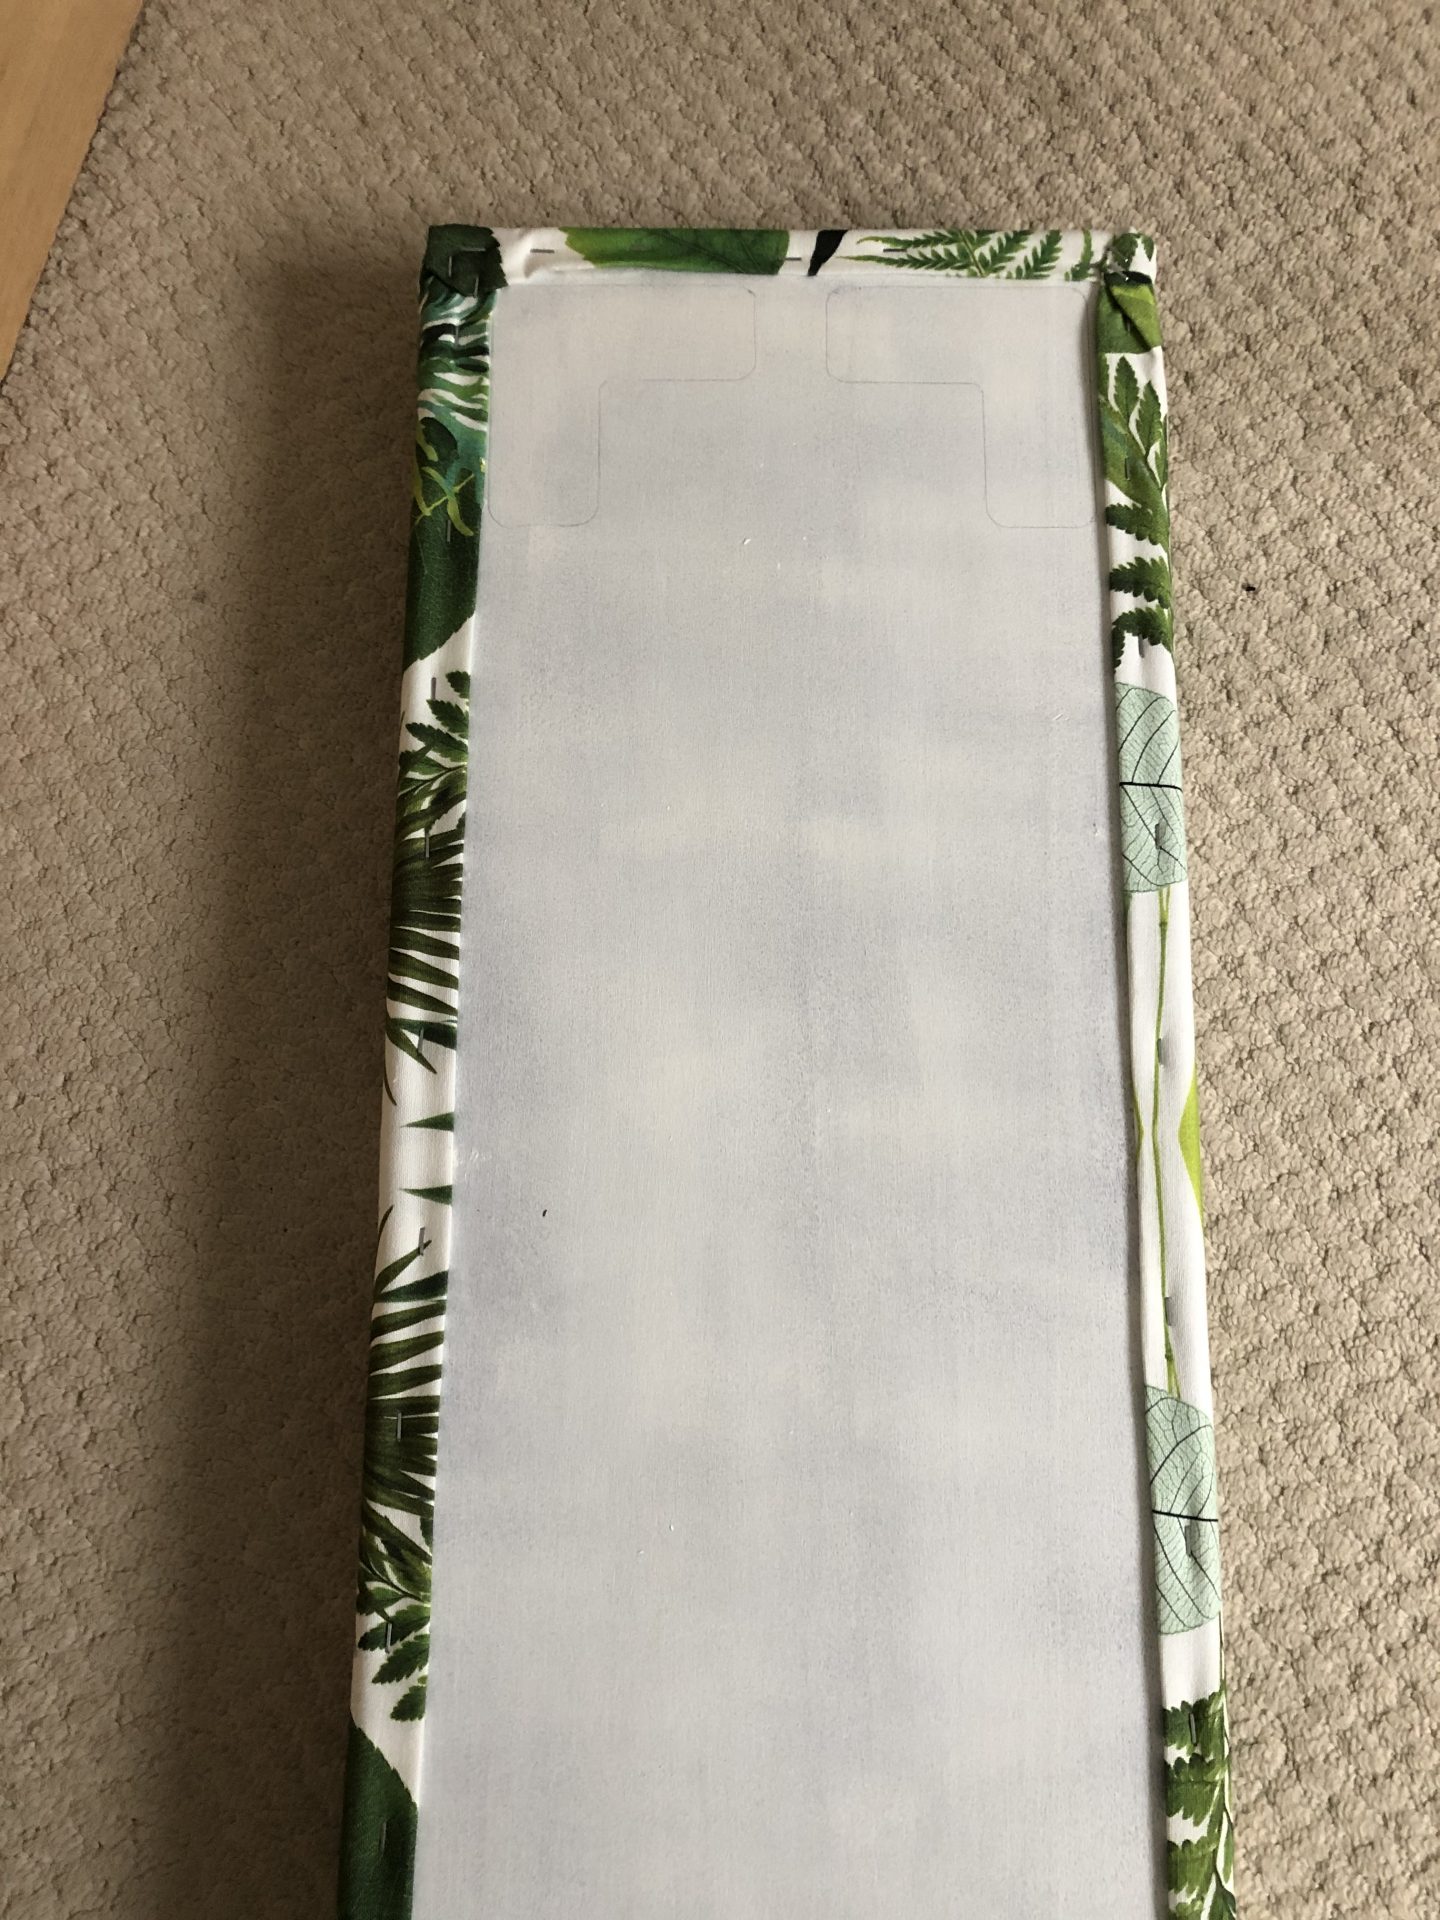
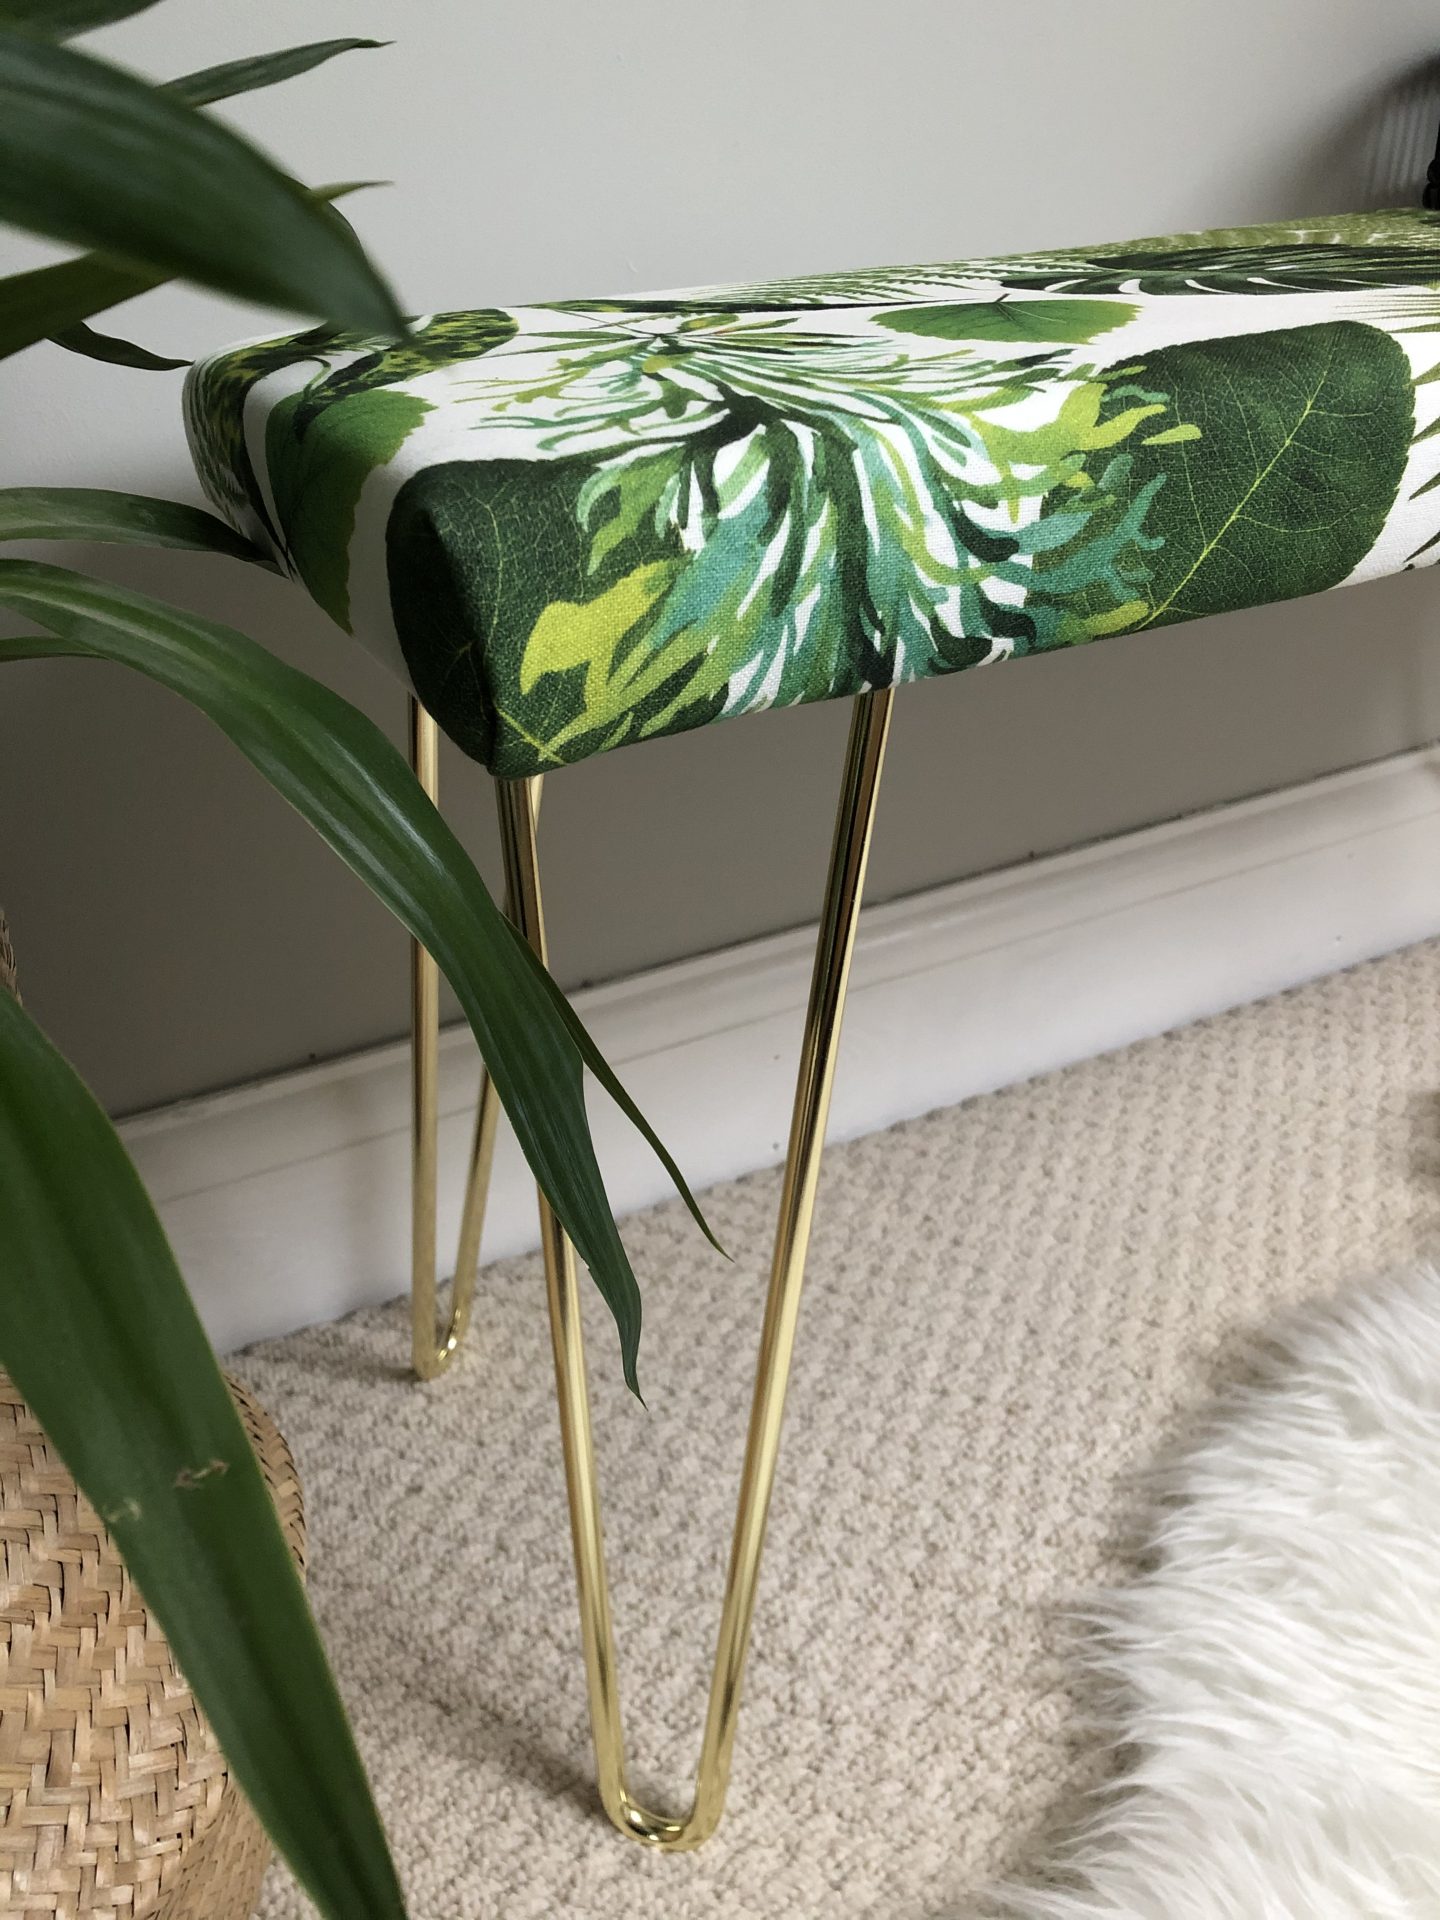
I eventually managed to find some lovely looking fabric on Ebay which said it was ideal for upholstery and came in measurements I could add actually understand ie, metres. Before I set about stapling the fabric, I decided to mark on the underside of the bench where my hairpin legs would go so I drew round the outline in pencil. This gave me a good guide mark of where I’d be attaching the fabric to try and keep it neat.
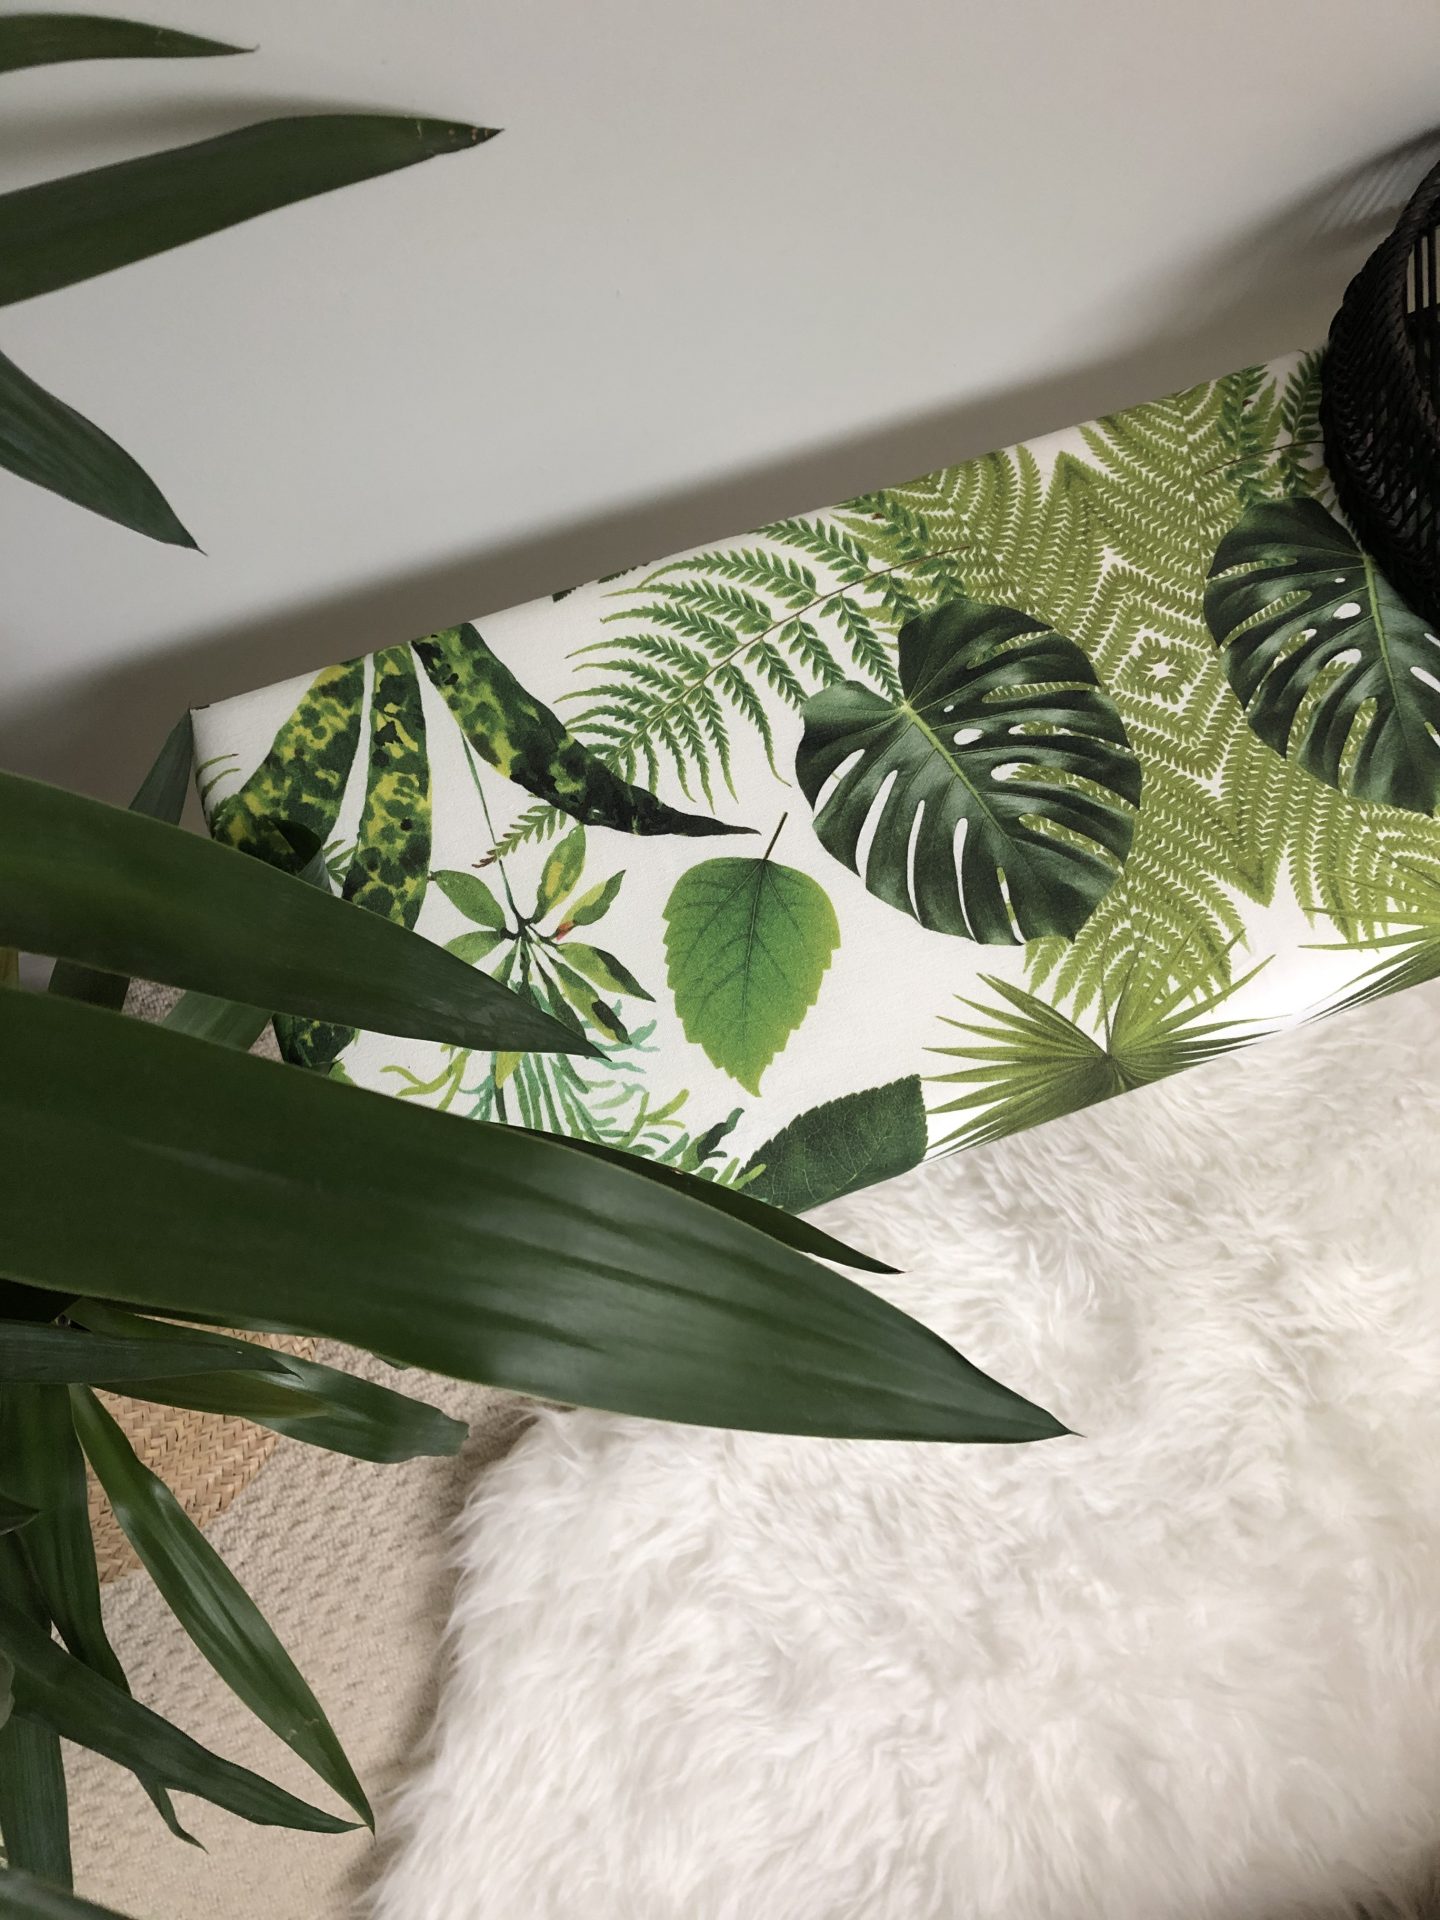
Most importantly, iron that fabric! You need to make sure it’s entirely crease free before starting work. I then laid the fabric over my bench as it’s got the leaf/plant pattern and I wanted to work out what would form the centre piece of the bench. Then I cut off most of the excess to give me an easier piece of fabric to work with.
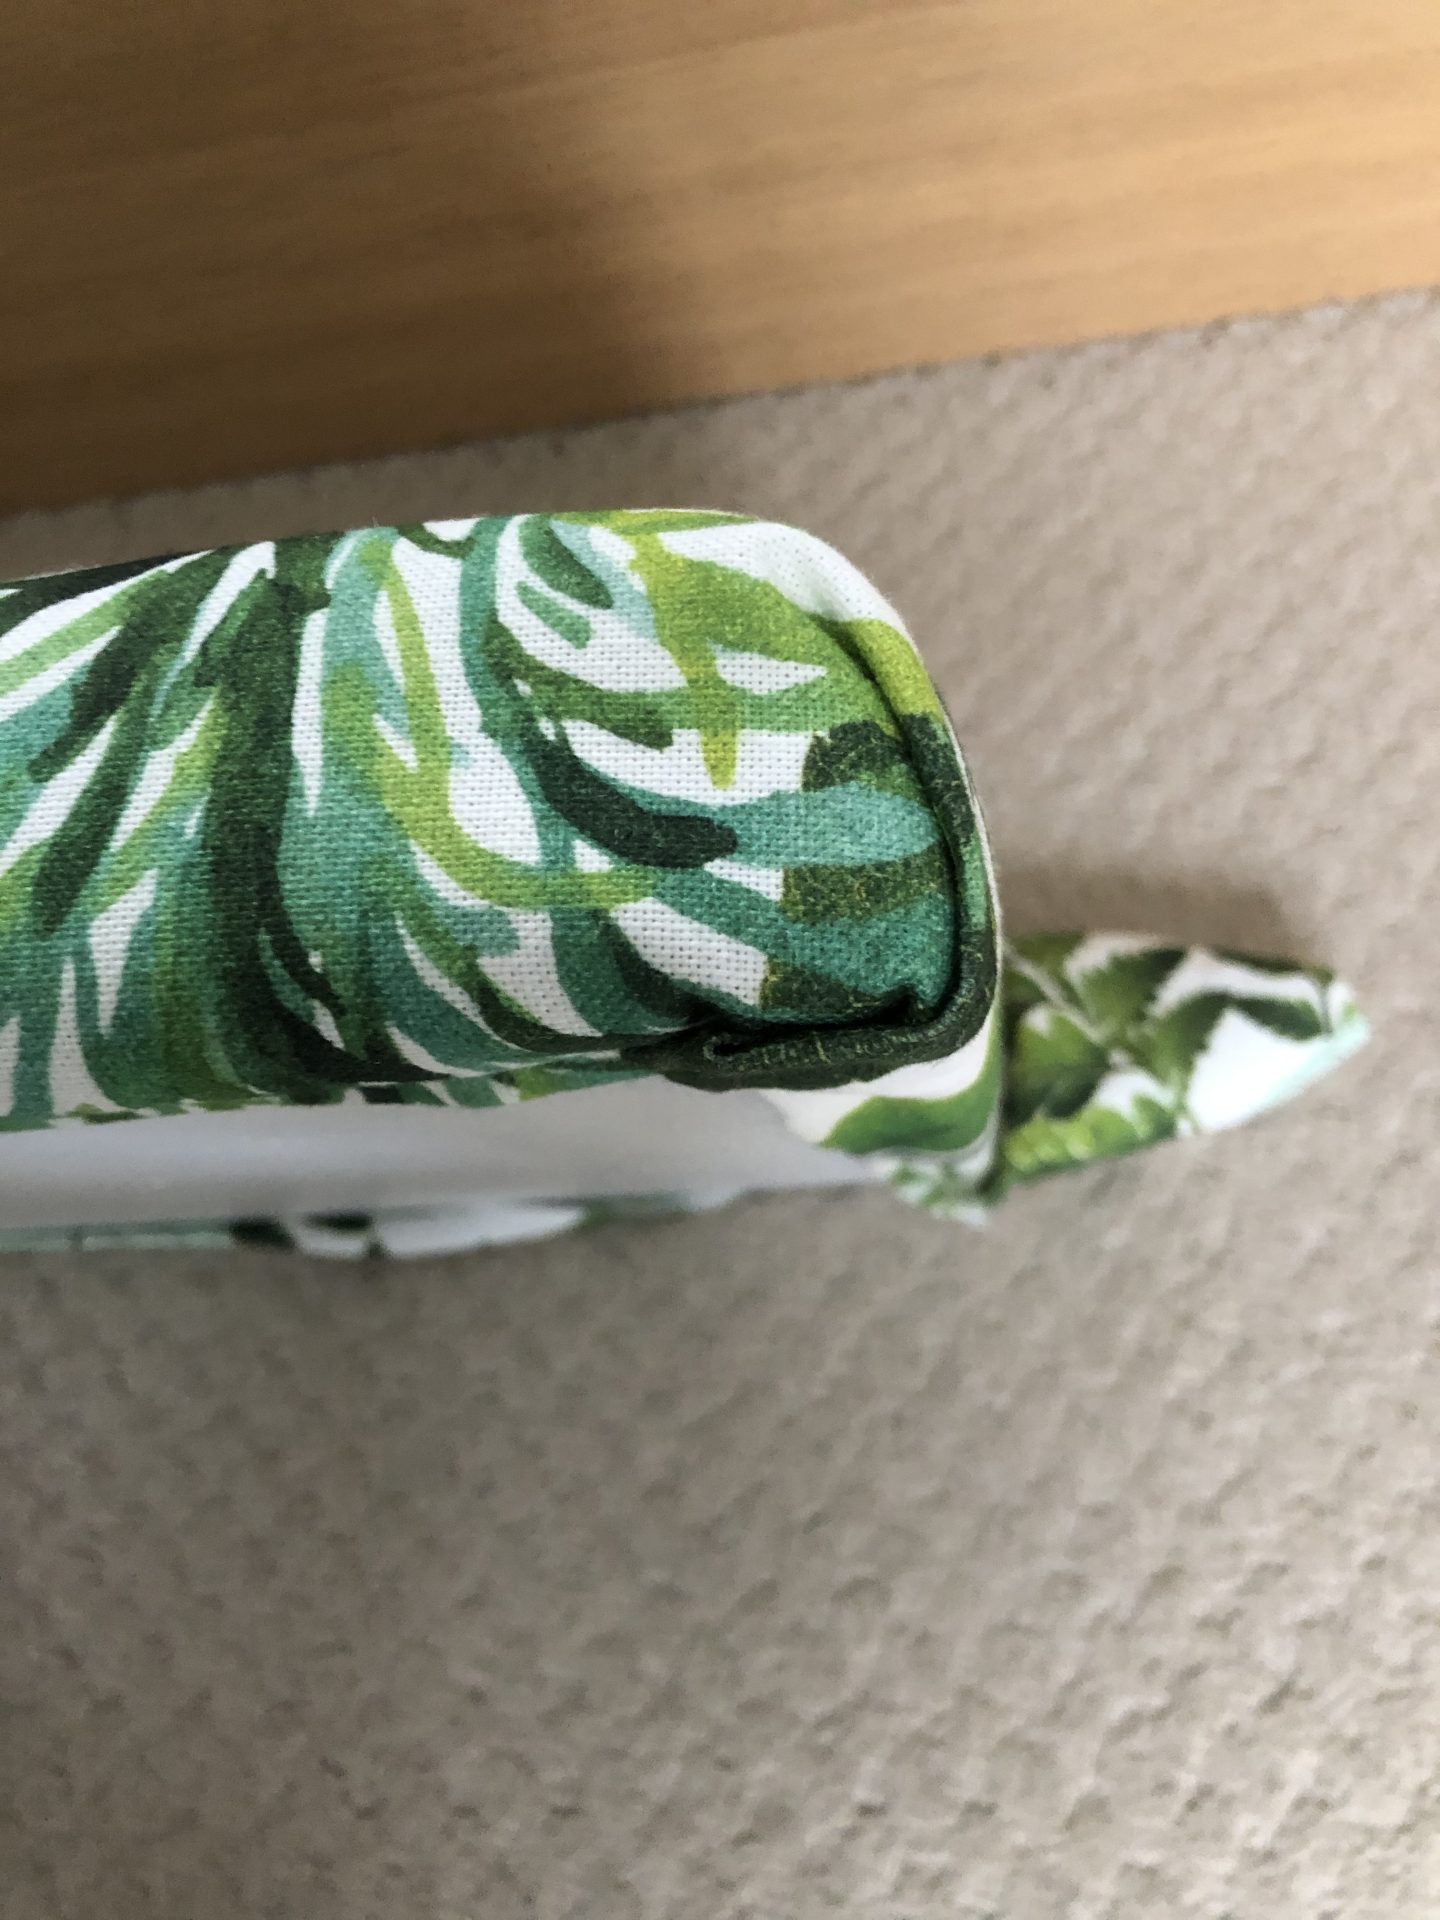
To start stapling, flip the bench cushion over so you have access to the wooden board. Fold the fabric over so you’re stapling a neat edge that won’t be frayed, and start stapling from the middle of your longest side, working your way out on each side.
Once you’ve done a long side, then do a short side, and then tackle the corner between the two. I won’t even attempt to explain the corners because I had to watch a You Tube video to make sure I got as neat a tuck as I could. Continue to work round the bench making sure you pull the fabric taut as you go.
Step Five – Adding Legs
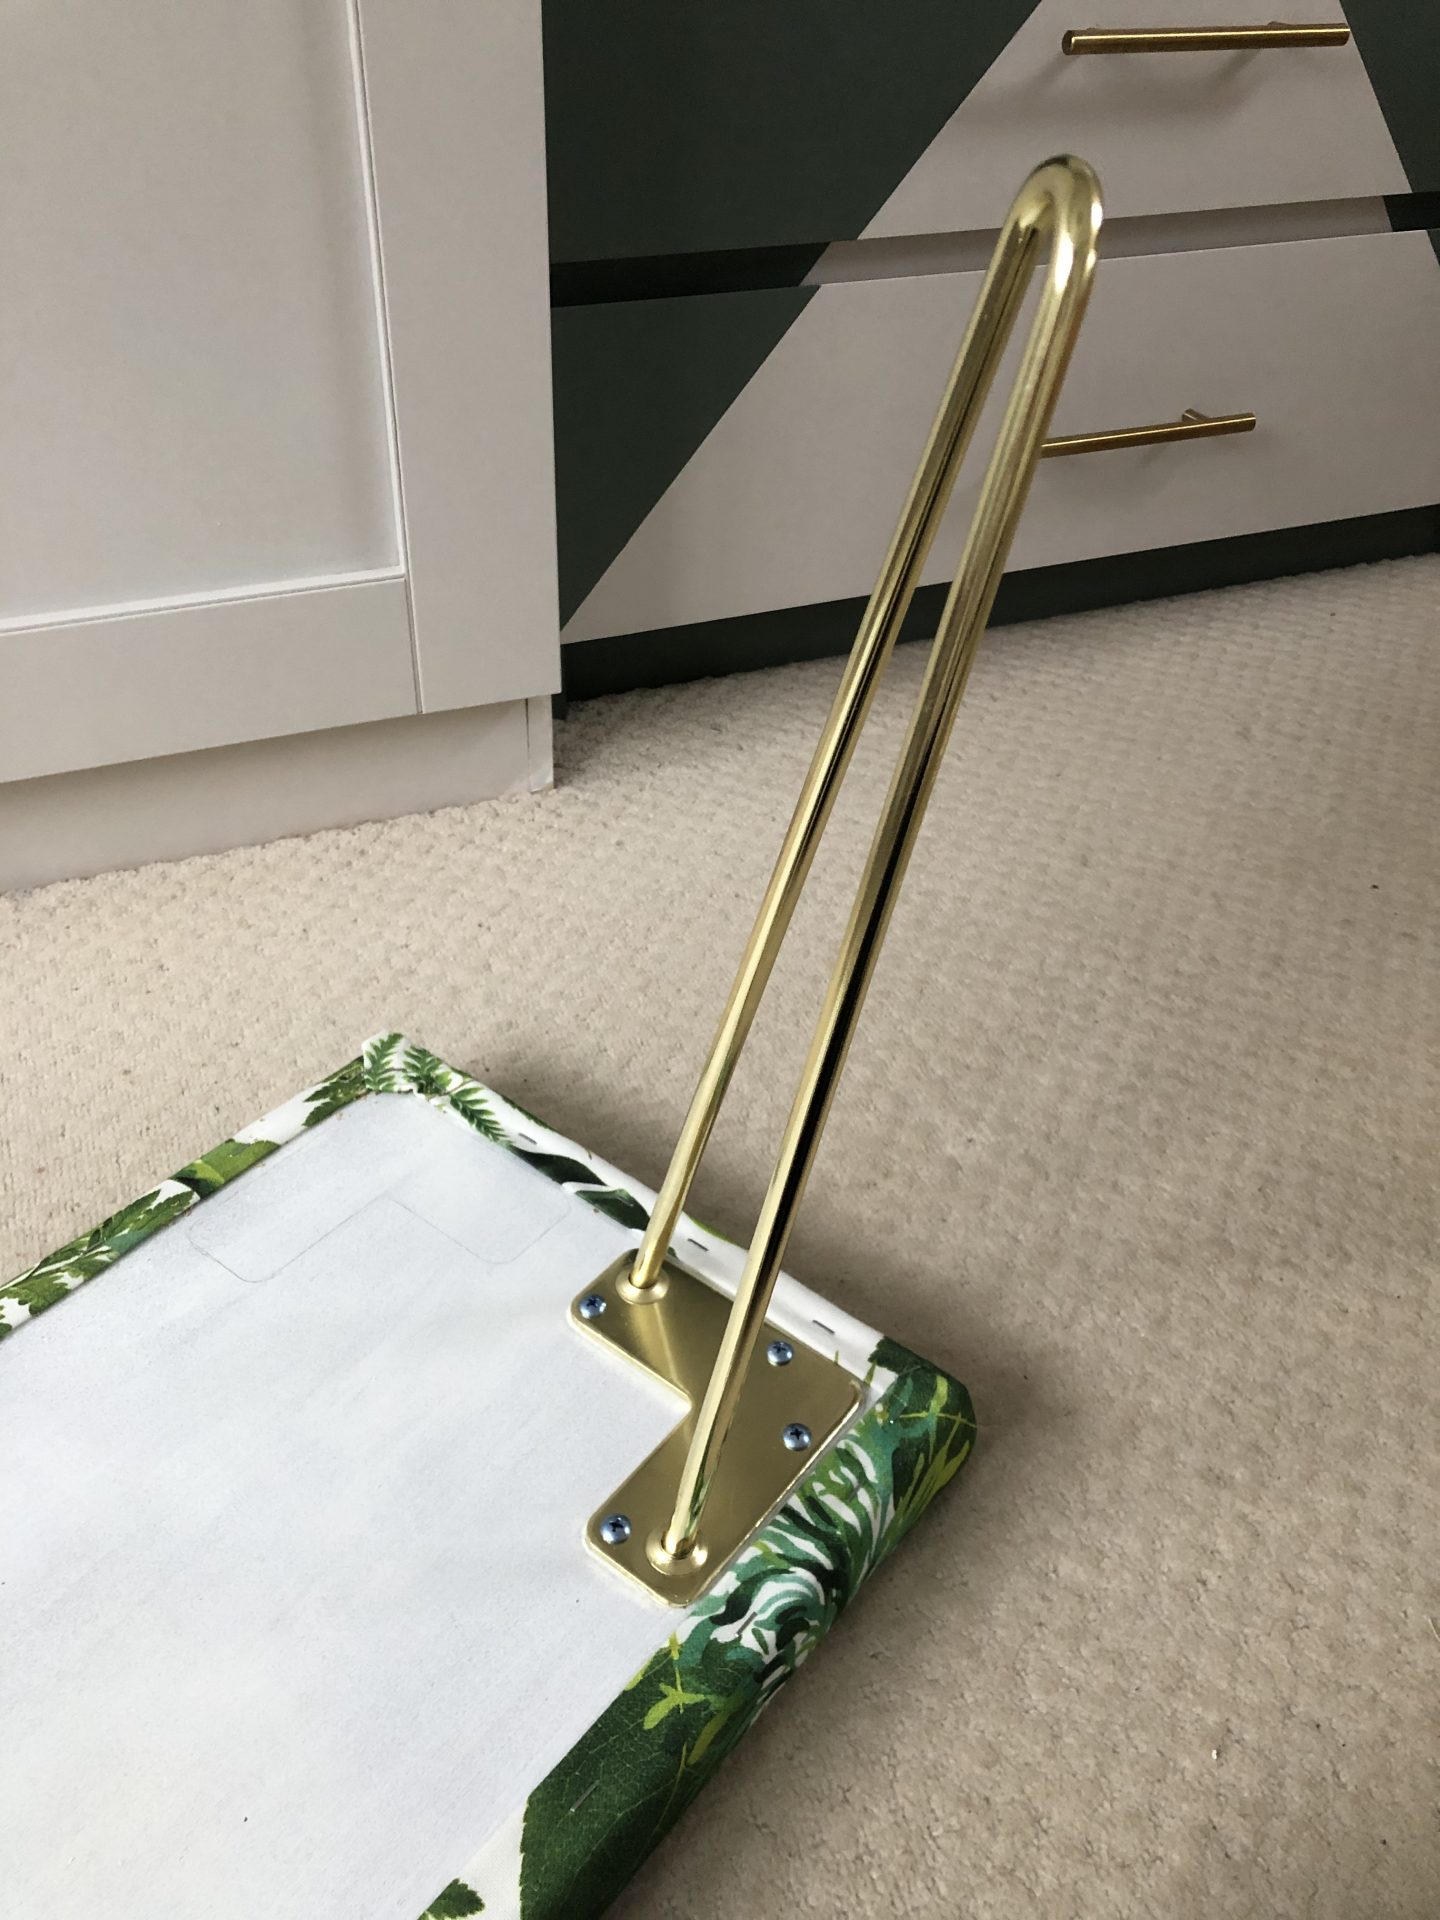
This is only if you’re adding hairpin style legs but they’re quite popular so I wanted to share what I did. There are 4 holes for screws per leg, so I held the leg over the pencil template I’d already drawn out and made pencil marks where I needed to drill the pilot holes. Drill each pilot hole, then use a screwdriver to screw in the legs.
And you’re done! Honestly, this project did take me a couple of weeks on and off because I’m not very good at doing things all in one go but I couldn’t be happier with the end result. It’s so good to have given a bit of furniture a new lease of life and for a fraction of the cost that buying something like this would have cost me. Again, I hope this has encouraged you to have a go at upholstery, this was my first attempt and I can do it then anyone can 😊 I’ve also saved the process to my Instagram Story highlights in case video is helpful – good luck!
Disclaimer: Thank you again to The Hairpin Leg Company who gave me a set of their brass hairpin legs to complete this project.
Follow me on Facebook | Instagram | Pinterest | Twitter


Looks amazing I love those hairpin legs, I’m now looking round my room thinking what could I use some for LOL
https://www.katescloset.uk/
Author
Once I Do something once I then want to do it again and again 🙂 Xx