
Who doesn’t love a bargain? And if you say “me” then I’m going to have to accuse you of lying. The truth is though I’ve always been quite in awe of proper bargain hunters, the people who can go to a car boot sale and turn someone else’s 50p junk into their own treasure. Well! I am jealous NO LONGER. Because in this here blog post I’m going to tell you how I turned our FREE tatty 90s wardrobes into something so luxe I could charge £1,000 for it a la John Lewis. Without further ado, here is how we achieved our budget wardrobe makeover.
Now as is only right and proper before I go any further, I would first of all like to credit the lovely Sam who blogs at Dove Cottage as it was her original idea and work that gave me the confidence to tackle this project. She too had glass and melamine wardrobes that weren’t the prettiest and with a bit of paint managed to transform them into something beautiful in her own budget wardrobe makeover. Her blog post was so good that I debated whether it was even worth writing my own but since we used slightly different paints I thought it worth doing.
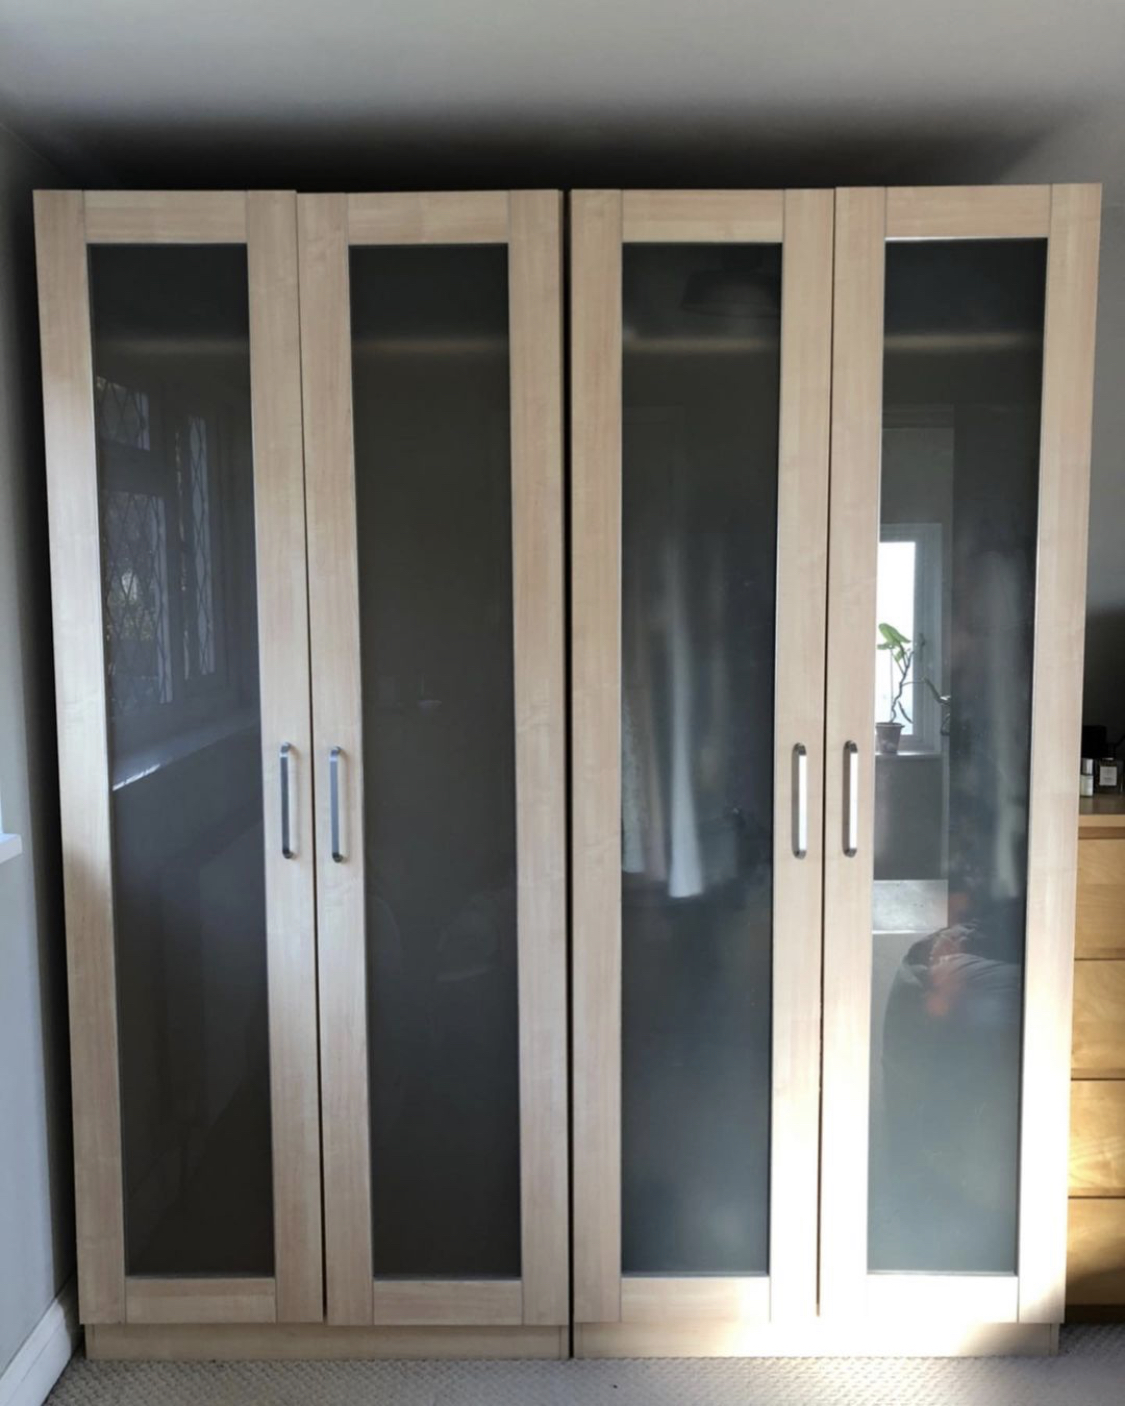
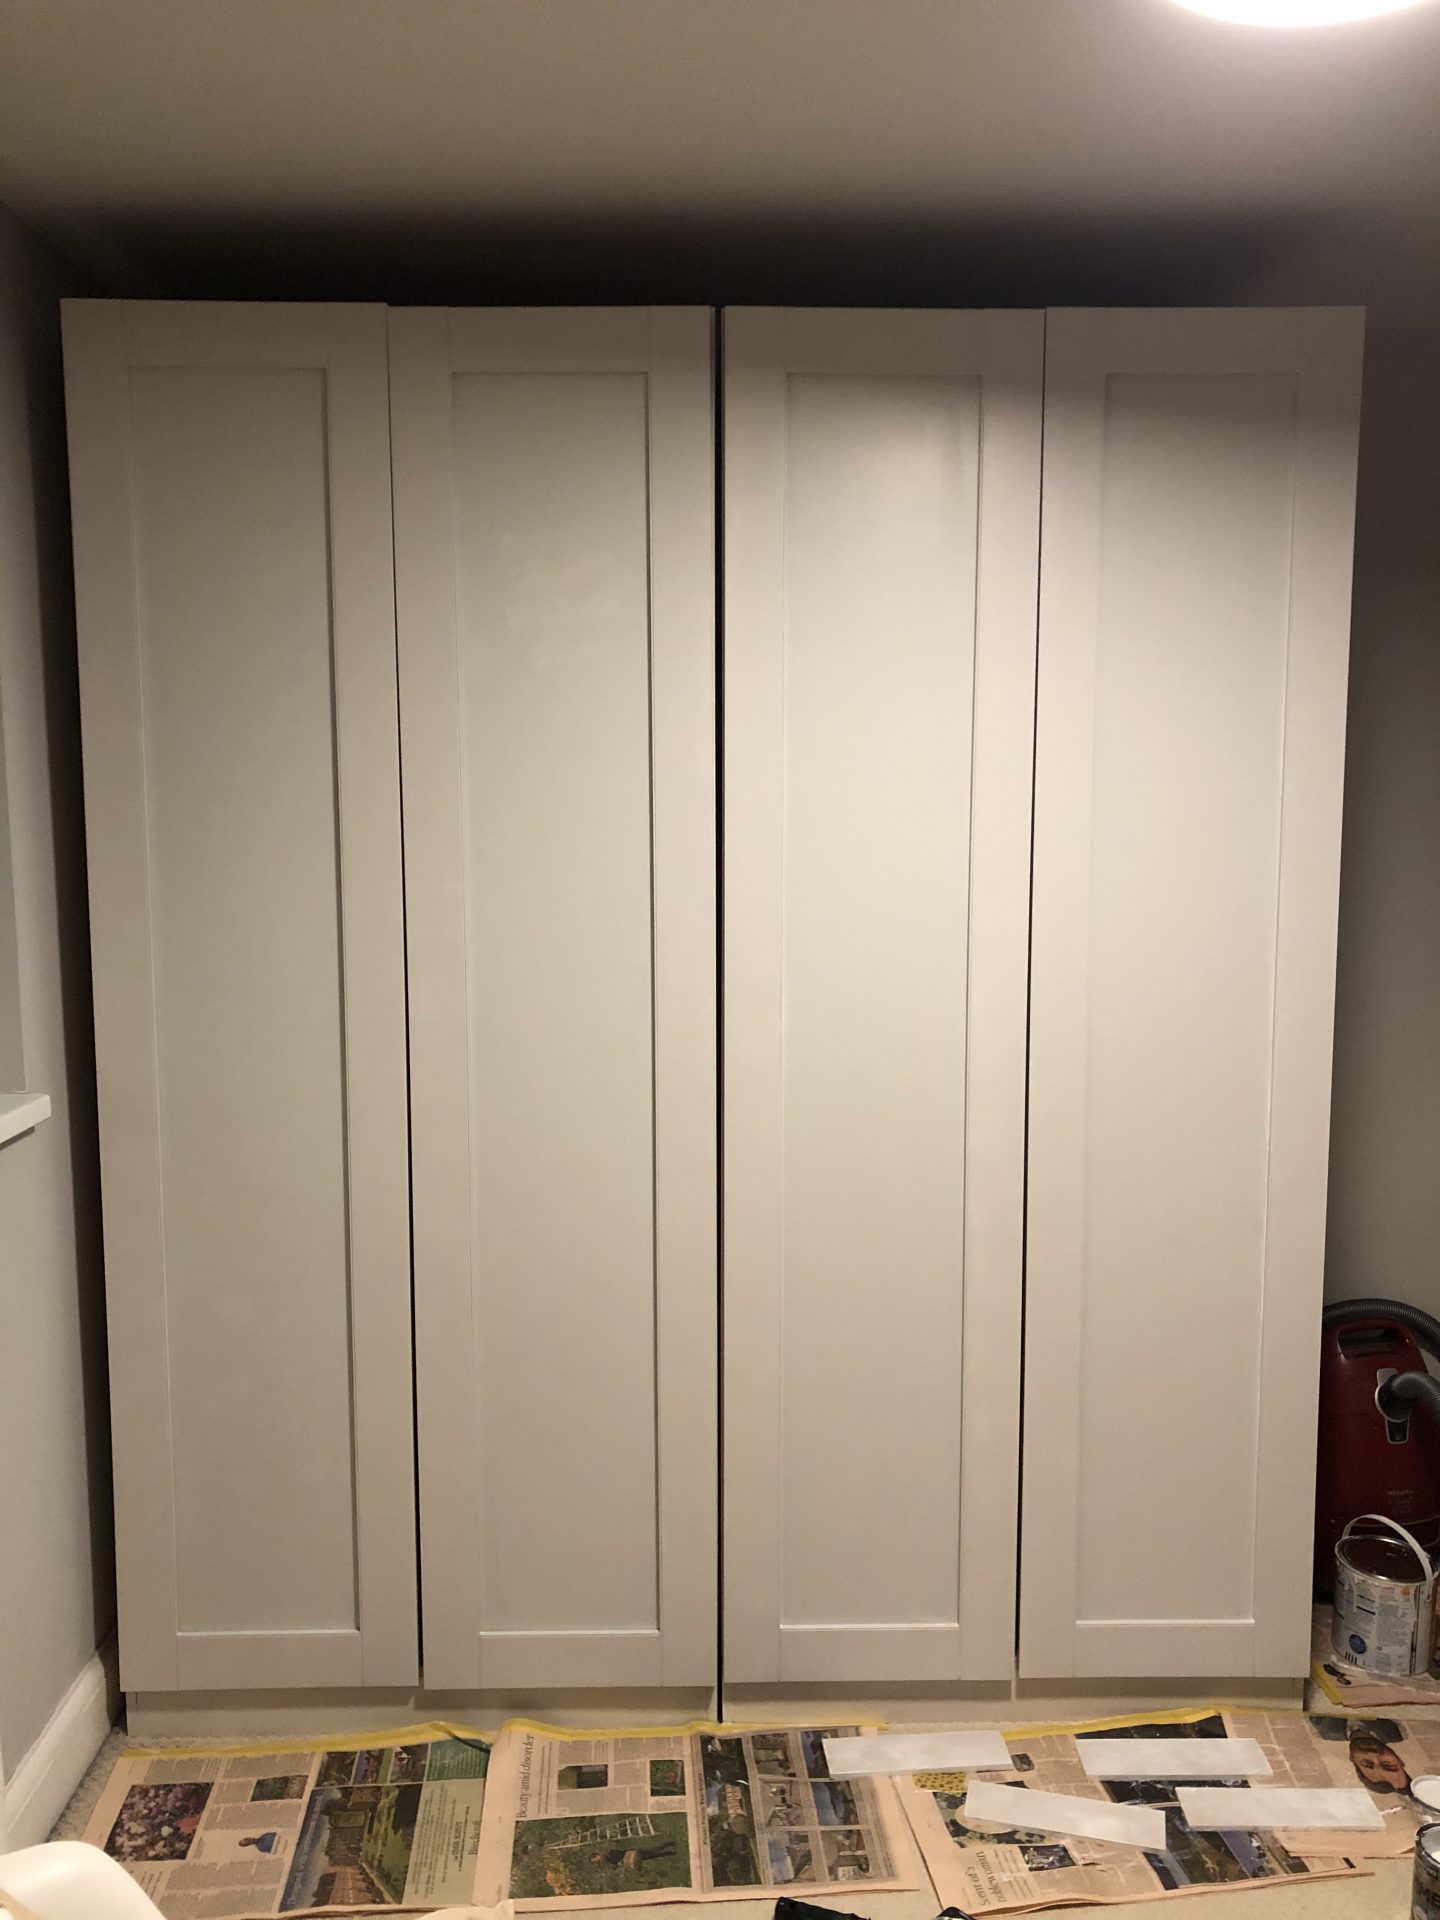
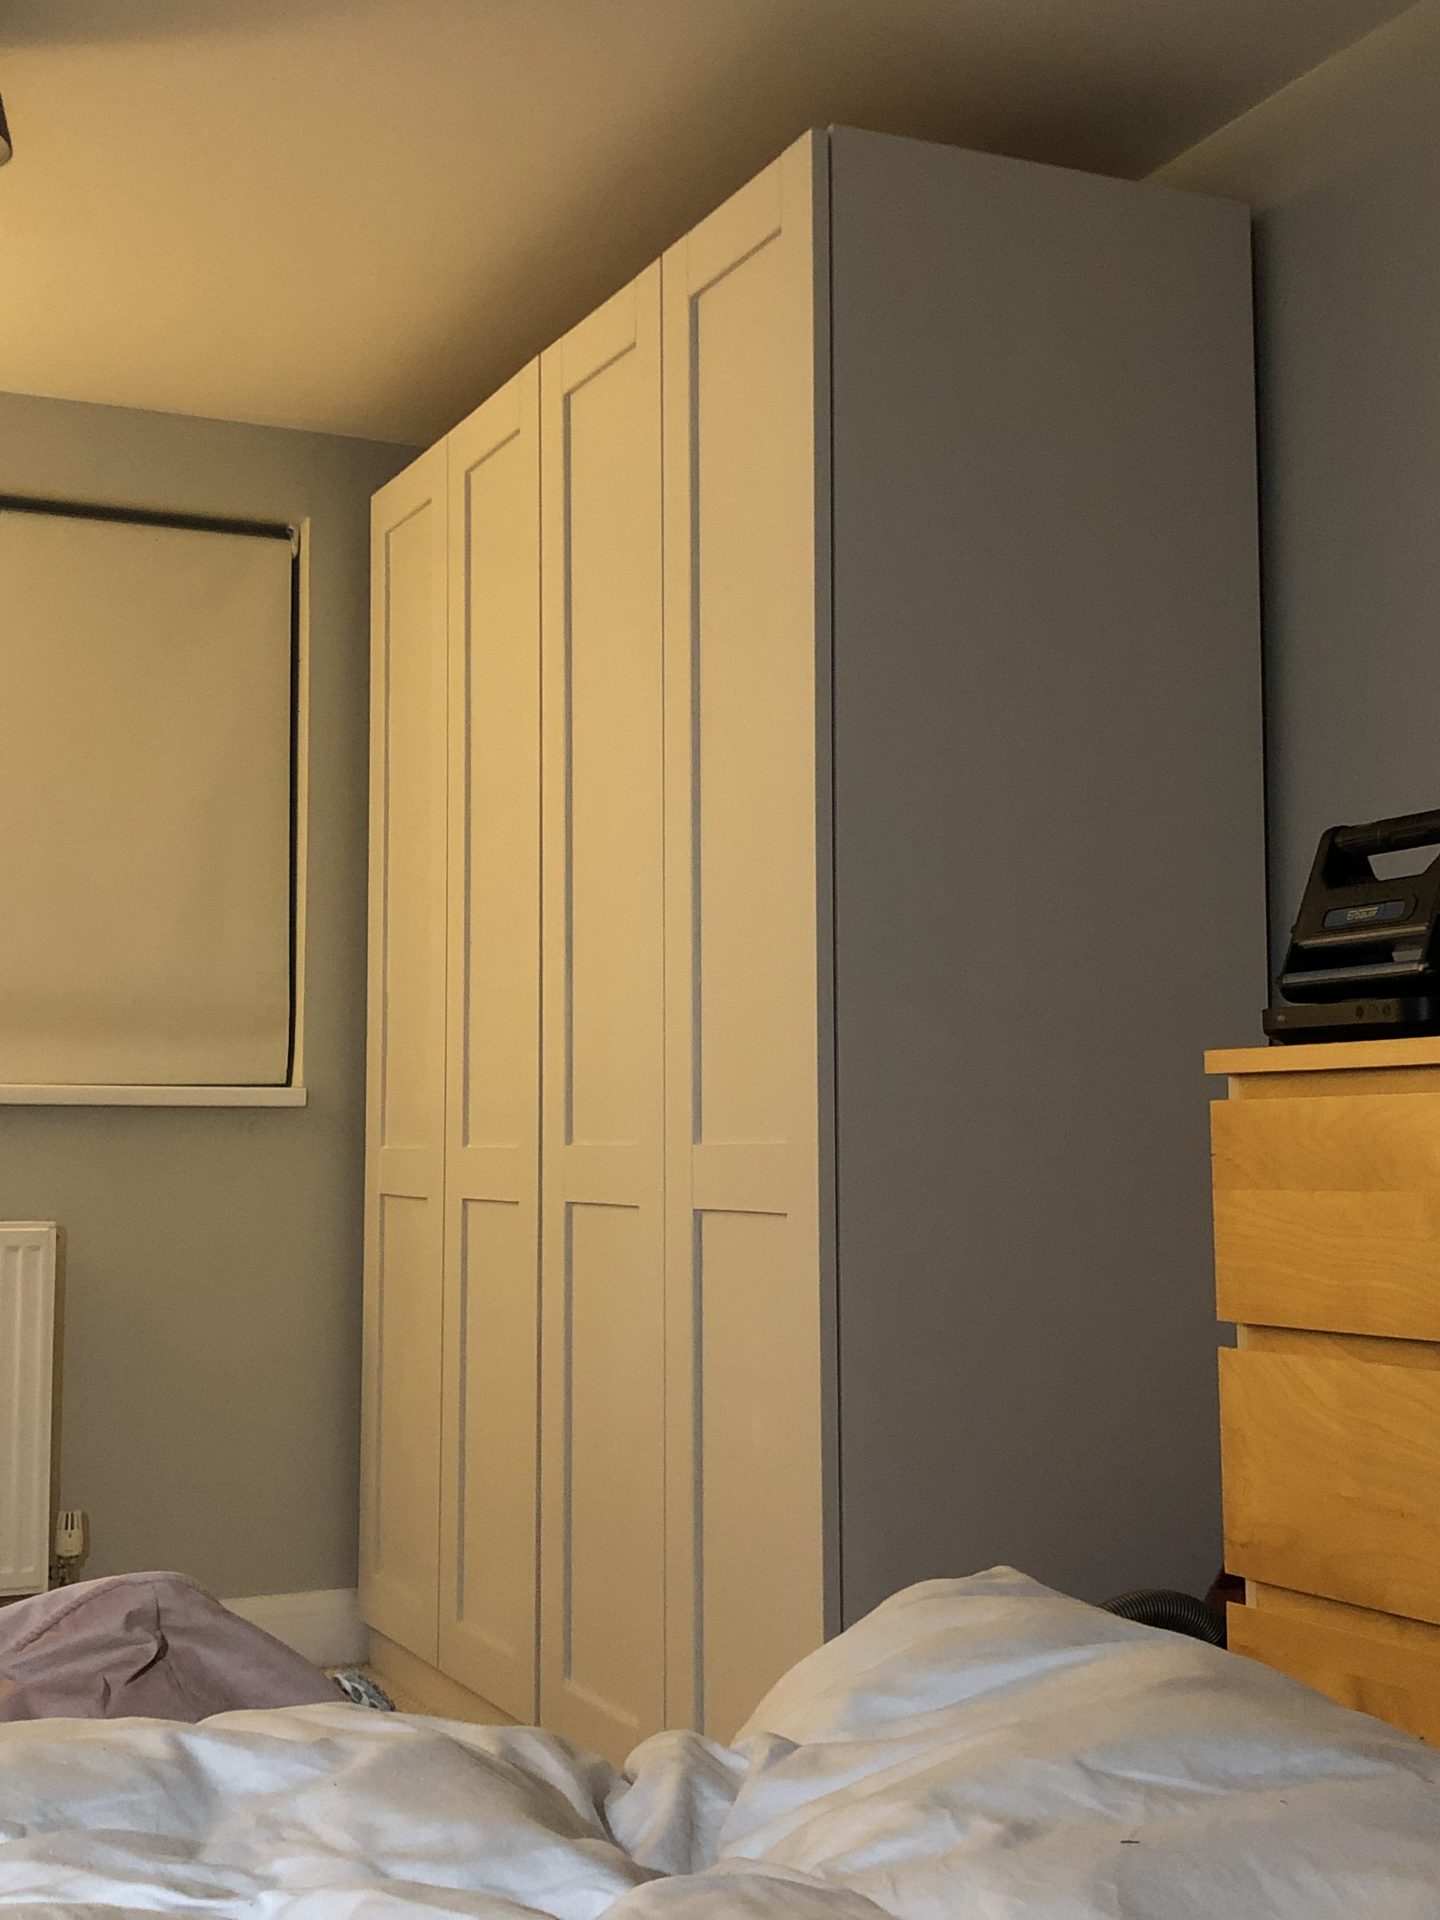
The wardrobes in question are two double wardrobes in our loft conversion bedroom. The previous owners completed a loft conversion on our home which is a godsend in terms of saving us money although there are things we’d like to do to reconfigure the space in the future. They left the wardrobes behind which whilst not aesthetically pleasing, was handy since we didn’t have any ourselves and there is limited space in the room for full-height wardrobes since we have sloping ceilings. You can also see more listings of loft homes here that offer ready-made loft wardrobes like these.
I’d been toying with the idea for a little while of giving the wardrobes a spruce up as a fun, inspiring project but I kept coming back to replacing the glass middles with cane and to be honest, I’m just not prepared to sell a kidney for something we’re not going to keep forever (eventually we’d like to create a built-in storage system). Cane webbing meant that it would be far from a budget wardrobe makeover so back to the drawing board.
Then whilst scrolling Pinterest I stumbled across Sam’s blog post and was blown away by the amazing finish she’d achieved by painting her wardrobes, something I never thought possible when you thrown glass into the equation. So armed with a few tricks of the trade, I decided to have a go at our very own glow-up.
Here’s what I used for our budget wardrobe makeover:
-Sugar soap and cloth (already had)
-Filler, sandpaper and caulk (already had)
-Johnstone’s Any Surface primer in white, £12 (as recommended by Sam)
-Brush, foam roller and tray (already had)
-Paint colour is Ammonite by Farrow & Ball, but mixed in acrylic eggshell finish by Decorating Centre Online, this was leftover from a previous project
-A board of 9mm MDF, £7.50
-No More Nails glue (already had)
-Brass knobs, £11
-Drill
And here’s how I completed our budget wardrobe makeover with a little help from Mr D!
Step One:
Remove the hold handles and fill the holes. Once the filler has dried, sand them down to make sure the surfaces are smooth and give the wardrobes a quick rub down with sugar soap and a cloth – sugar soap is great at getting residual dirt off.

Step Two:
Prime the wardrobes using the Johnstone’s Any Surface primer. I did one coat of the primer over the wardrobes and glass, whereas Sam only did the glass. The reason being is that she went on to use chalk paint for her colour, which adheres really well to any surface. Since I was using an eggshell paint, I opted to prime. The paint advises to apply with a brush so that’s just what I did.
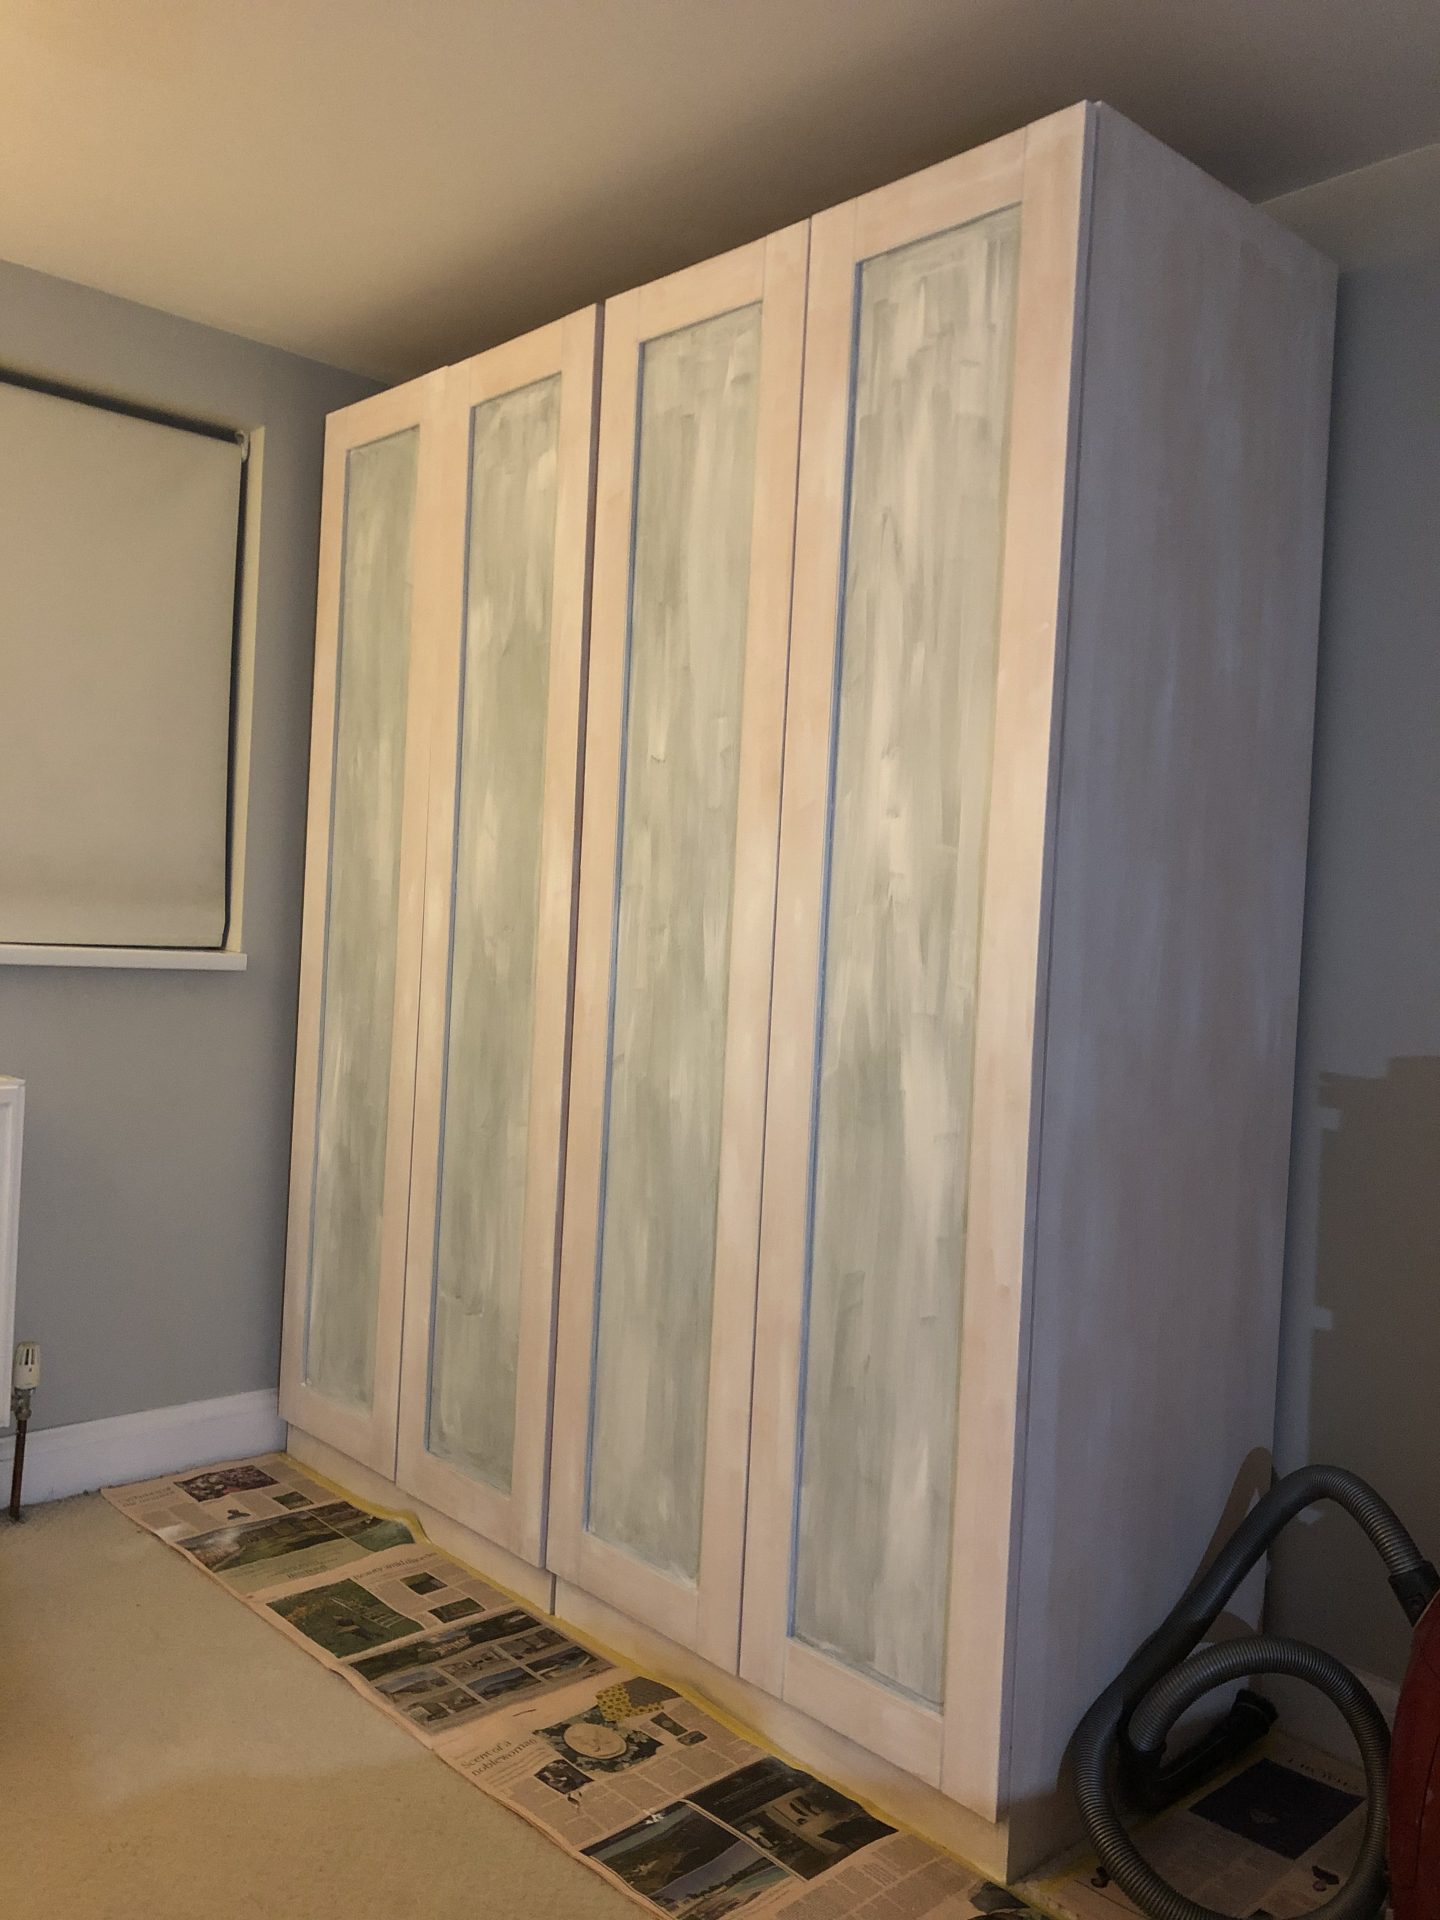
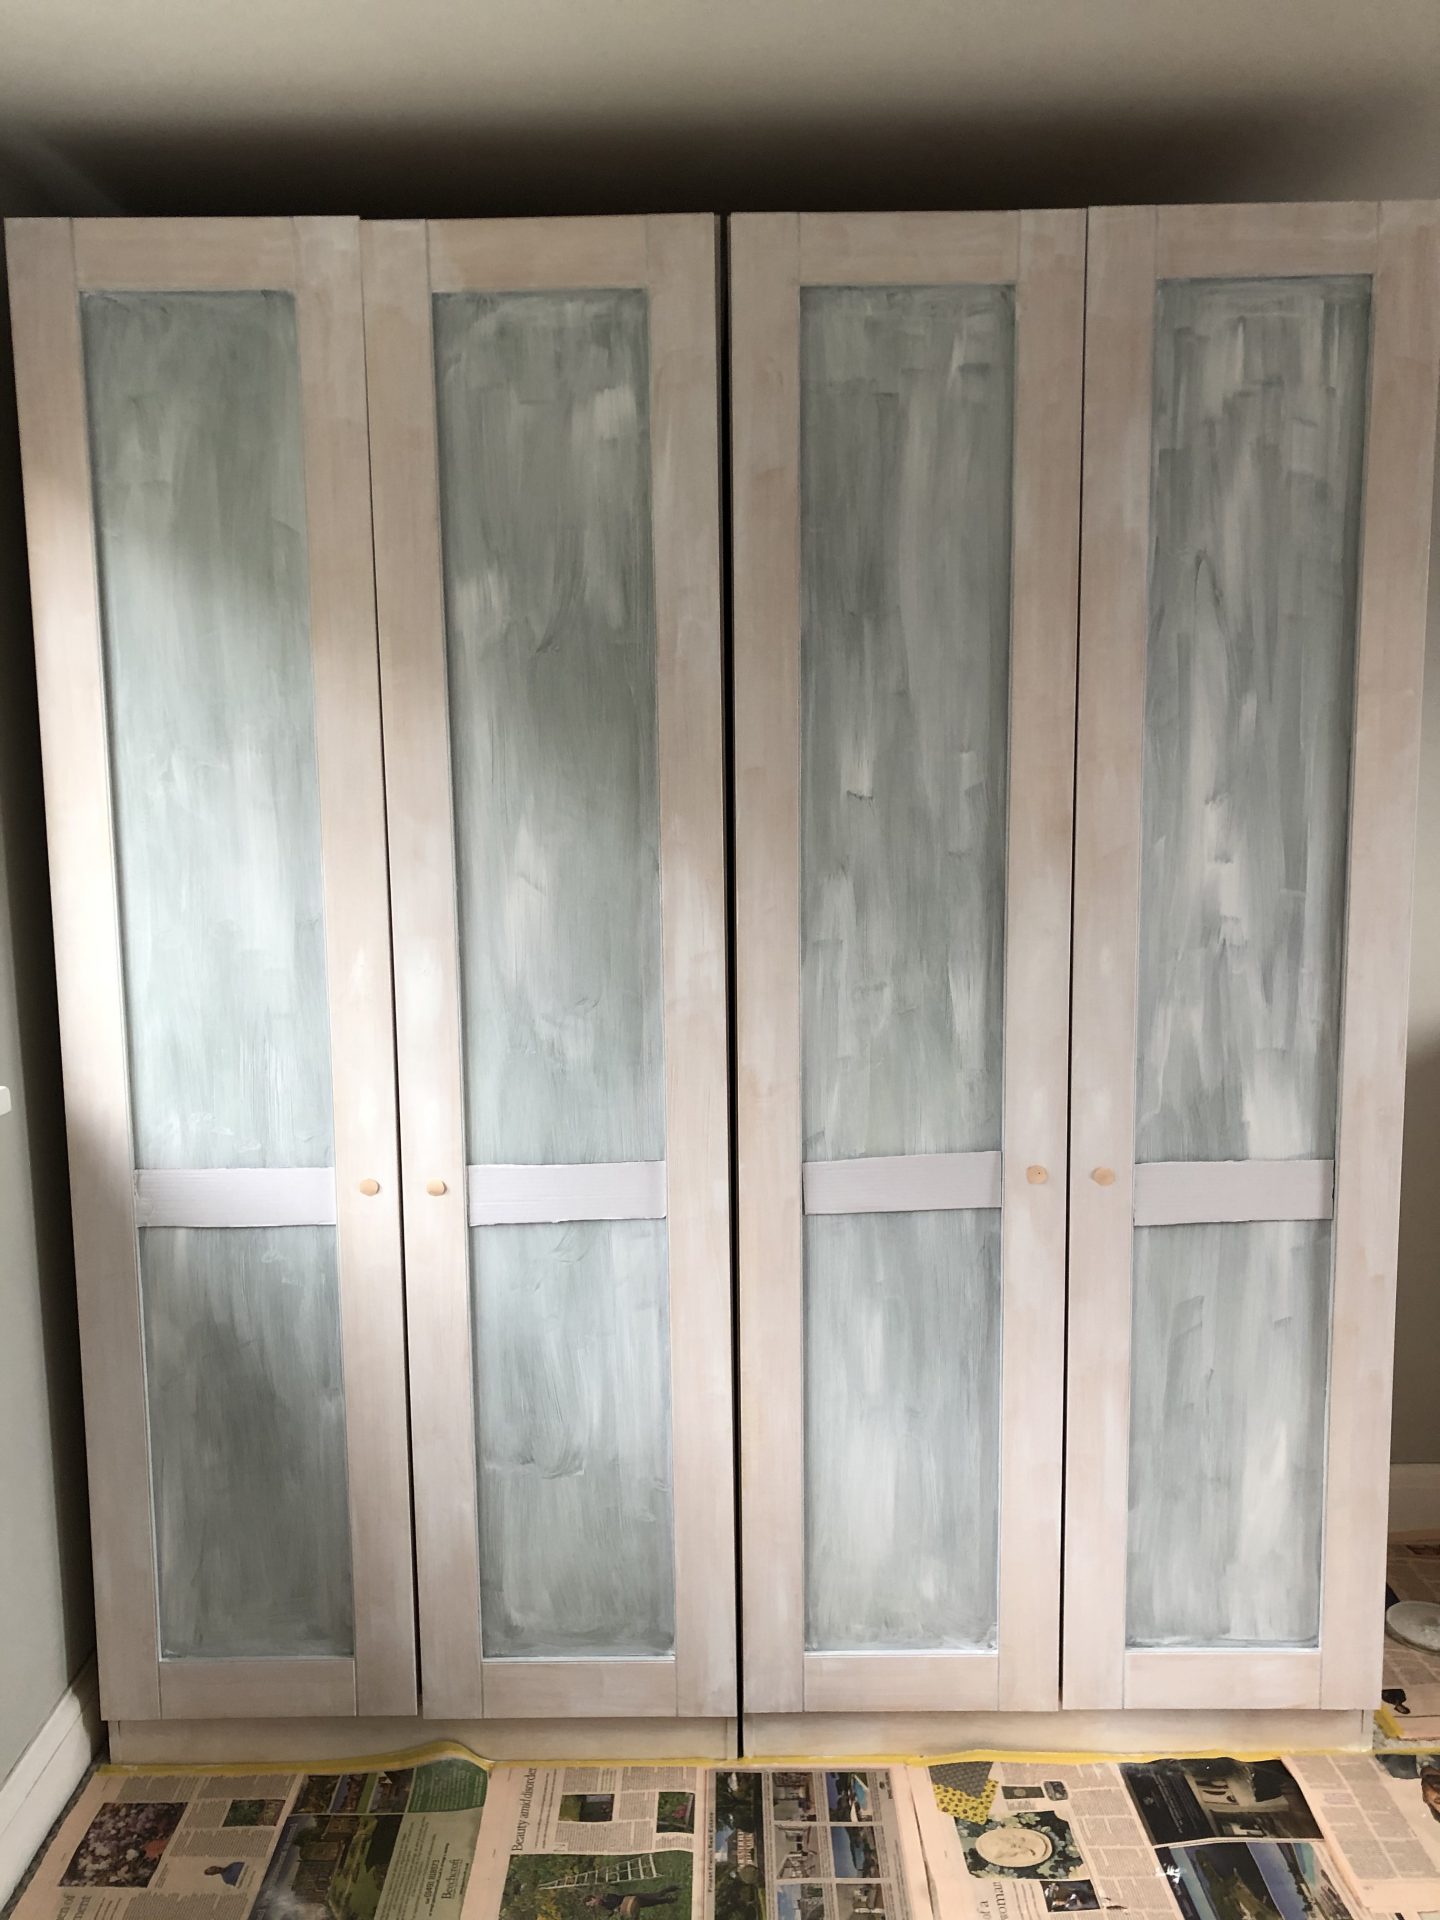
Step Three:
Once the primer had dried (which doesn’t take long), I started to go on with the colour. The best method is to paint around the frame where the glass meets the melamine with a brush first. Then you can use the foam roller for the rest of the surface, the glass and the wood, to get a really smooth professional finish. I completed two full coats of colour on the fronts and backs of the doors.
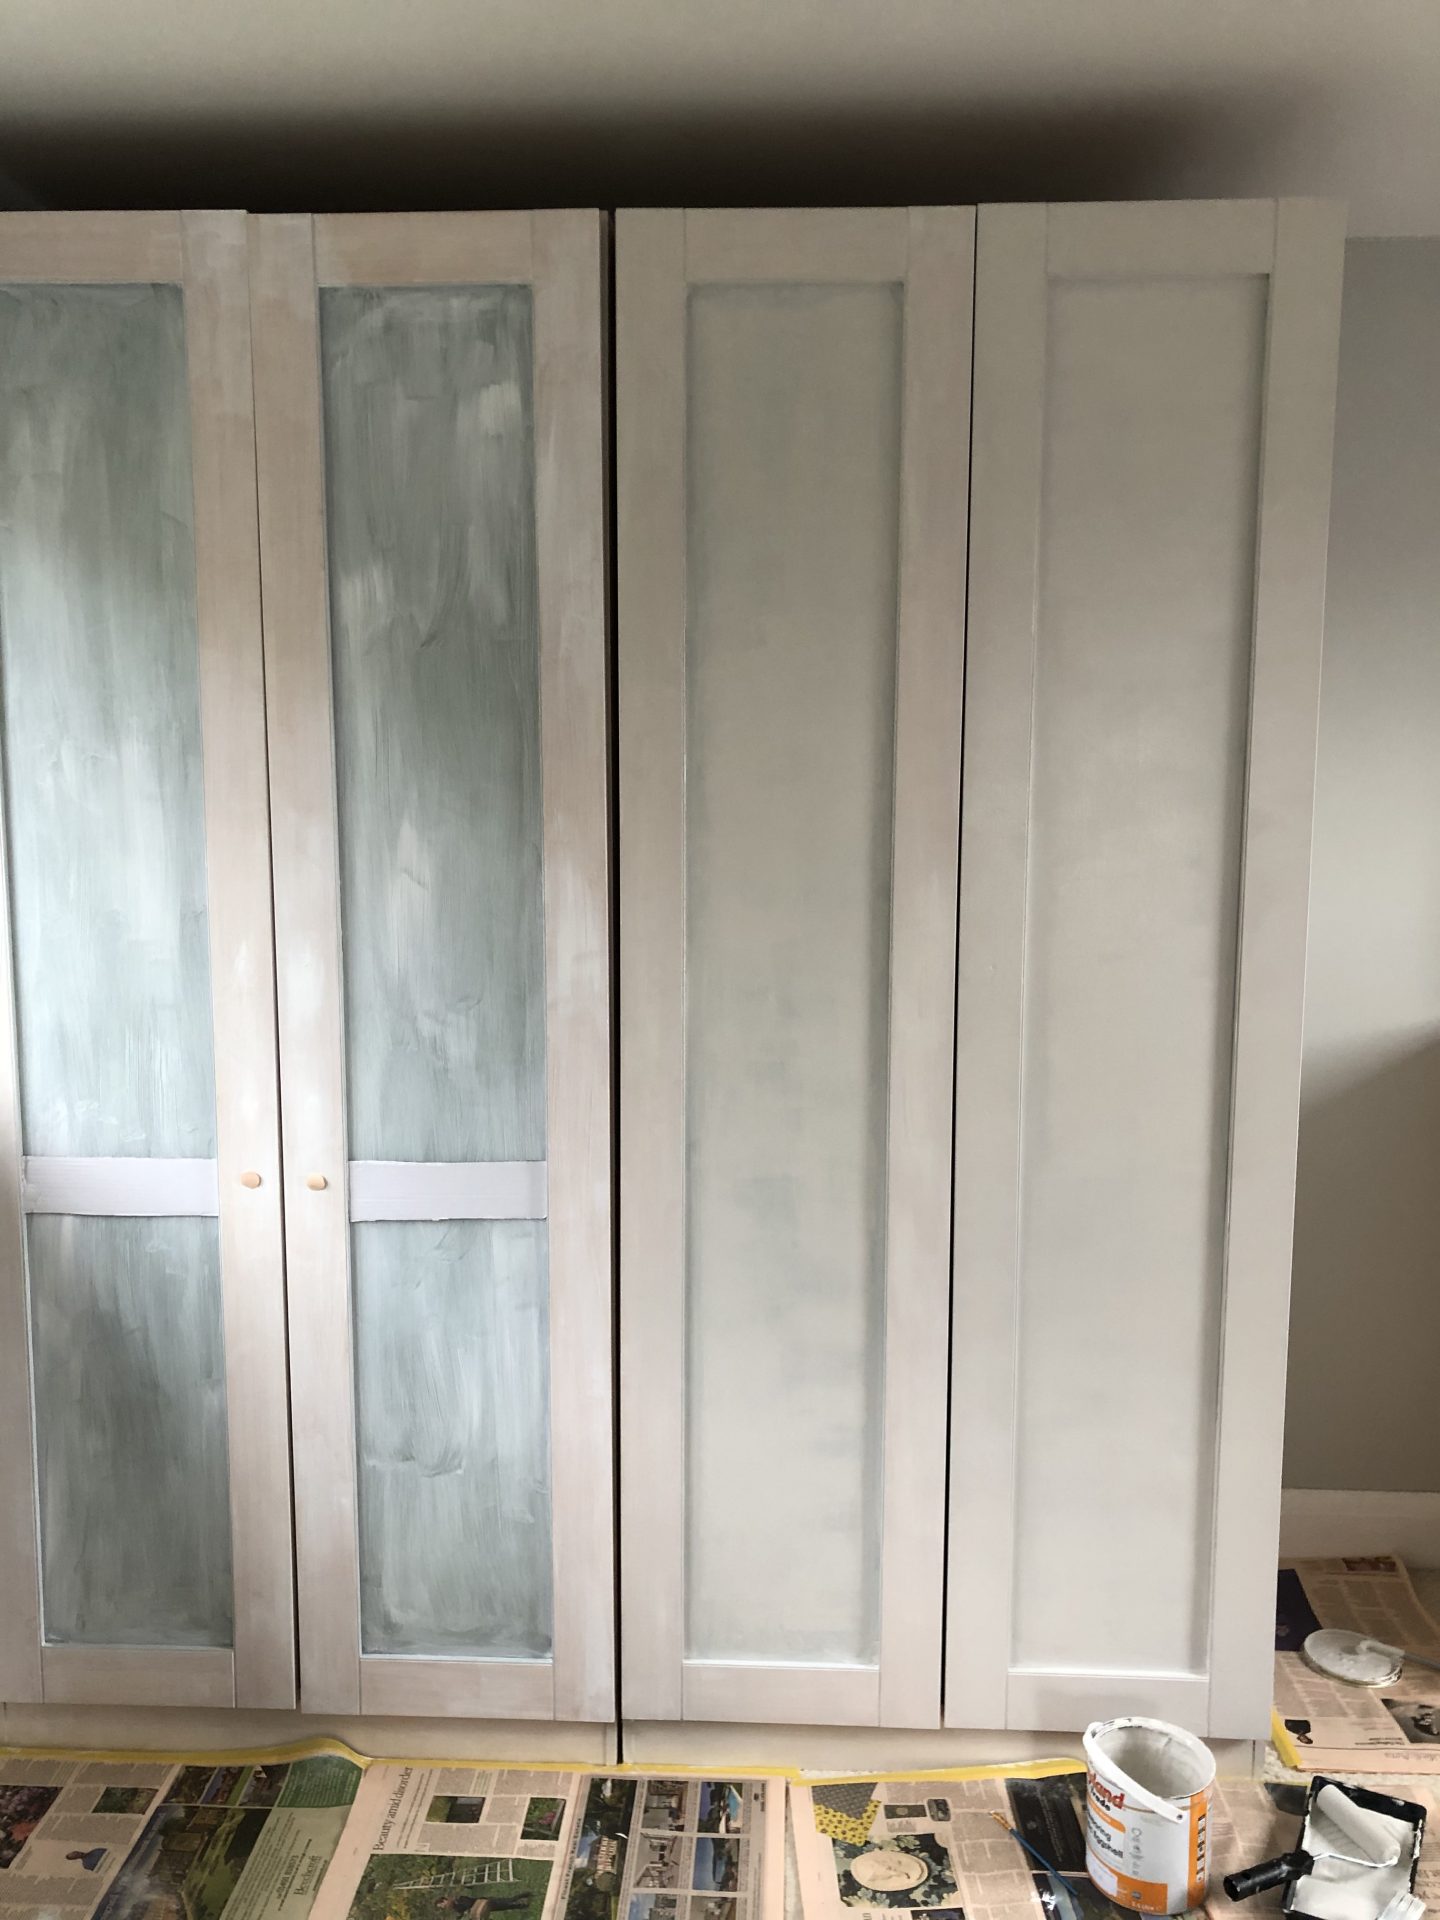
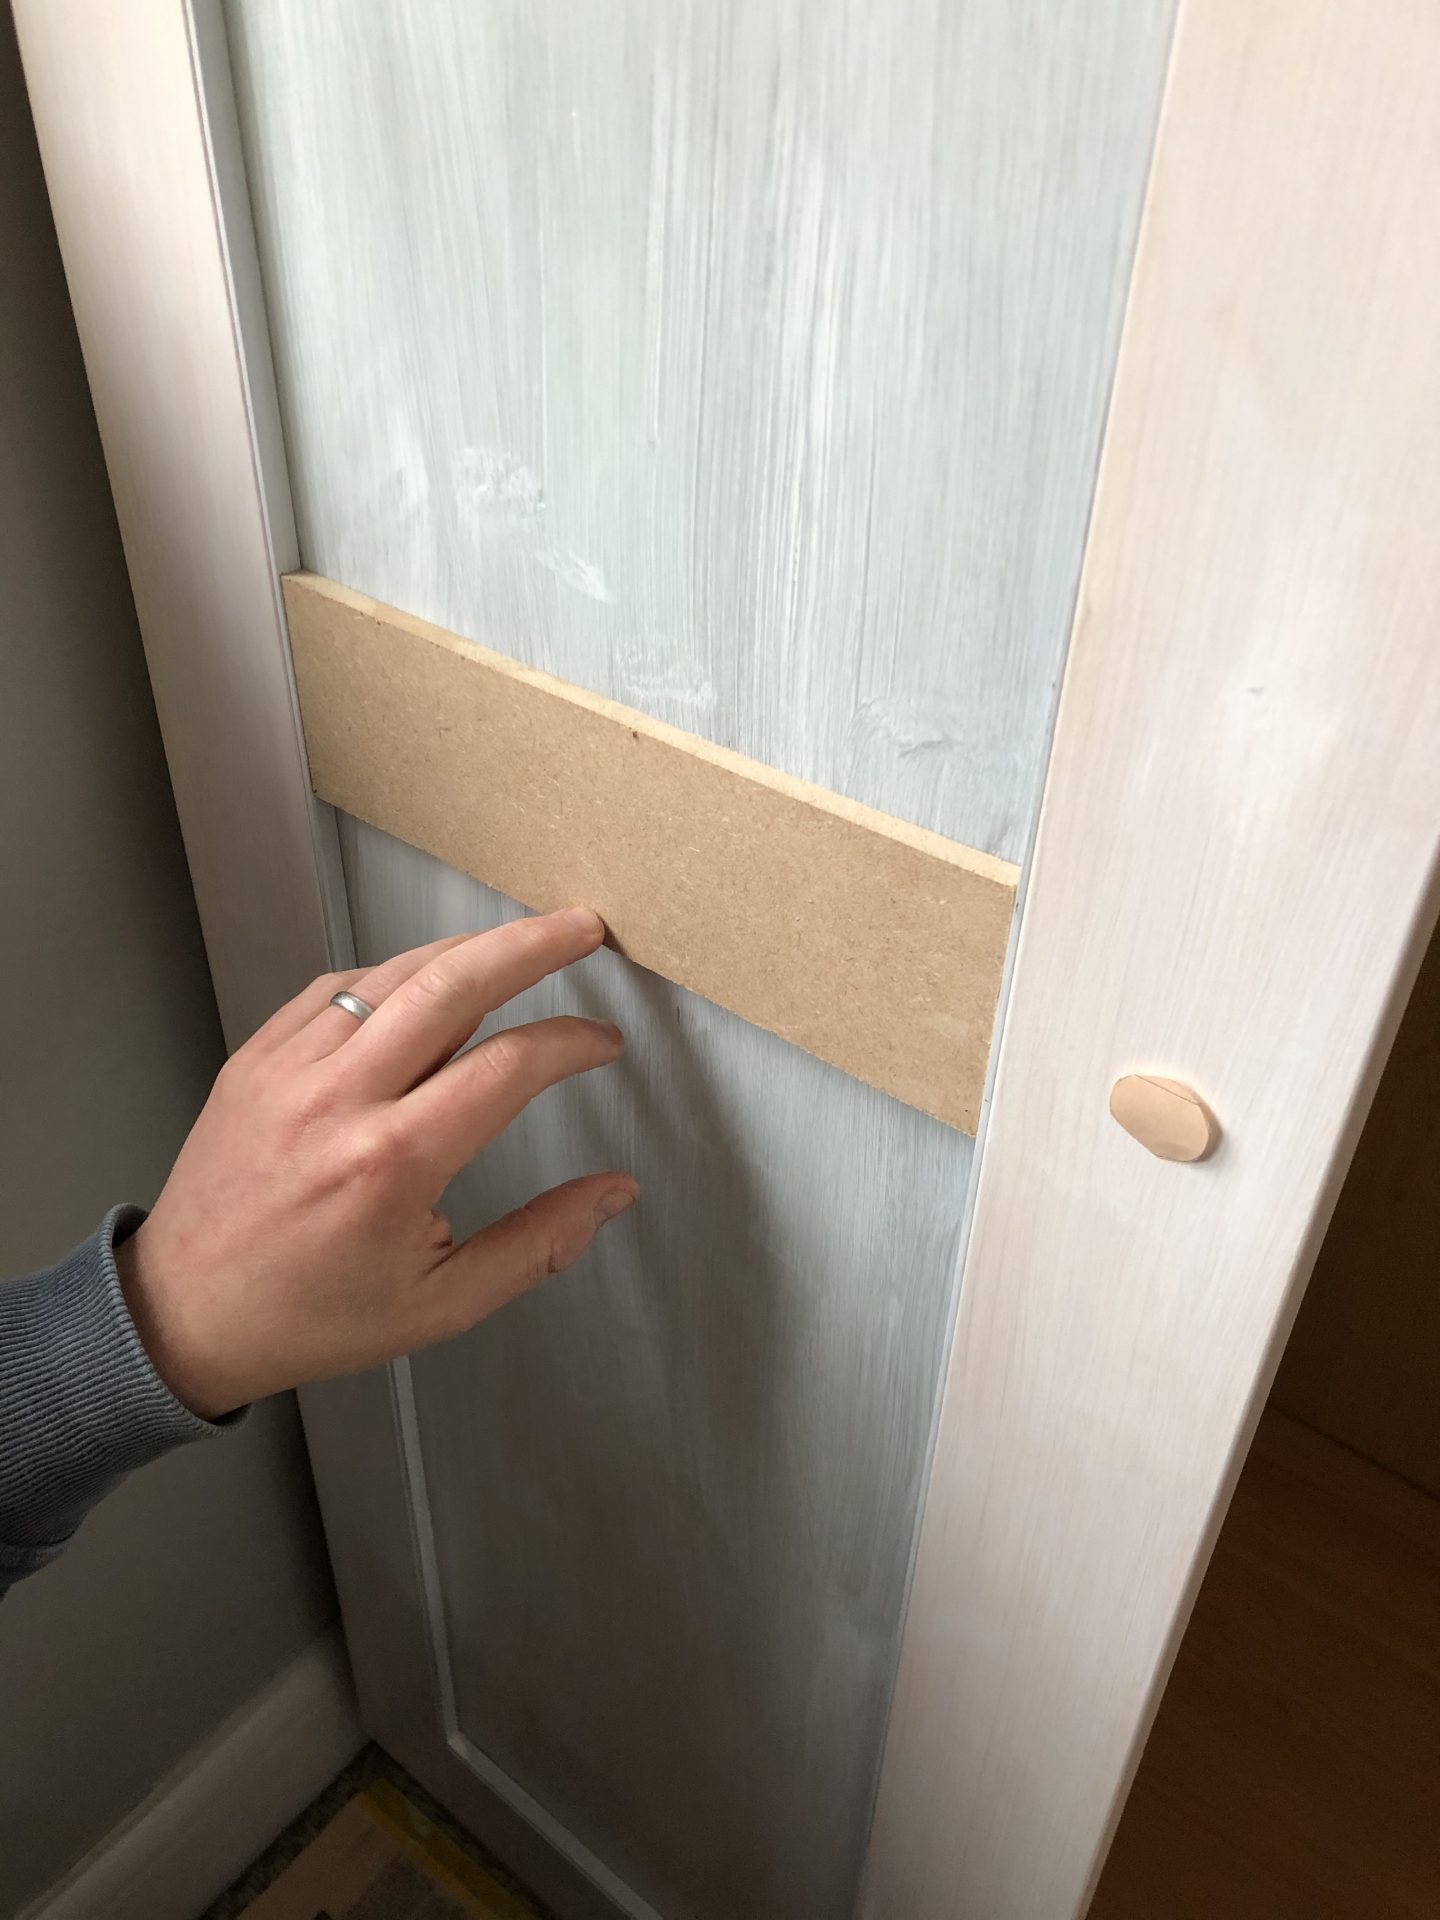
Step Four:
This relates to the MDF strips I decided to add to the wardrobe doors to create a bit more of a high-end look. I decided on 8cm high strips that Pete cut for me from one larger sheet. I primed them with the same primer as the wardrobes, and then added two coats of colour. Once the paint is dry, you can use No More Nails (or similar strong glue) to fix the MDF strips to the door fronts.
Step Five:
Once the strips were in place, I then used a flexible caulk to fill in any gaps, both between the strips and the glass, and just touching up around where the glass meets the frame.
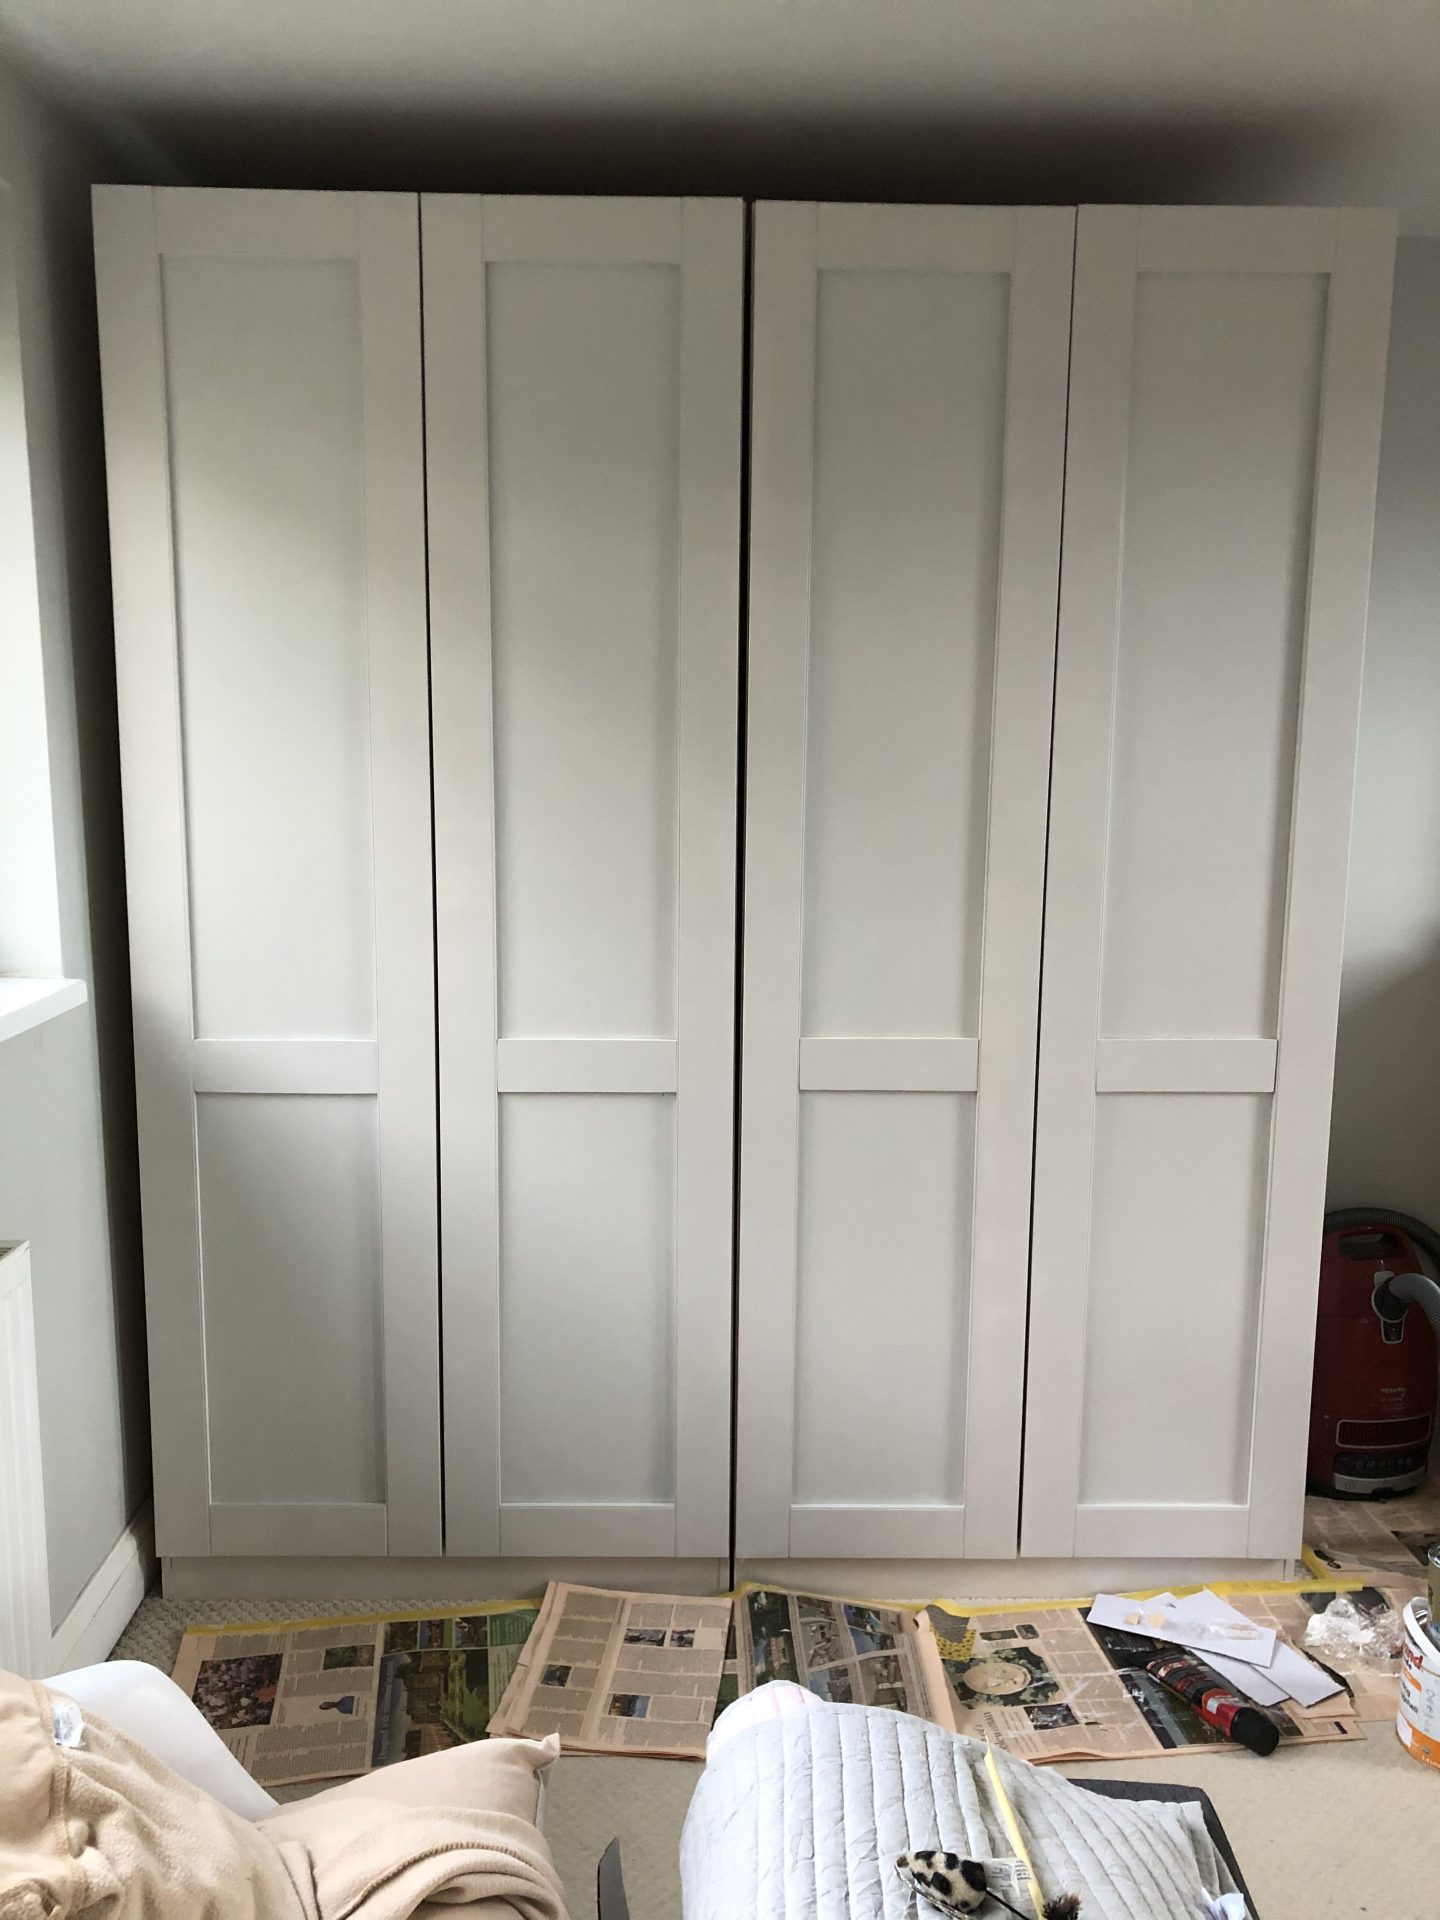
Step Six:
One final coat of paint on the glass and the MDF strips, just to tie it all in neatly together.
Step Seven:
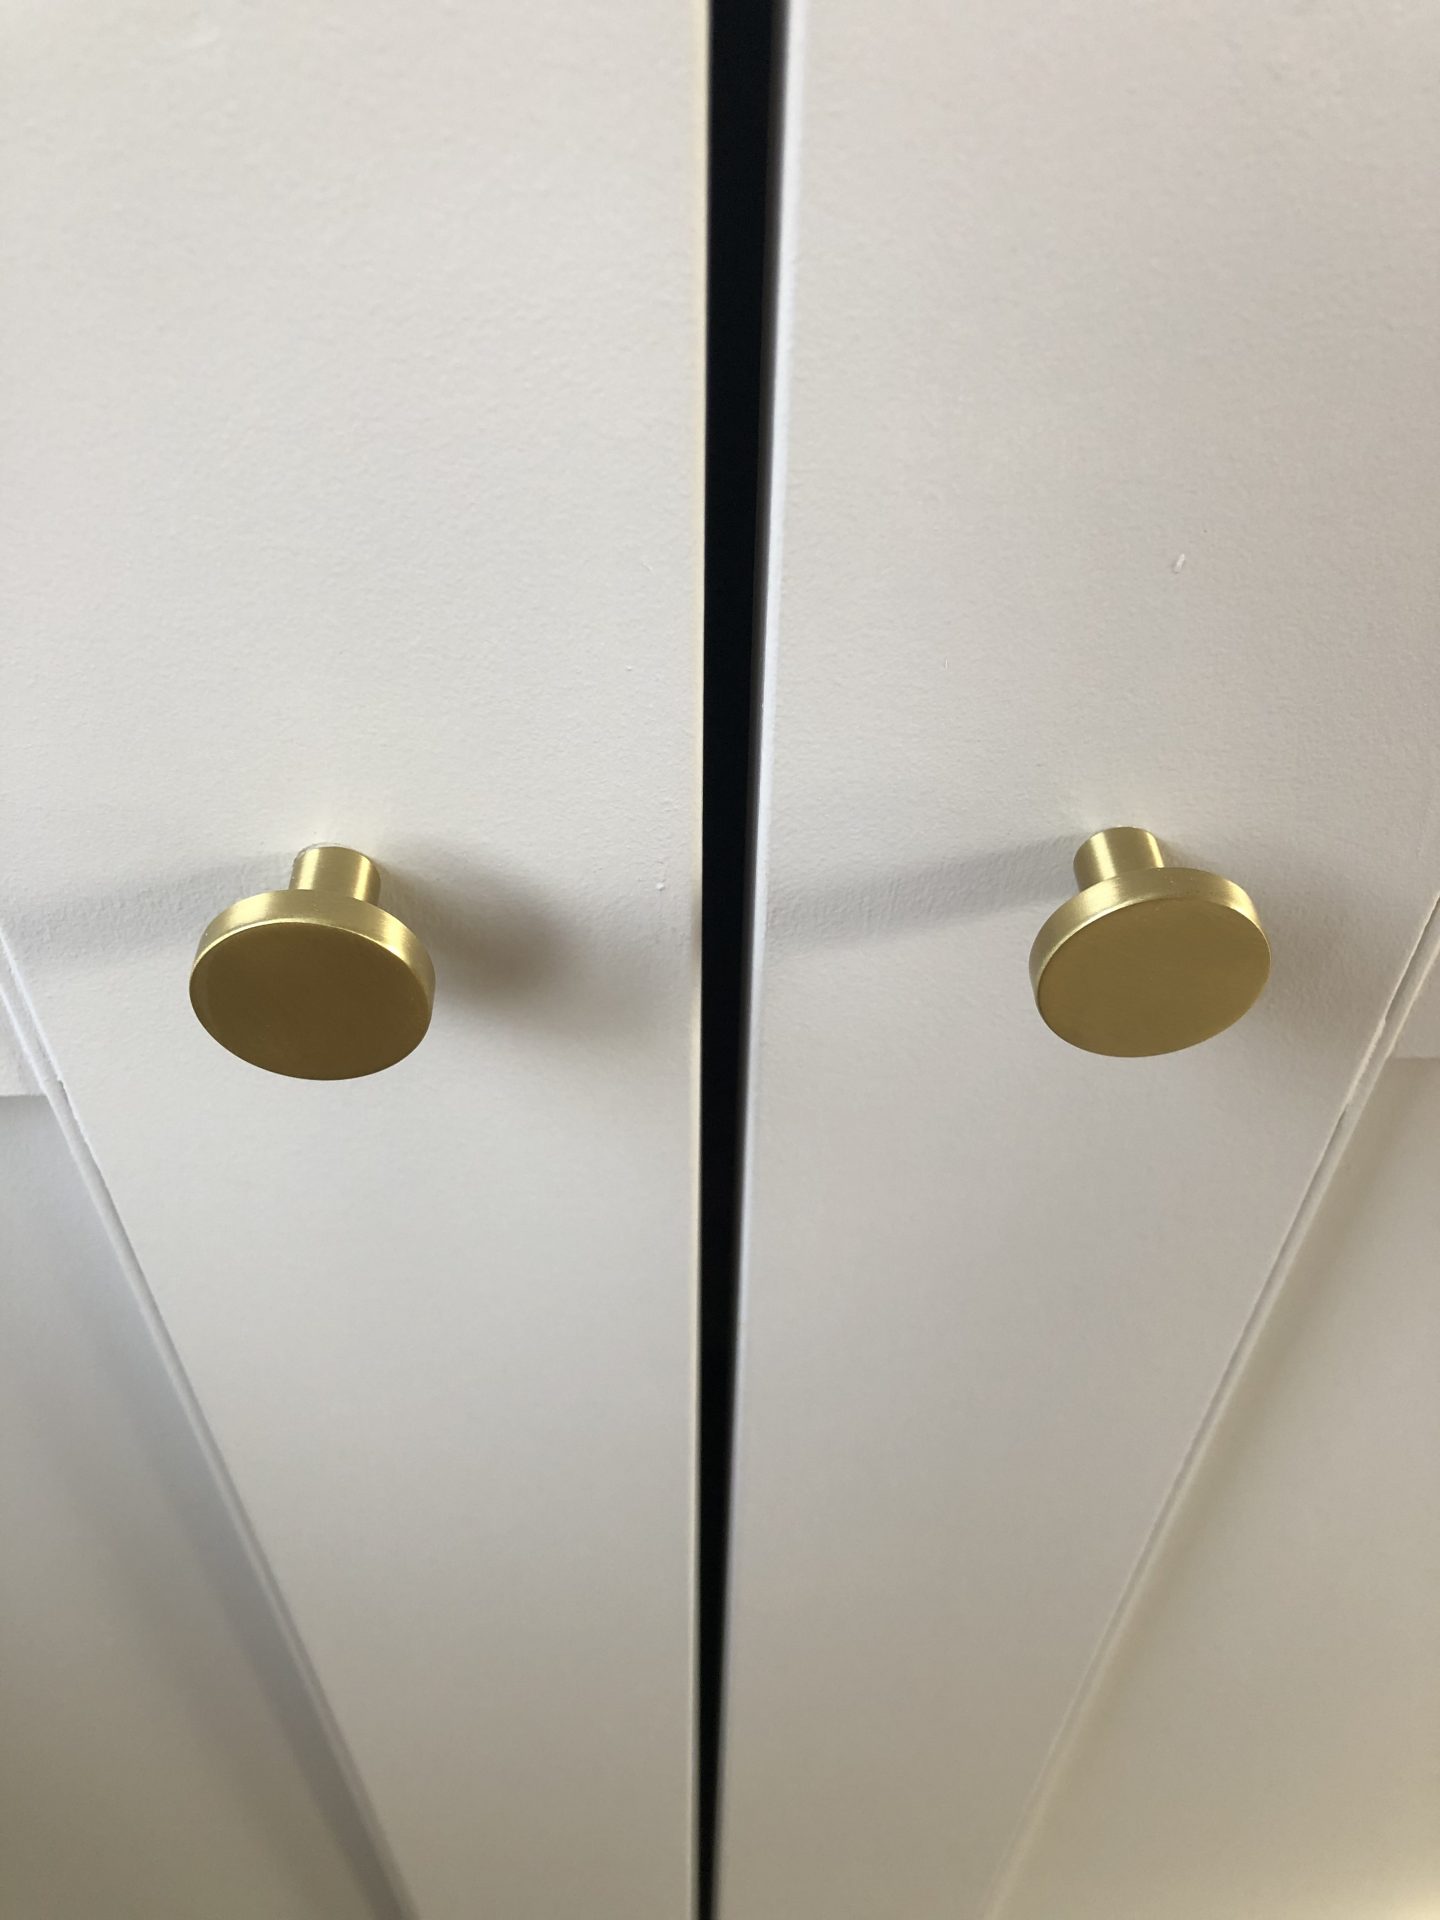
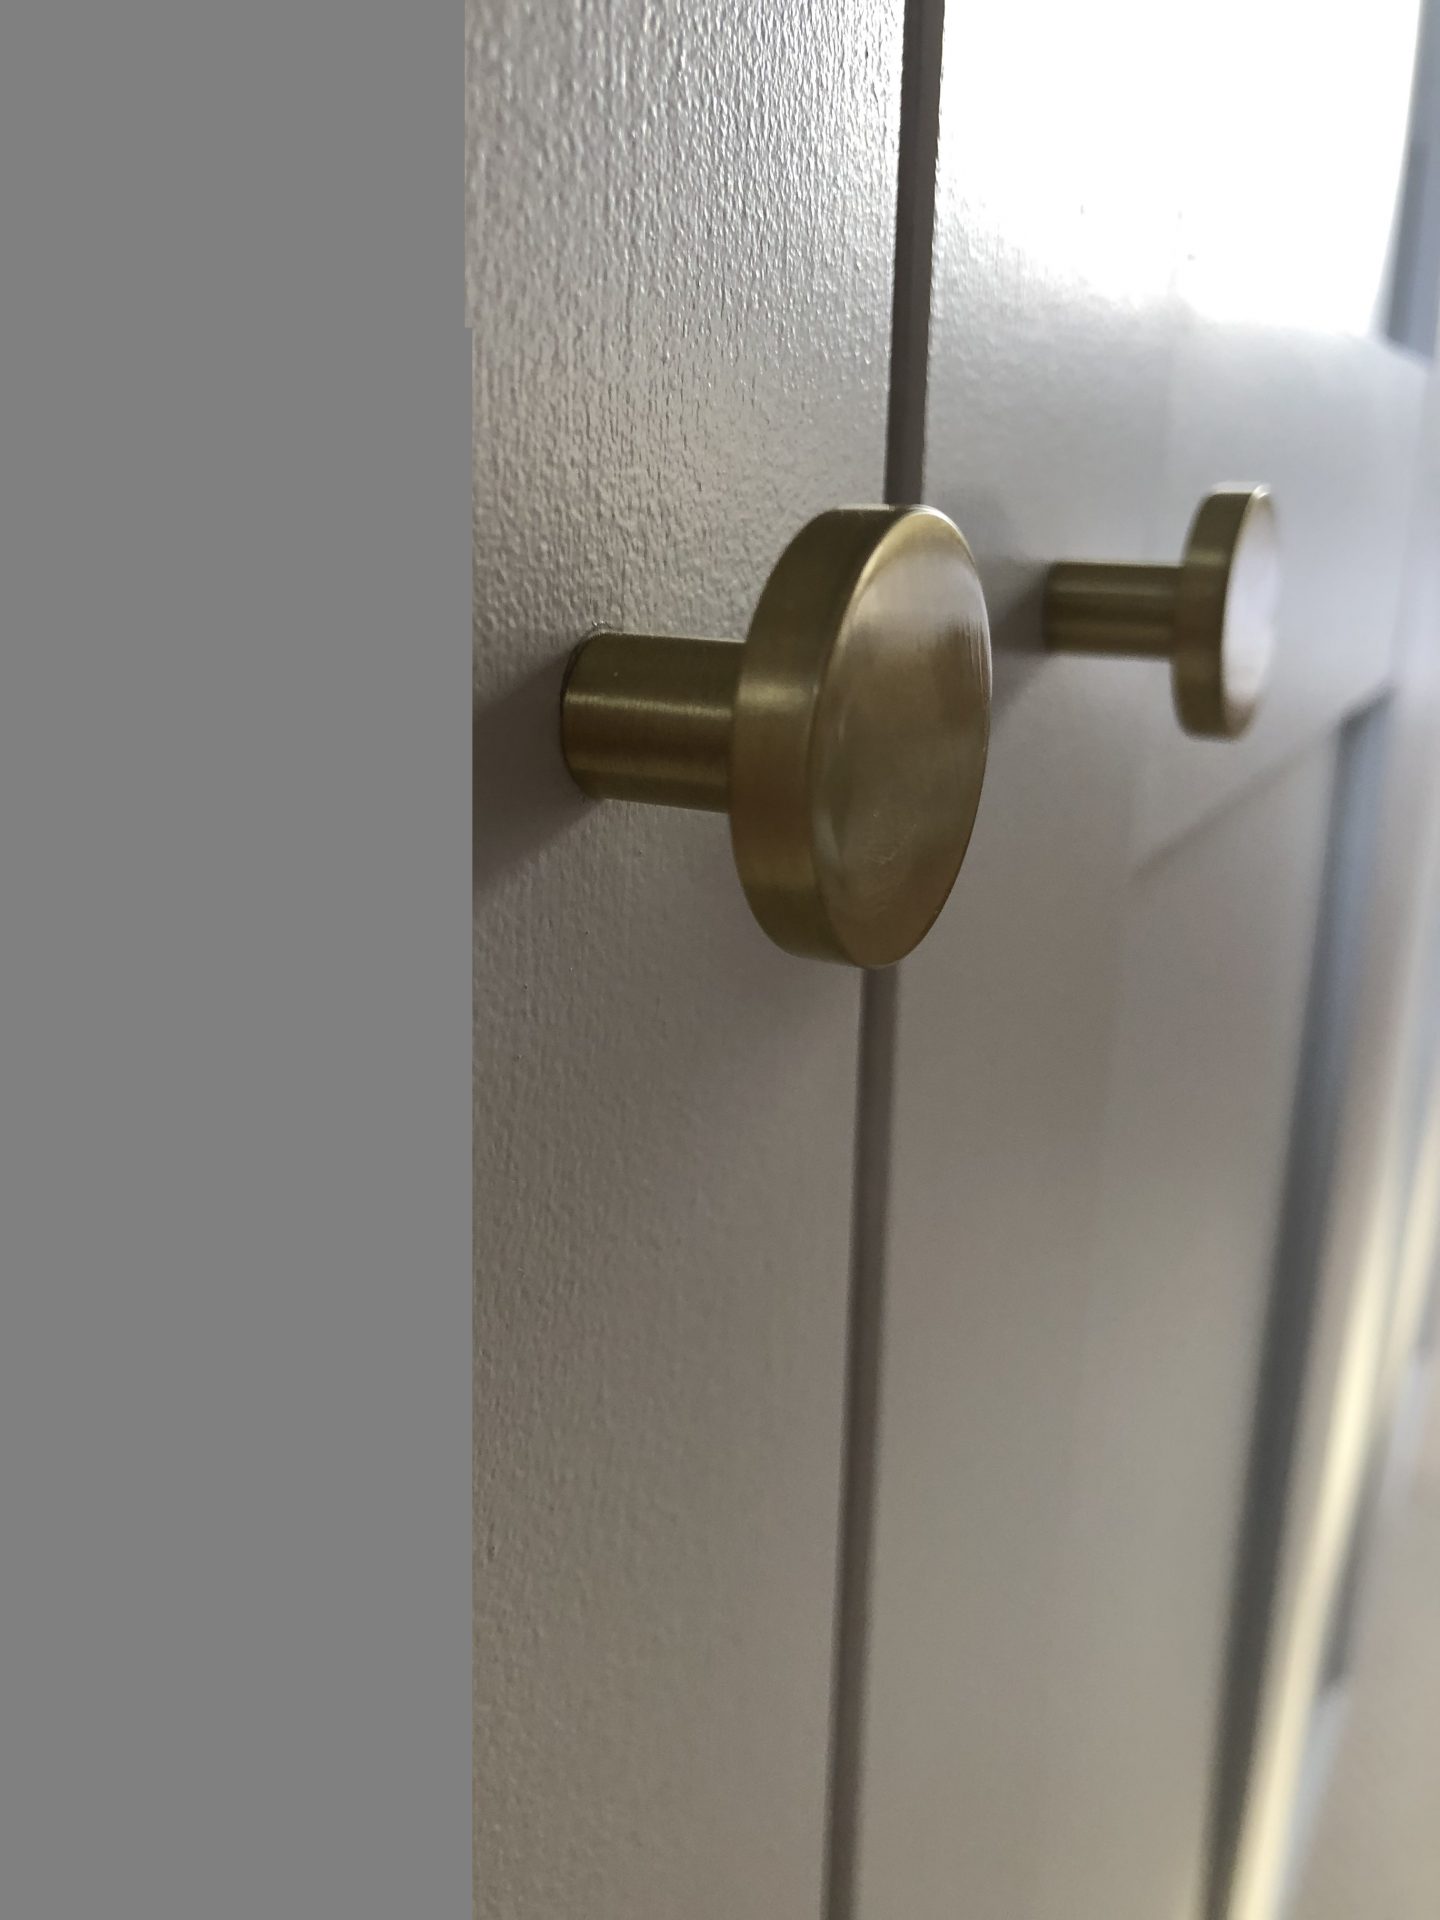
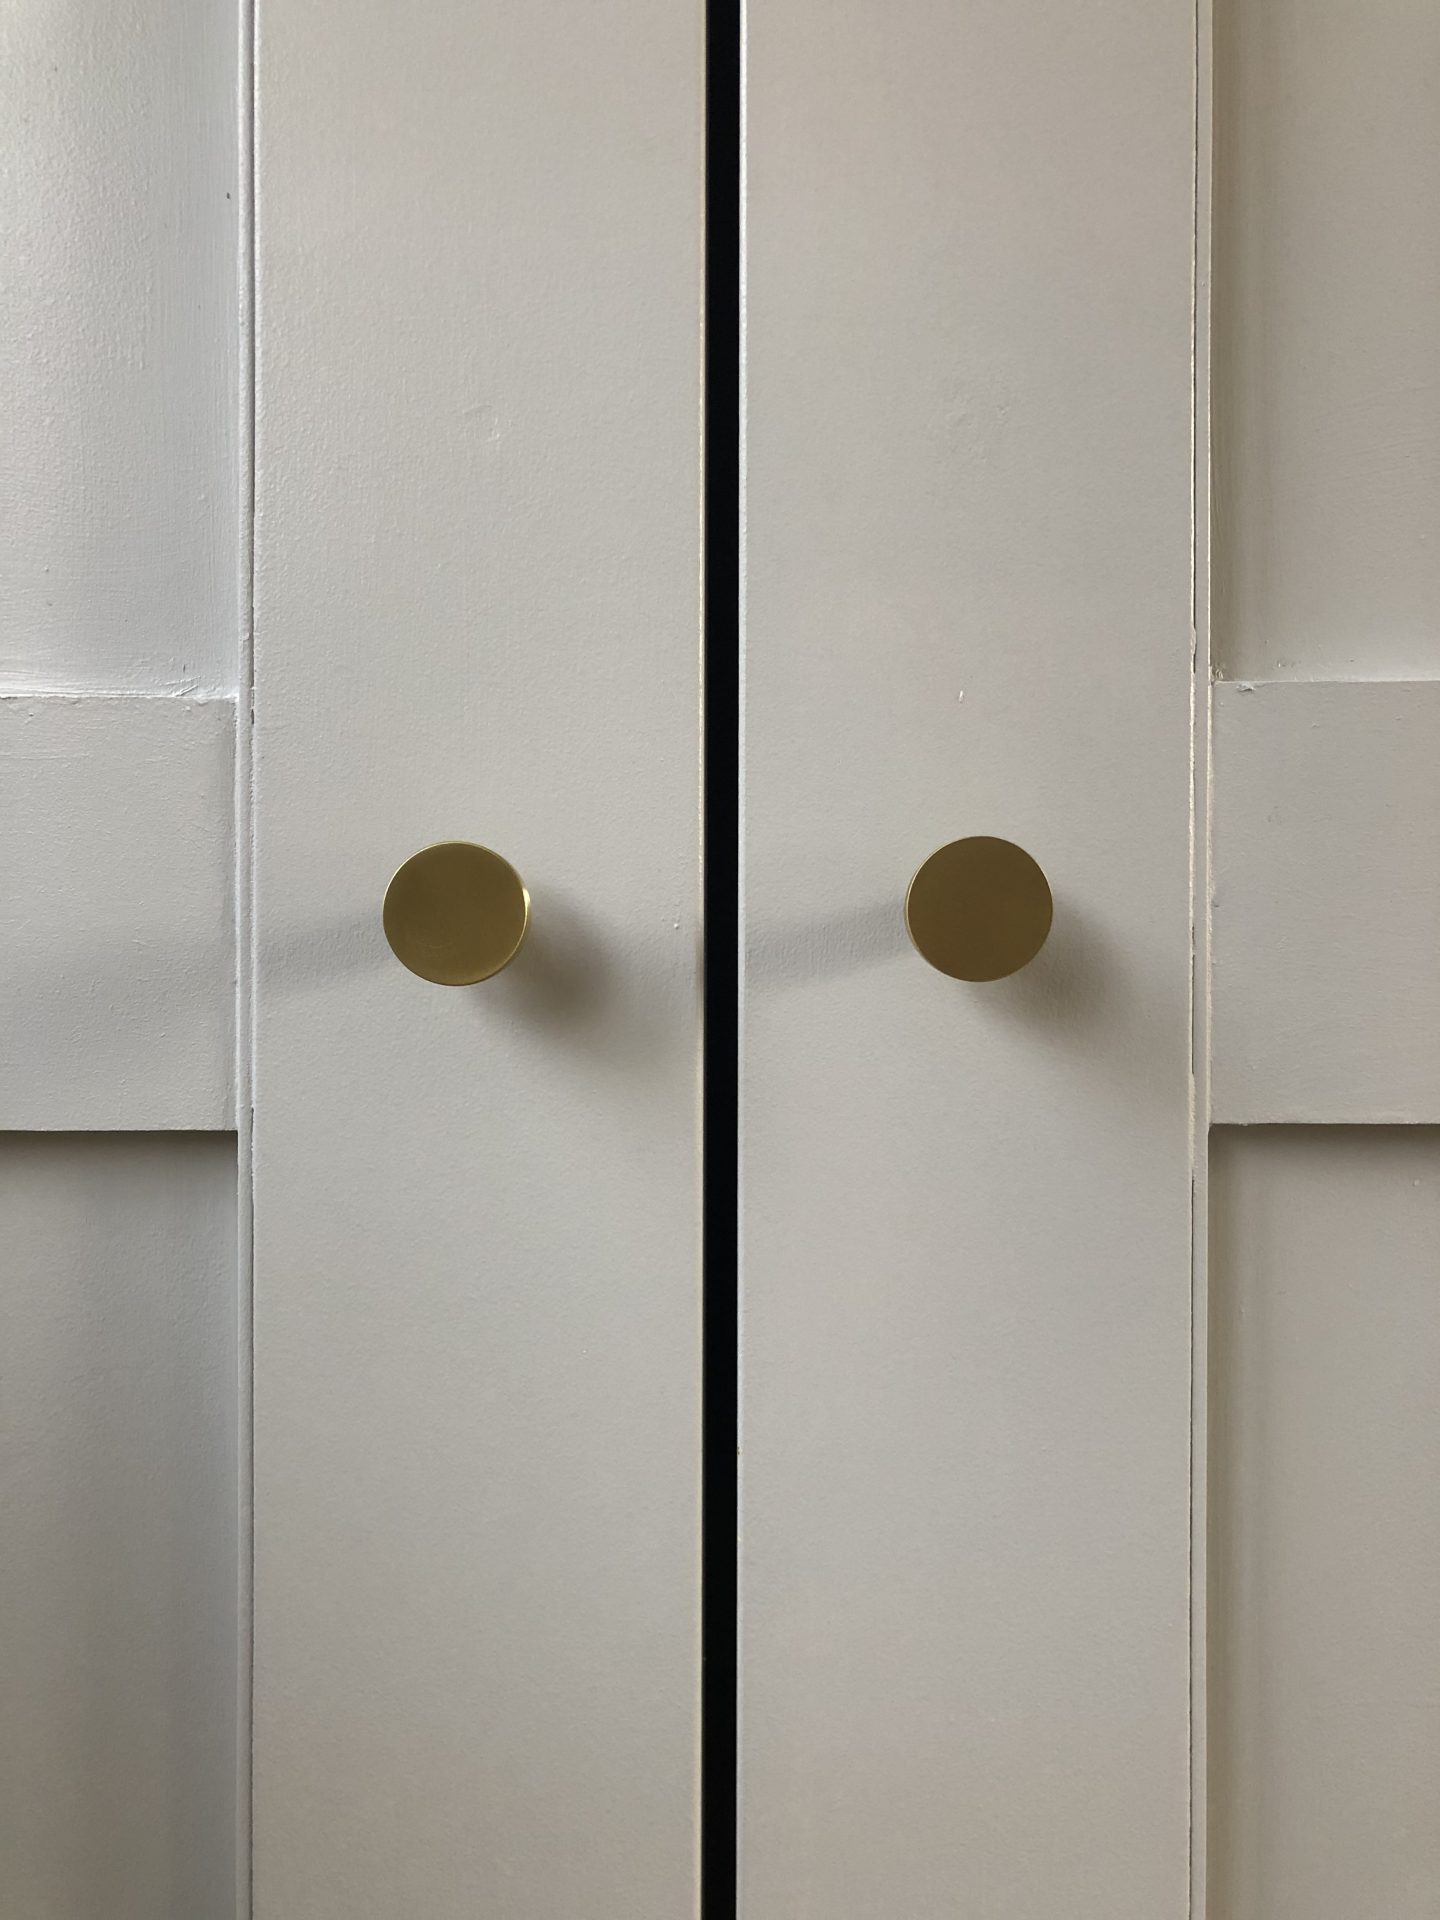
Fixing the new knobs to the wardrobe. For this you’ll need a drill to make the holes for the screws on the new knobs. They are equidistant in between the MDF strips as this creates a professional, smart finish.
Honestly I could not be more over the moon with this project. Whilst I expected it to turn out well because I trust Sam from Dove Cottage implicitly, I still had plenty of room to mess it up all on my own but I can genuinely say it looks SO good. The wardrobes are the first thing you see as you come up the stairs into the bedroom so this new look really does make a world of difference. You can also see more listings of loft homes here that offer ready-made loft wardrobes like these. Or you can call VIP Realty and they’ll assist you, depending on your location.
I hope this step by step guide on our budget wardrobe makeover has been really helpful, do let me know if you try any of your own projects!
Follow me on Facebook | Instagram | Pinterest | Twitter


Wow they look amazing, you would never know they had glass panels x
https://www.katescloset.uk/
Author
Thank you so much Kate I still can’t quite believe how well they turned out 🙂 X
One of the things that stood out to me in particular was the use of high-quality images and diagrams, which helped to illustrate the points you were making and made the blog more engaging. Additionally, the layout and design of the blog was visually appealing and easy to navigate, which made for a great user experience.
Brilliant job, I am going to give this a go too! Thank you for sharing x
Author
Good luck Michelle! X
These look great! Where did you get your knobs from?
Author
Thank you! THey are from Amazon
I’m about to start almost the same project with practically identical wardrobes. I’m using a dark grey Rustoleum paint and plan to use grass cloth wallpaper on the glass panels. Hoping this works out but if not, I now know that it’s ok to just paint that glass. Great idea about the mdf dividers on the front, I may have to steal this one. Thanks for your ideas and showing me that it CAN be done.
Author
Good luck Trisha!