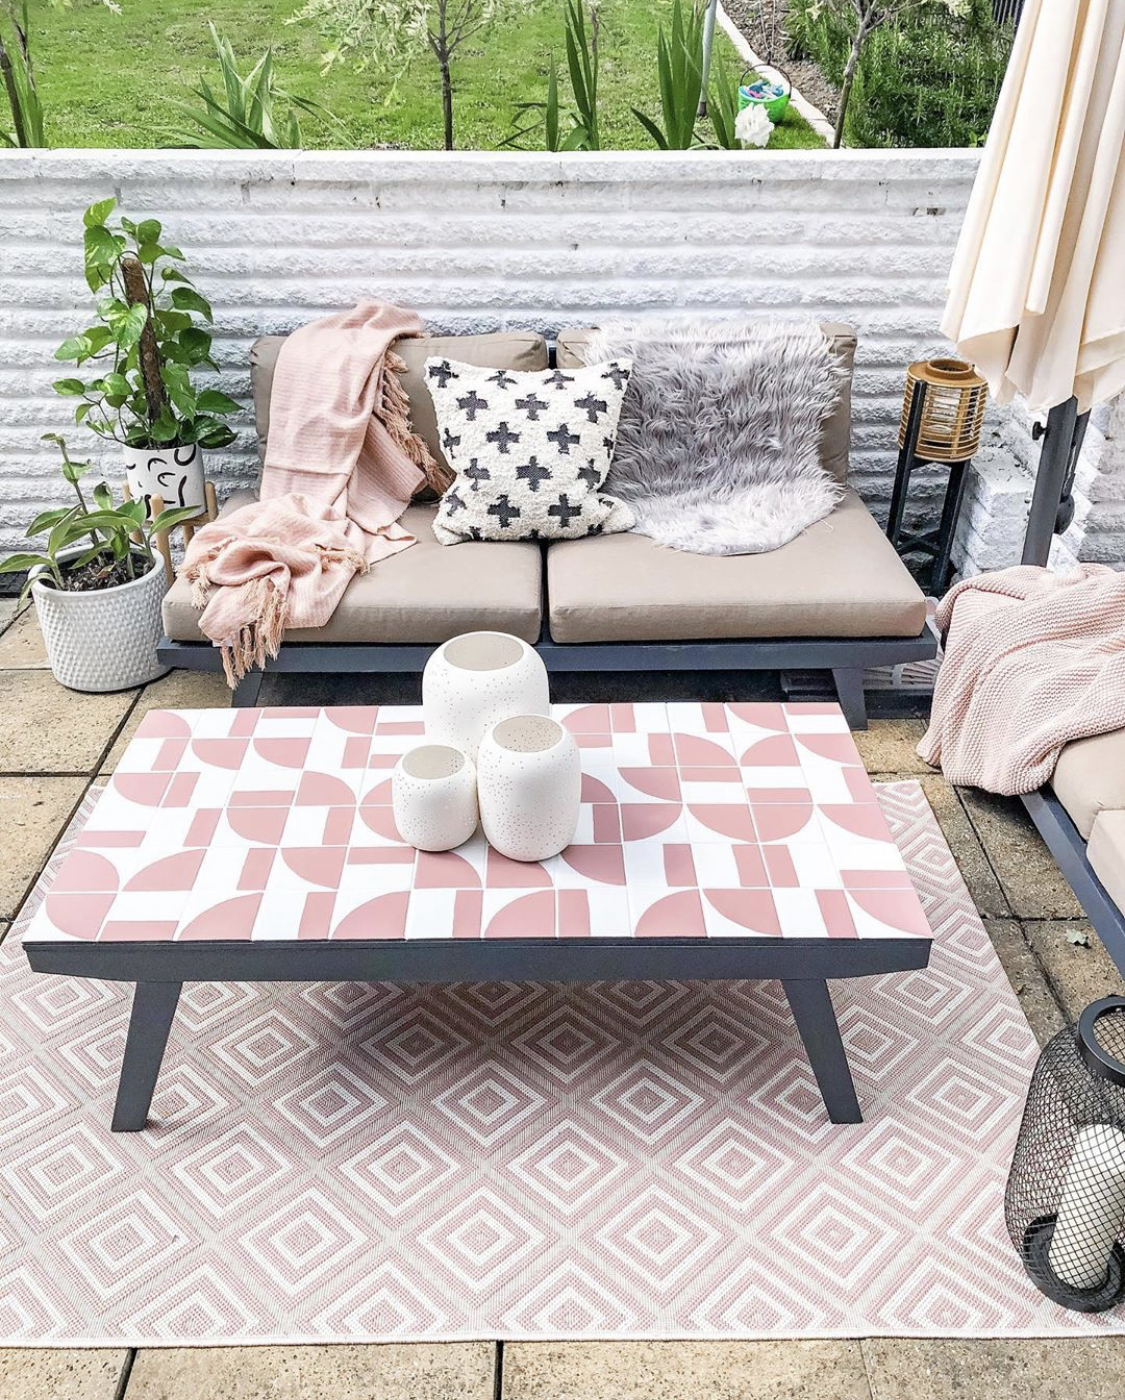
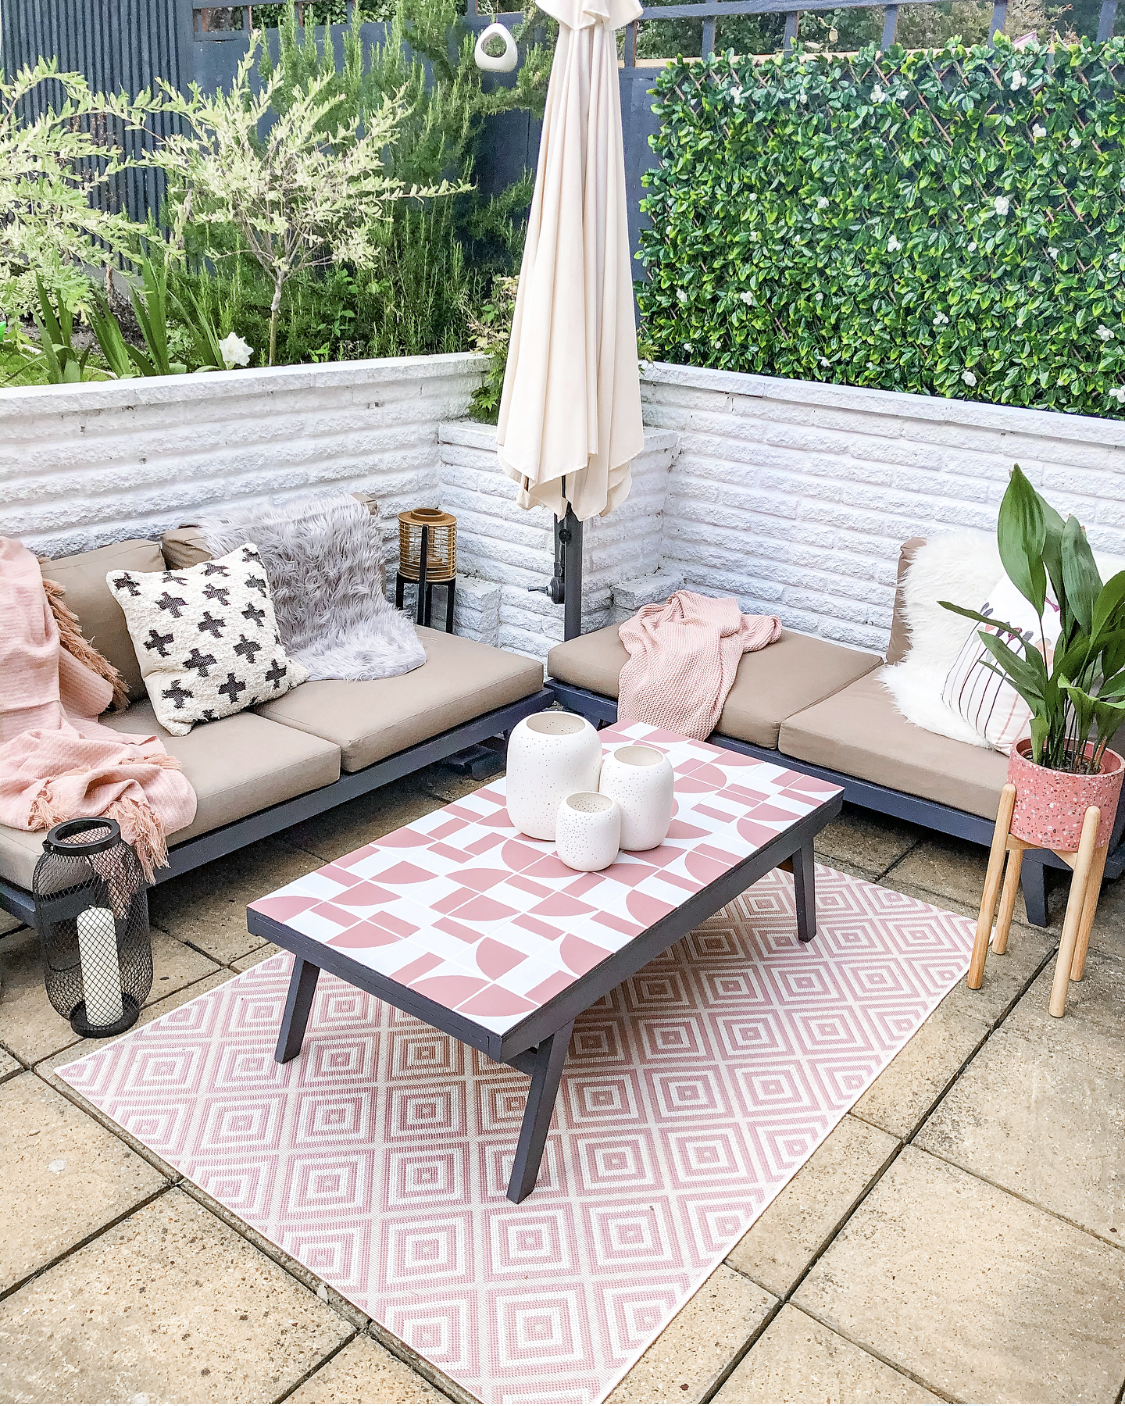
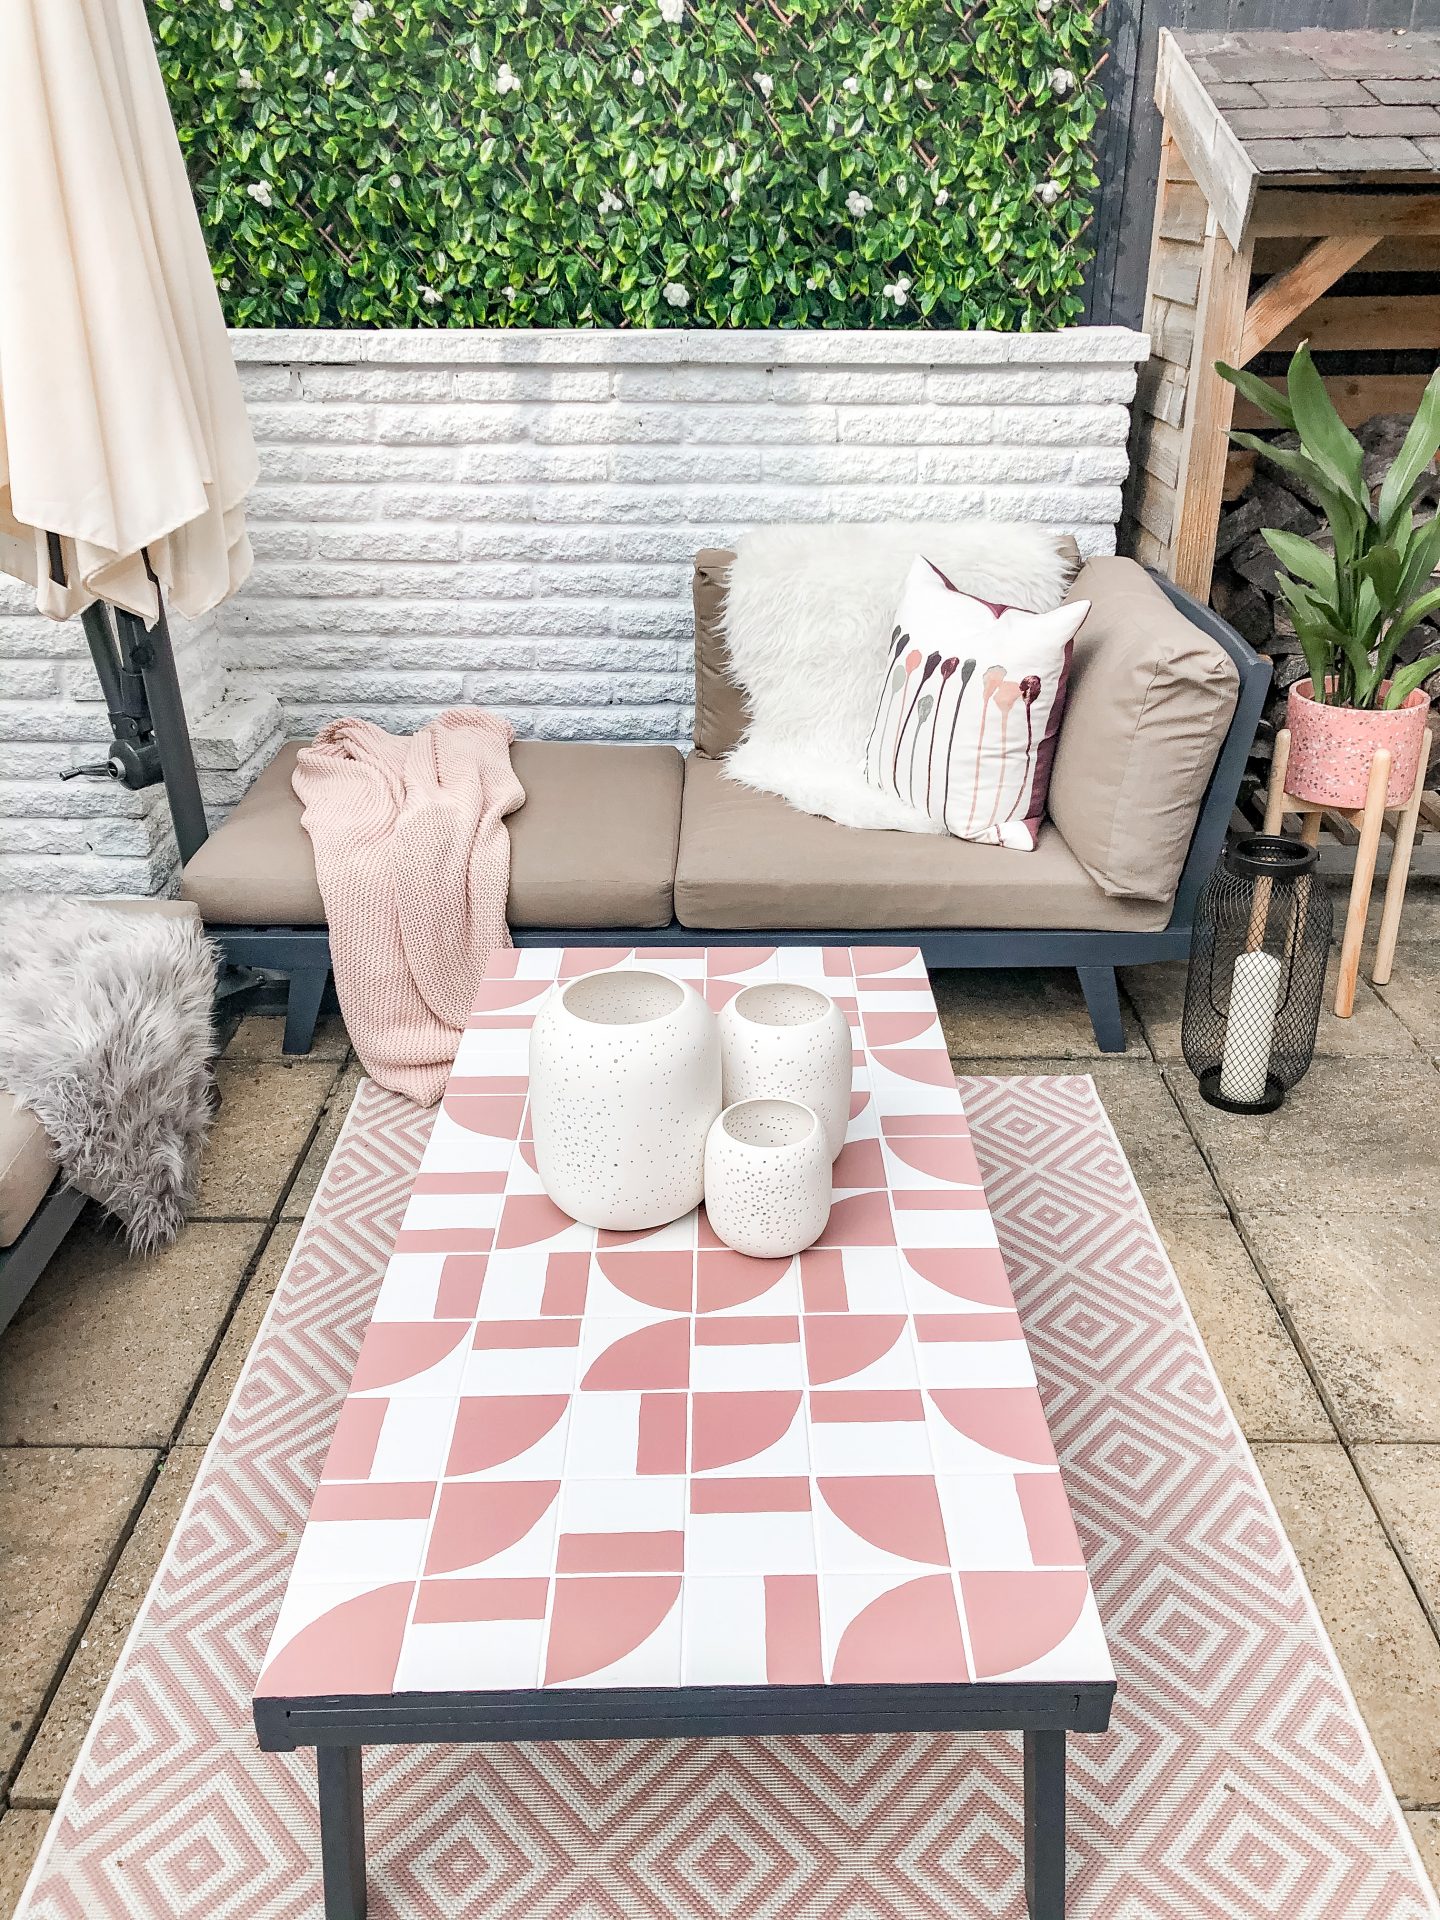
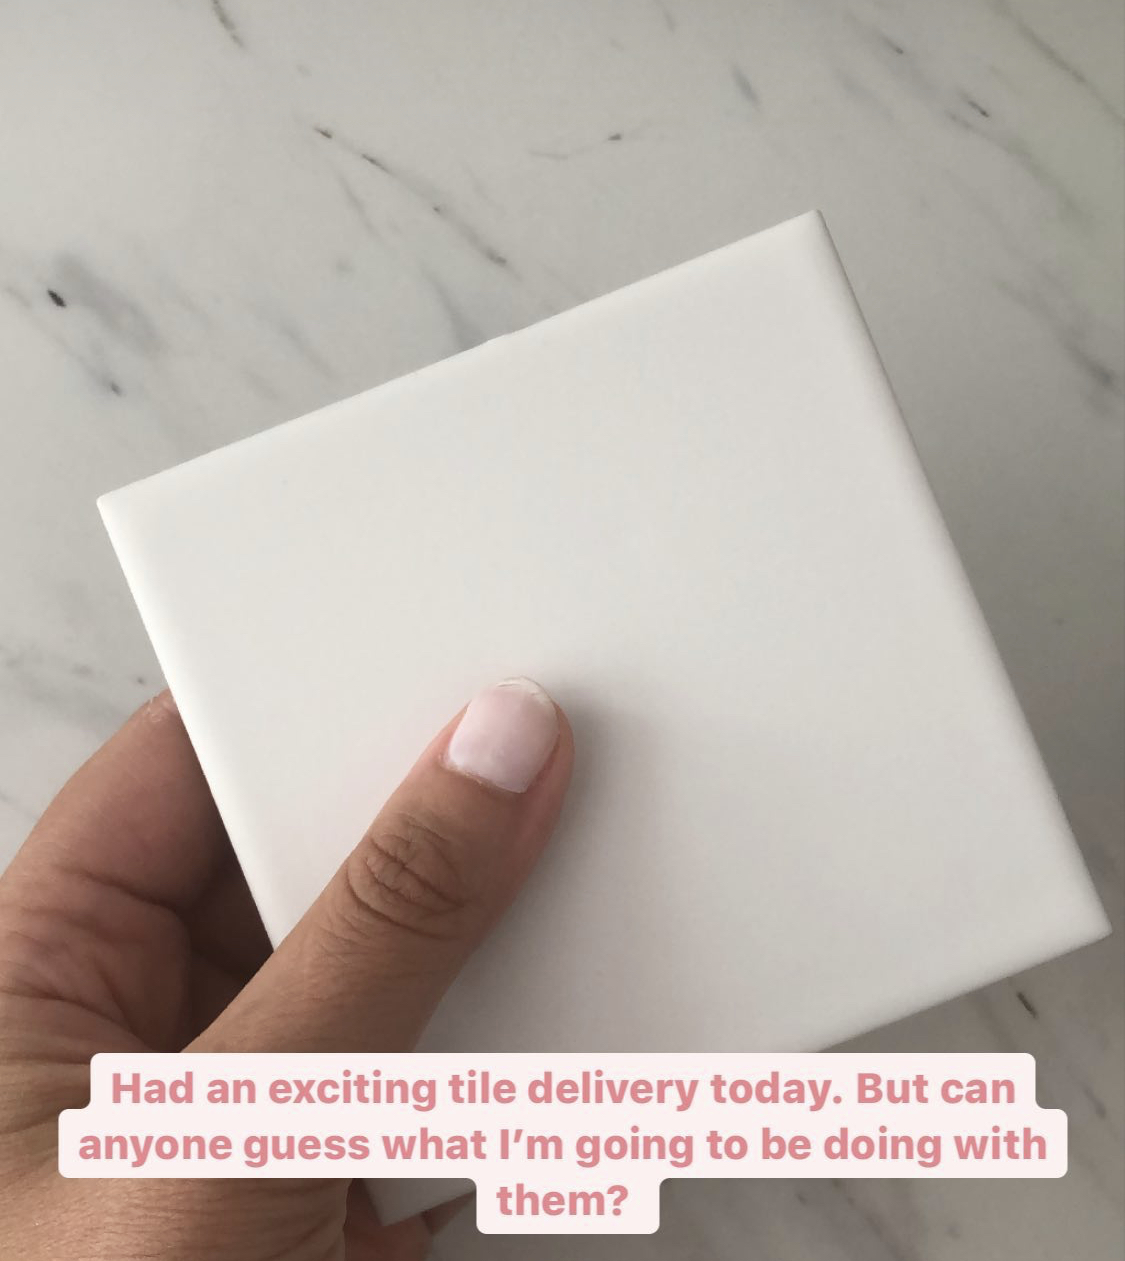
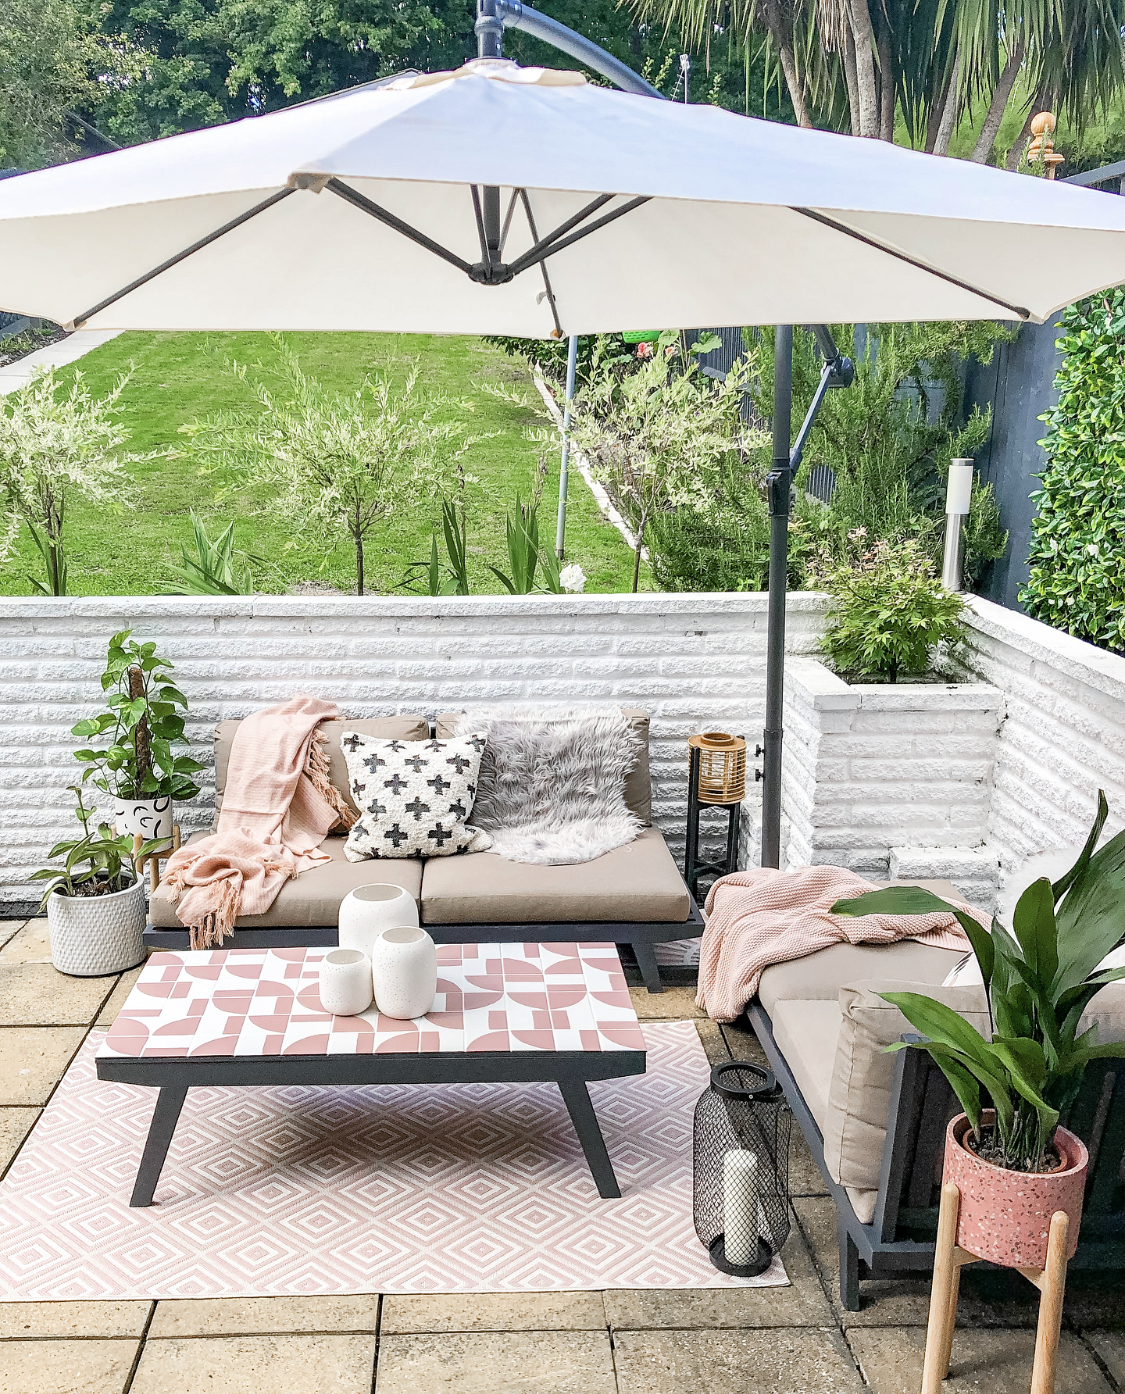
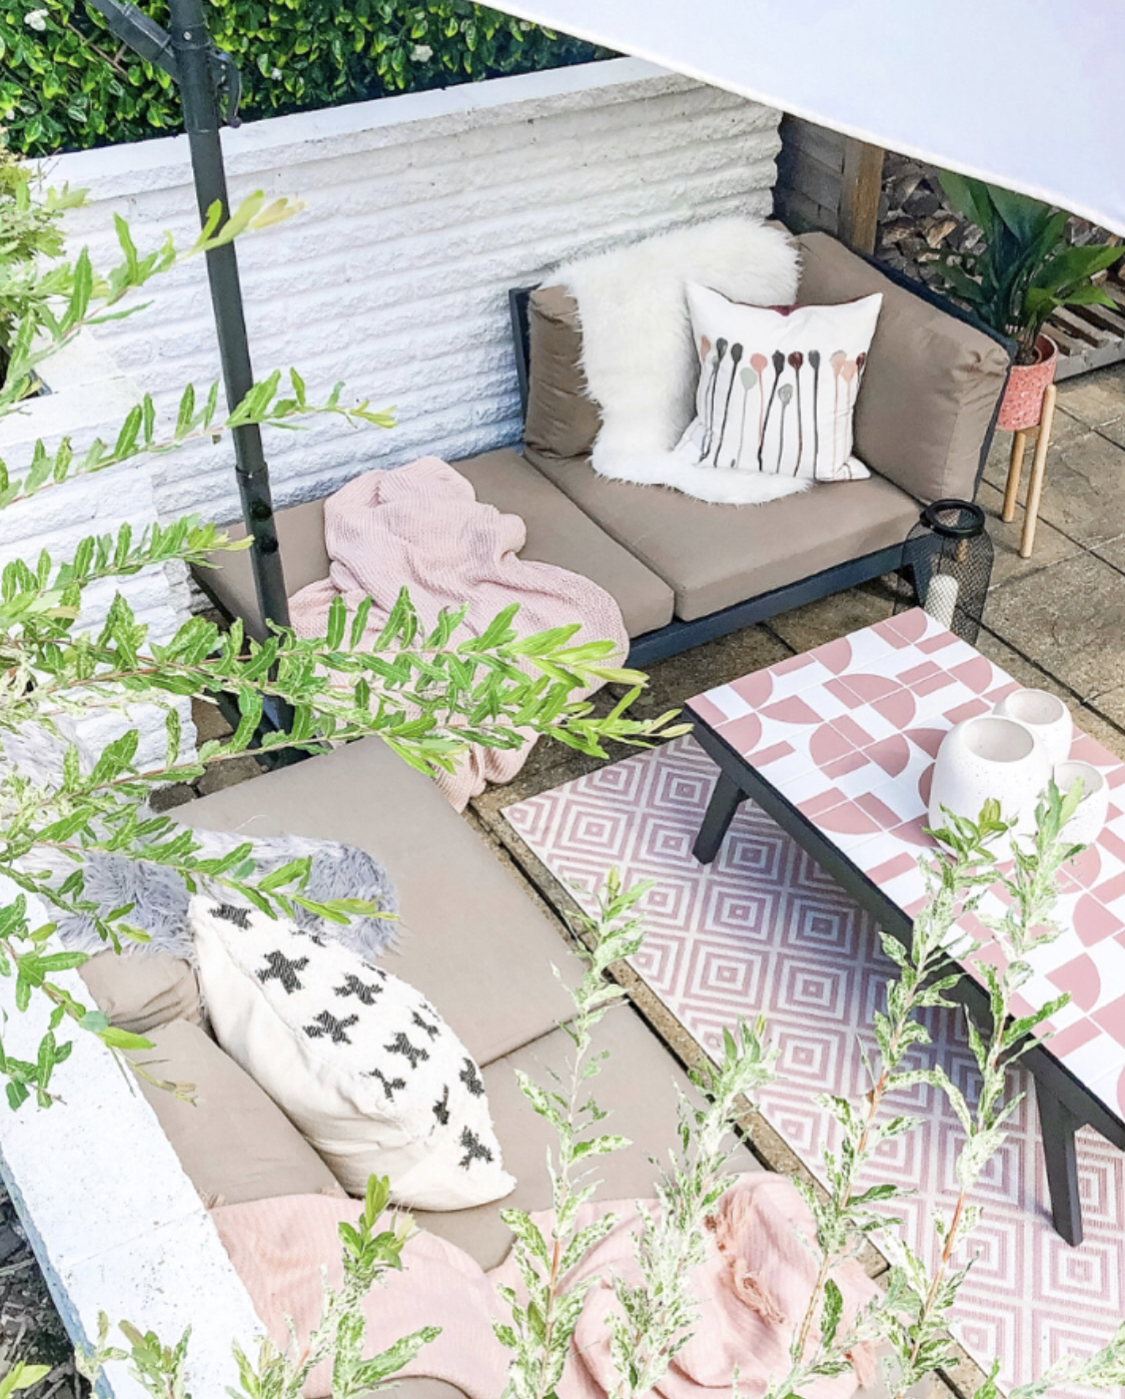
Do you ever get half-way through a craft/DIY/reno project and wonder why you ever started in the first place? I do, frequently. And I especially did when I decided to tile a table. Then, when it’s finished you realise it was all worth it, despite the mistakes. I know there will be some early summer sun and the tiled table will be a great addition to our garden.
I know a few people might be keen on trying this upcycle for themselves so I thought I’d share my ups and downs so you can learn from my triumphs and mistakes. Before I go further, a huge thank you and credit to Geneva van der Zeil who first shared this as an original project, and wrote both a detailed blog and shared video tutorials too. I wouldn’t even have thought to try this without her.
I’ve shared everything I’ve done over on my Instagram account, under “Tiled Table” highlights so you’ve got a bit more of a story/visual aid to help along but figured a blog post is also handy to refer back to so here goes.
For this project you will need:
-A table
–Outdoor paint and brushes
-Tile adhesive and tile grout, plus tools for tiling
-A sealant
-Tile spacers
-A piece of MDF (optional but highly recommended)
1) The Table
The idea of this project is to upcycle something you already have, rather than go and buy a table just to tile it. Geneva found the table she used for free, mine was an already existing one we’ve had for a couple of years outdoors. You’ll need to make sure your table is sturdy as once you add the weight of the adhesive, tiles and grout, it will be about twice the weight and collapse if it’s too rickety.
My table measured 60cm by 120cm which as luck would have it is the same size as the one Geneva was using so it meant I could closely follow her steps.
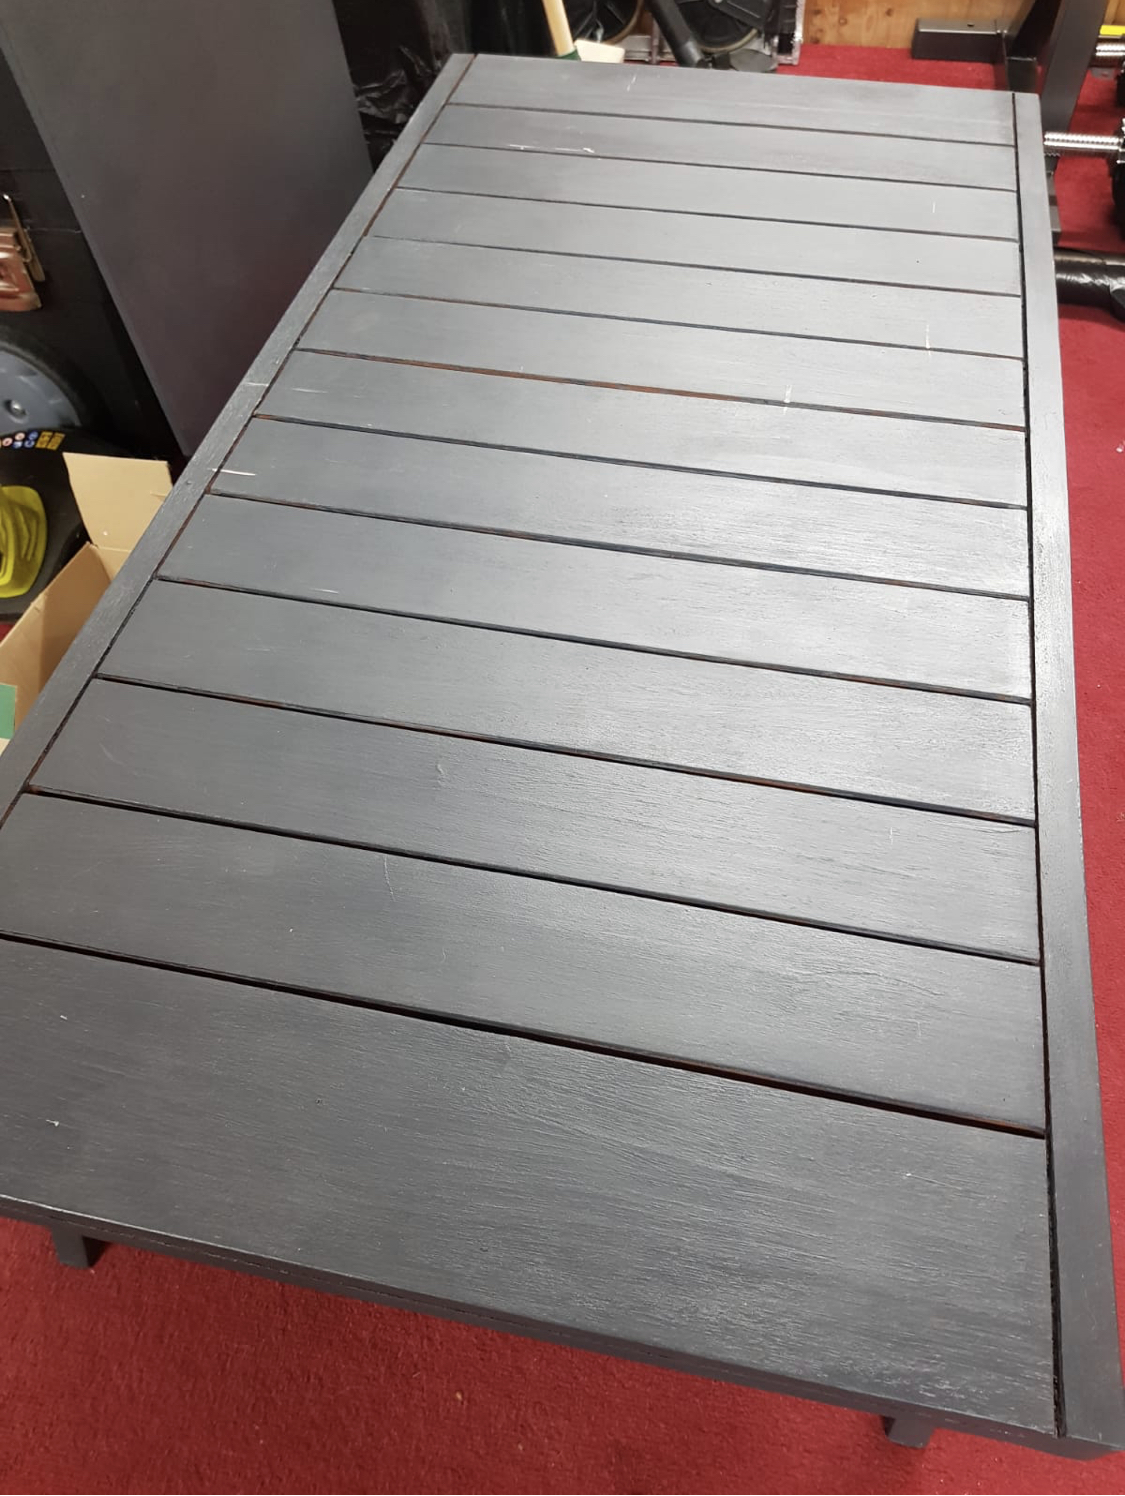
If your table already has a solid, flat surface you can tile directly on to it. Since mine was a slatted top, I asked Pete to fix a piece of MDF onto the top. You CAN tile onto a slatted surface but it may make the tile finish uneven.

Before he fitted the MDF I gave it a quick couple of coats of paint in Urban Slate so it looked like it was part of the table once he screwed it in place. One screw in each corner, and one in the middle of each longer edge.
2) The Tiles
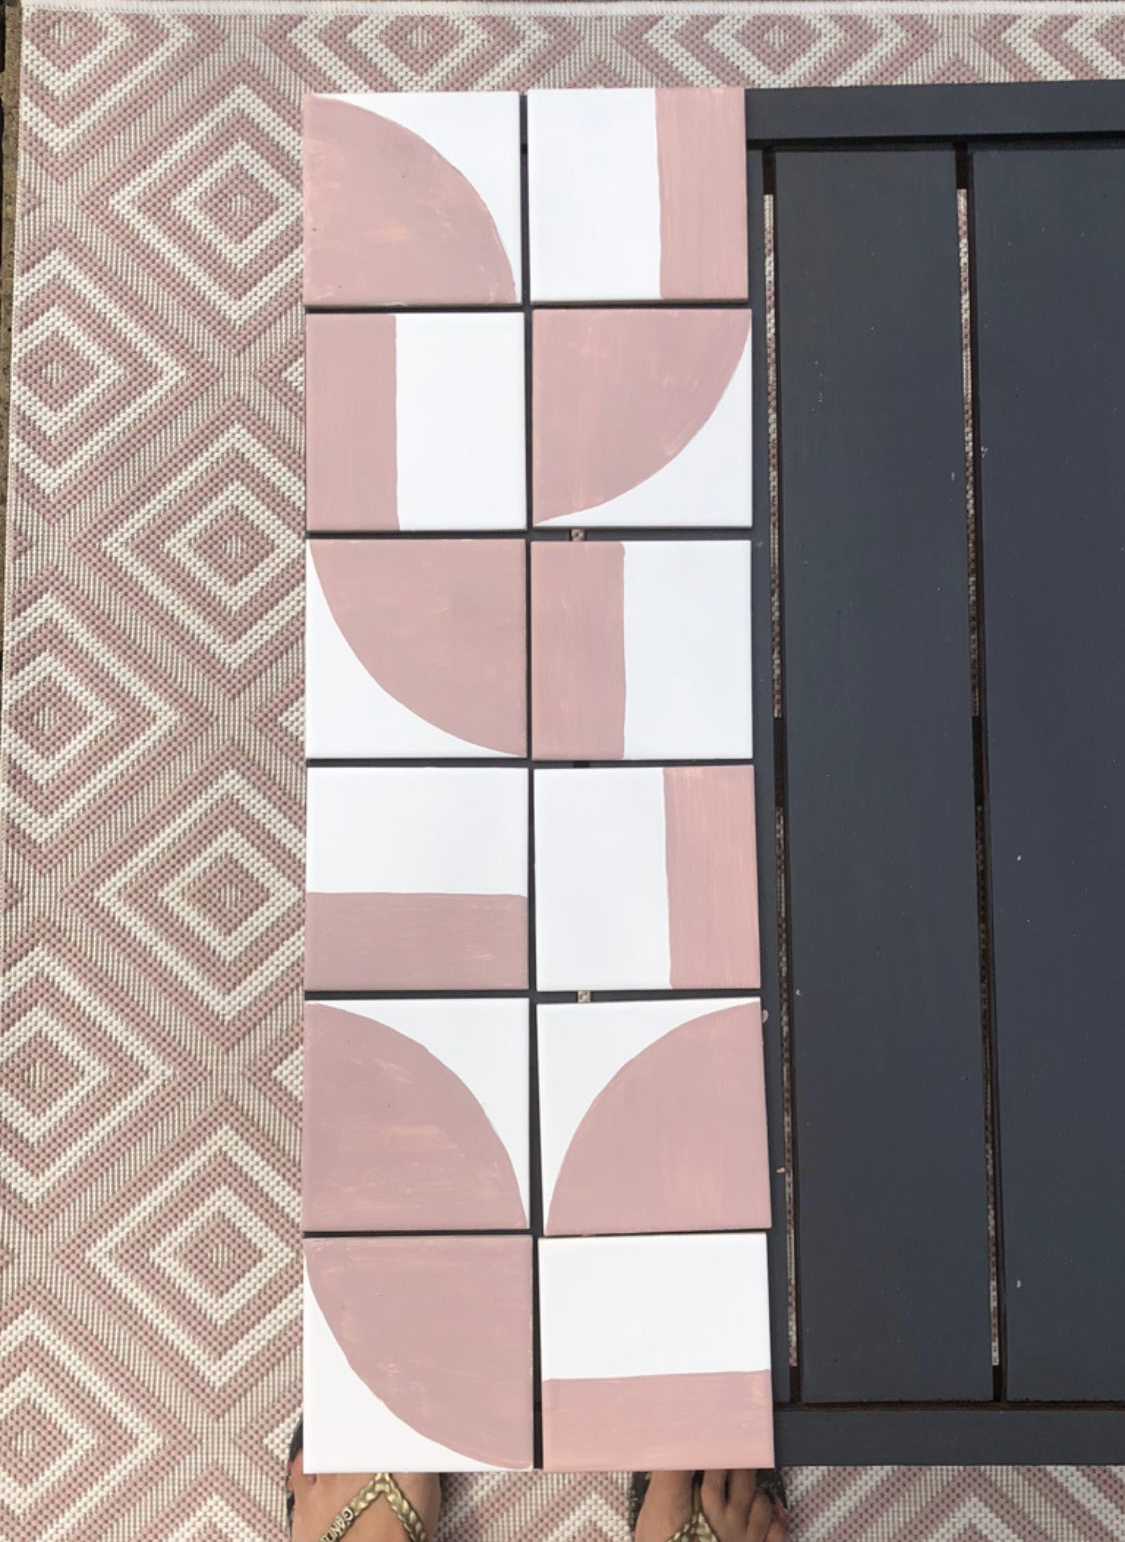
If painting tiles isn’t your thing, by all means go out and buy some patterned ones. I just couldn’t justify the additional cost for a simple outdoor DIY project. I also really loved Geneva’s pattern and decided to use that as a guide.
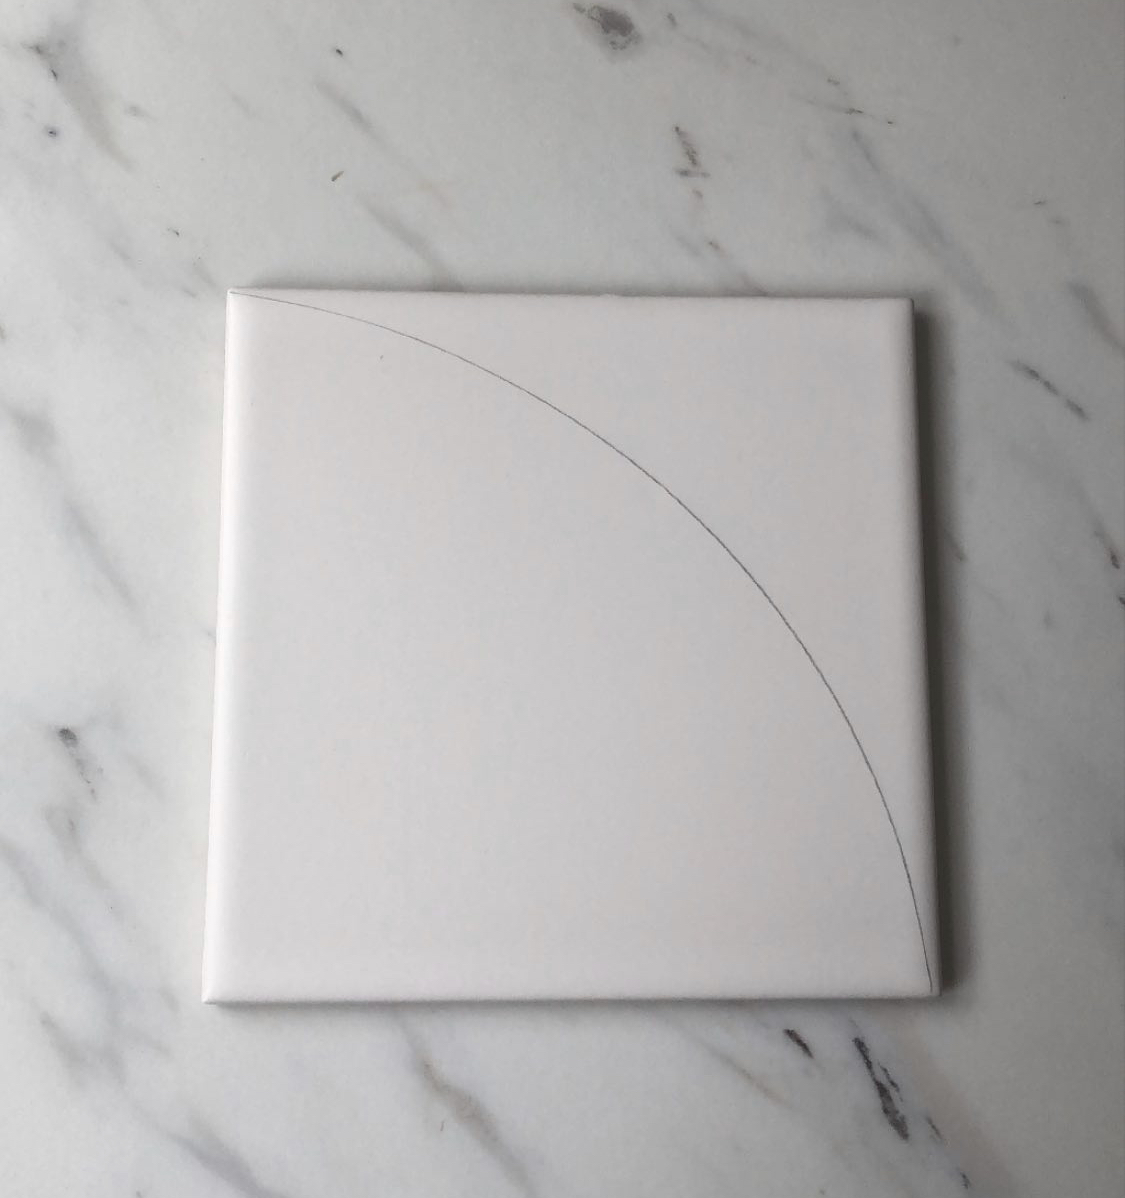
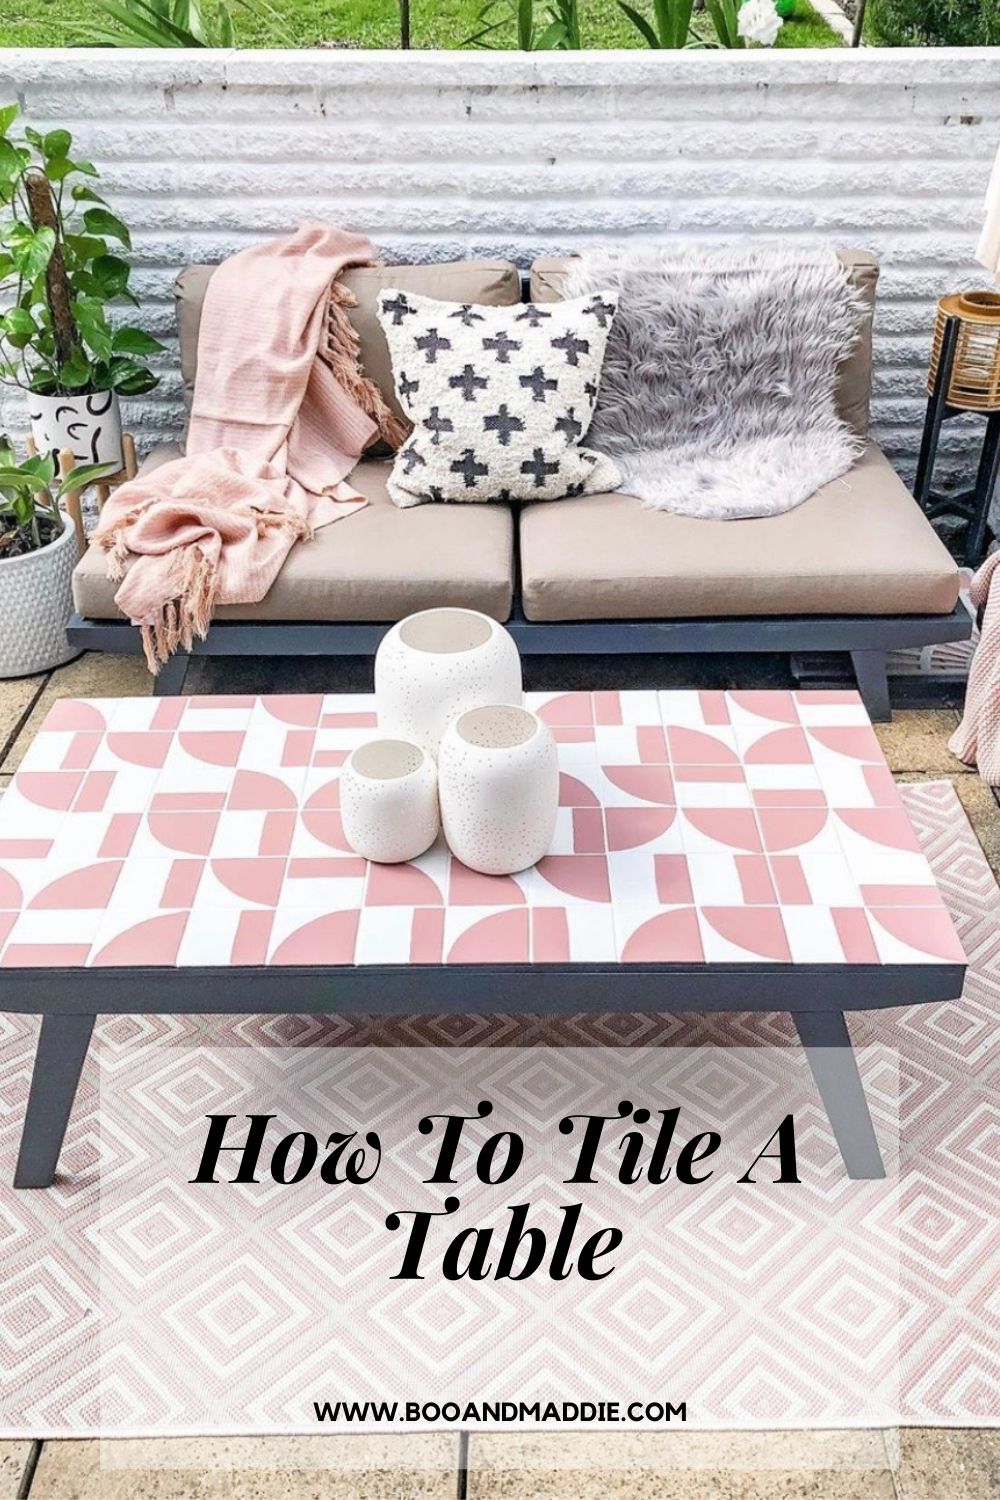
The tiles are from Walls and Floors, in a white matt finish. Don’t get gloss tiles if you’re going to paint them as it will be much harder for the paint to stick. Now, think carefully about your measurements. If for example, one edge of your table is 60cm long, 6 x 100mm square tiles won’t work as you need to allow for tile spacers and grout in between. The tiles I used were 97mm square, which allowed for 3mm tile spacers so they sat exactly on the table top without needing any cutting. You could decide to go for bigger tiles, the choice is yours.
3) Painting the tiles
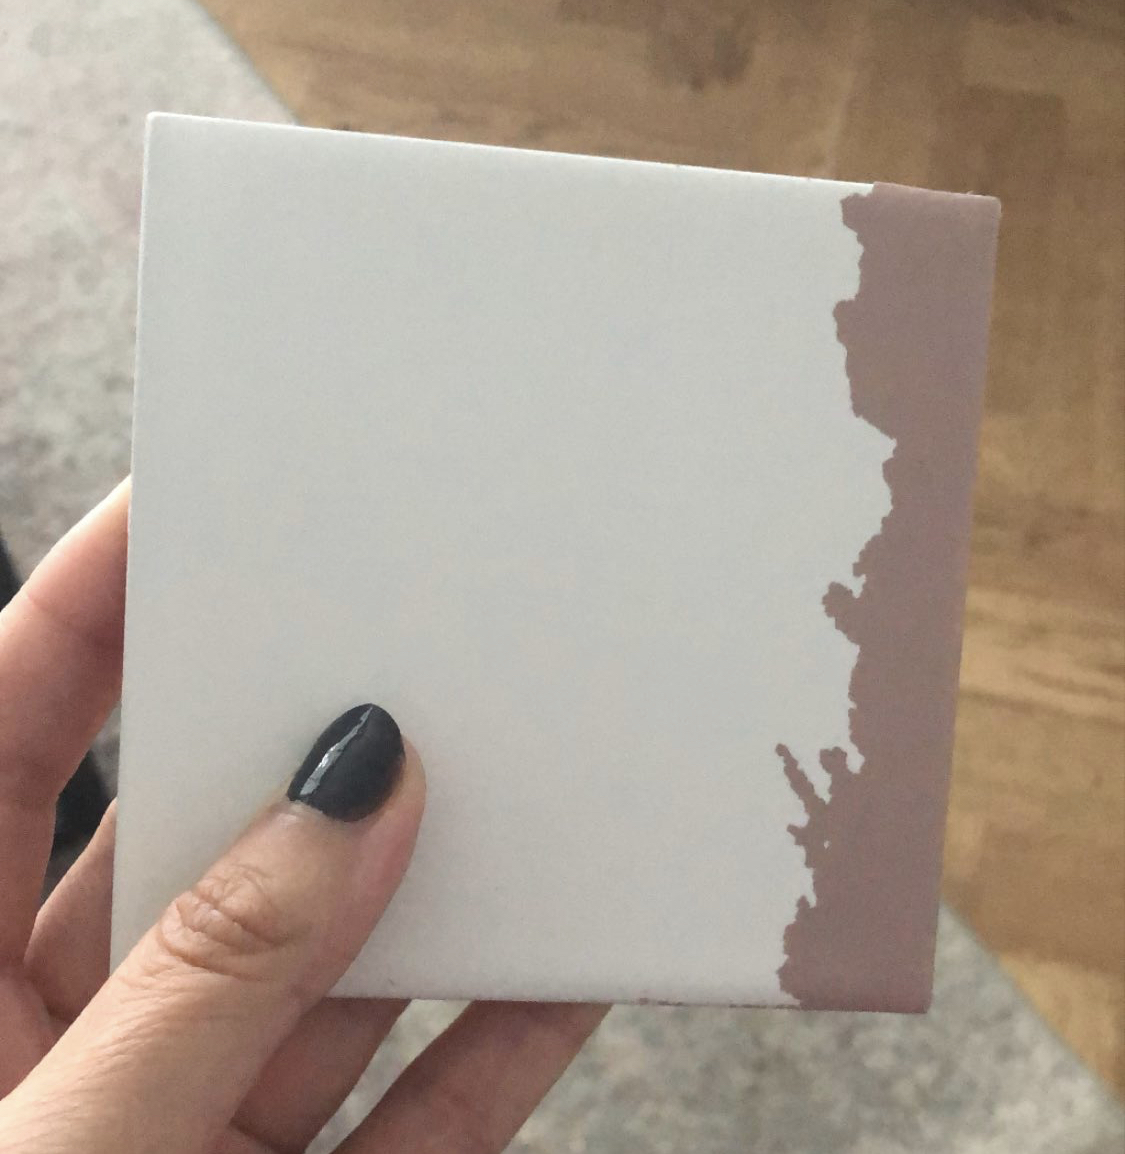
In hindsight, I think I would have been better to use a primer on the tiles rather than just paint straight on. I followed Geneva’s pattern, using a side plate to create my arc for the curved tiles and just marking a straight line for the others. Use a pencil to make your markings and it will just disappear when you paint over them.
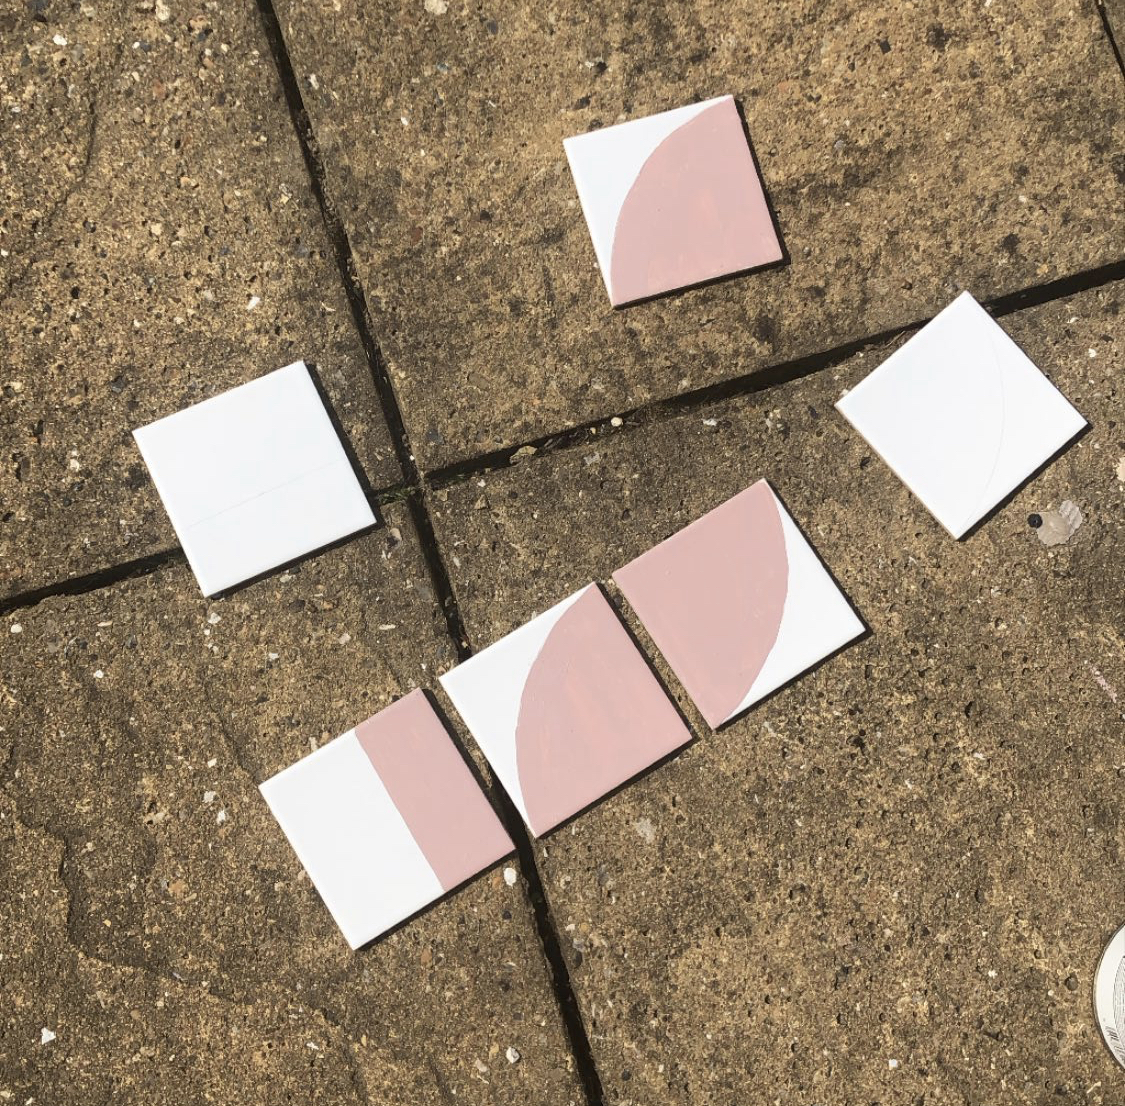
For paint, I used some leftover Frenchic Al Fresco paint in Dusky Blush. Since I used this on so many projects and surfaces, and its never needed a primer, I thought it would be fine and I got two coats on to the 72 tiles. Then, I had a bit of a disaster when it rained heavily and our outdoor table cover had a big hole in it. When I came to add a sealer coat to the tiles, I discovered that most of them had puckered and the paint was just scraping off, needing to be re-done from the start. I don’t know if a primer would have made the difference in this scenario.
Thankfully the paint almost just peeled off and I was able to repaint them, rather than having to damage them or buy more tiles and then repaint. Lesson learned!
4) Sealing the tiles
Again, following Geneva’s tutorial I sealed the tiles prior to gluing them to the table and the first product I tried is Rustoleum Crystal Clear Protective Coat in a spray. Now, this isn’t the product I ended up using. It worked fine to seal the tiles and protect them from rain, but unfortunately it seemed to react with the grout later in the process as I was sponging the grout off, and started flaking off.
It could have been for many reasons – again, maybe if I’d used a primer, that may not have happened. Maybe if I’d done more spray layers, who knows. It’s just unfortunate that for whatever reason, it didn’t seem to work.
In the end what I used was this No Nonsense Stone and Tile Sealer, I found it a much easier product to work with as you can just brush it on rather than spray it so you have a lot more control.
5) Tiling
I can honestly say I felt SO nervous about tiling. You’ll need a good tile adhesive, which you can either buy pre-mixed or in powder form to be mixed, but remember that if you opt for the latter you’ll have to work out your quantities and well, maths was never my strong point. Thankfully we had some adhesive left over from last year that was still good, so I was able to use this.
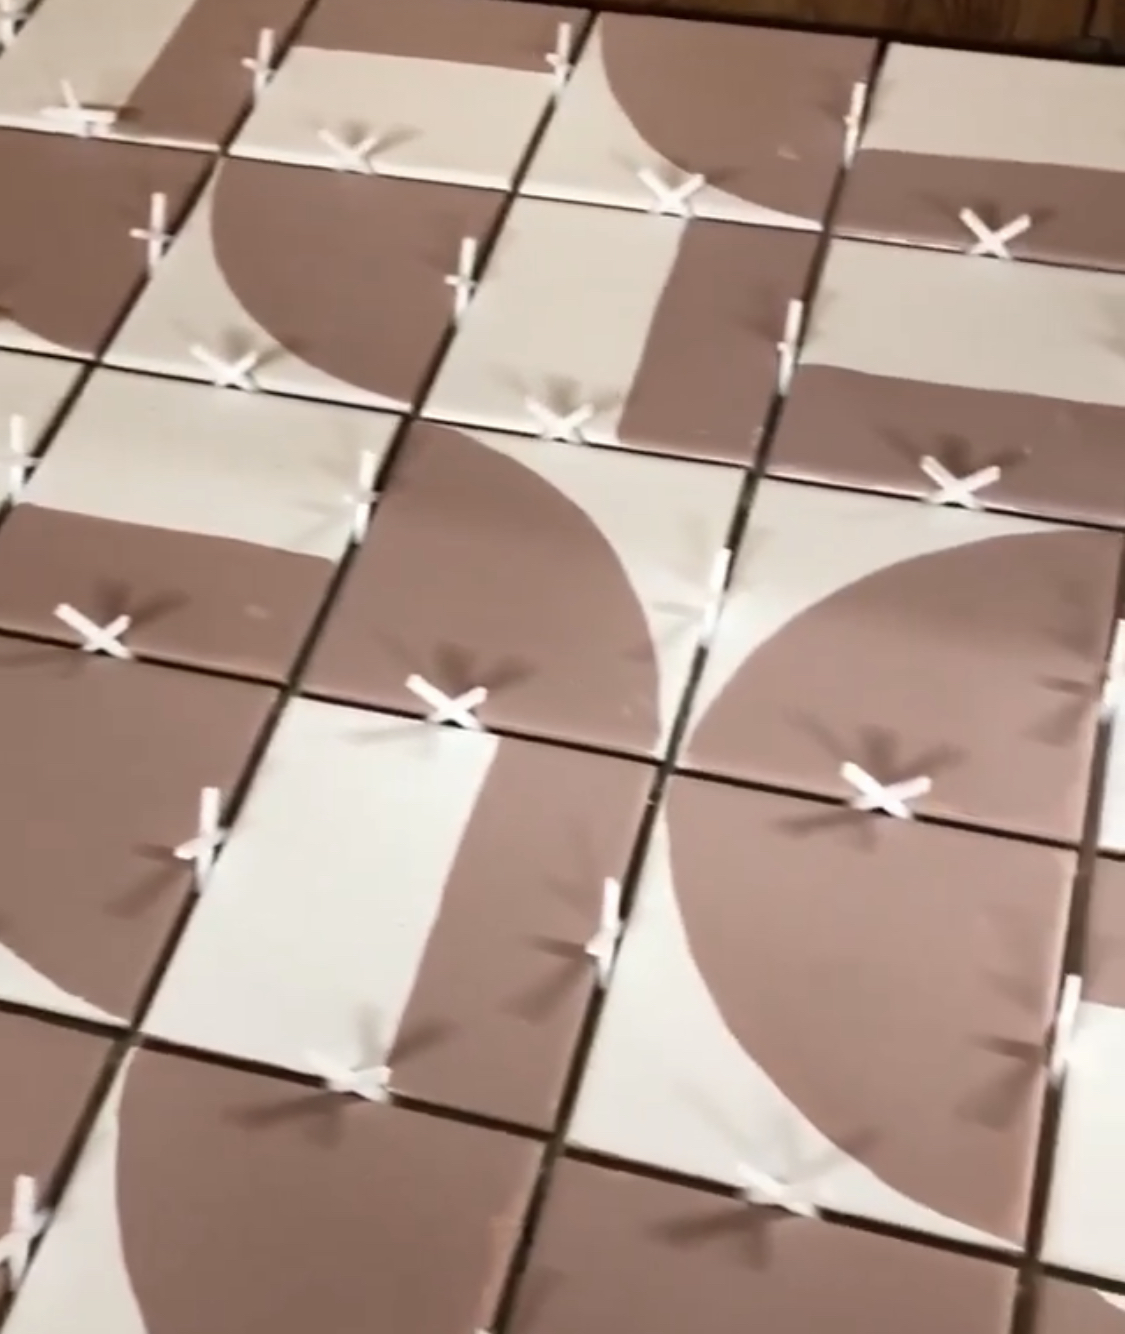
For both gluing and grouting, you need to work quickly. I glued on one day, using my tile spacers to keep the tiles in place. The next day I went back to grout, and mixed up far too much of my grout mixture but well, better to have too much than too little.
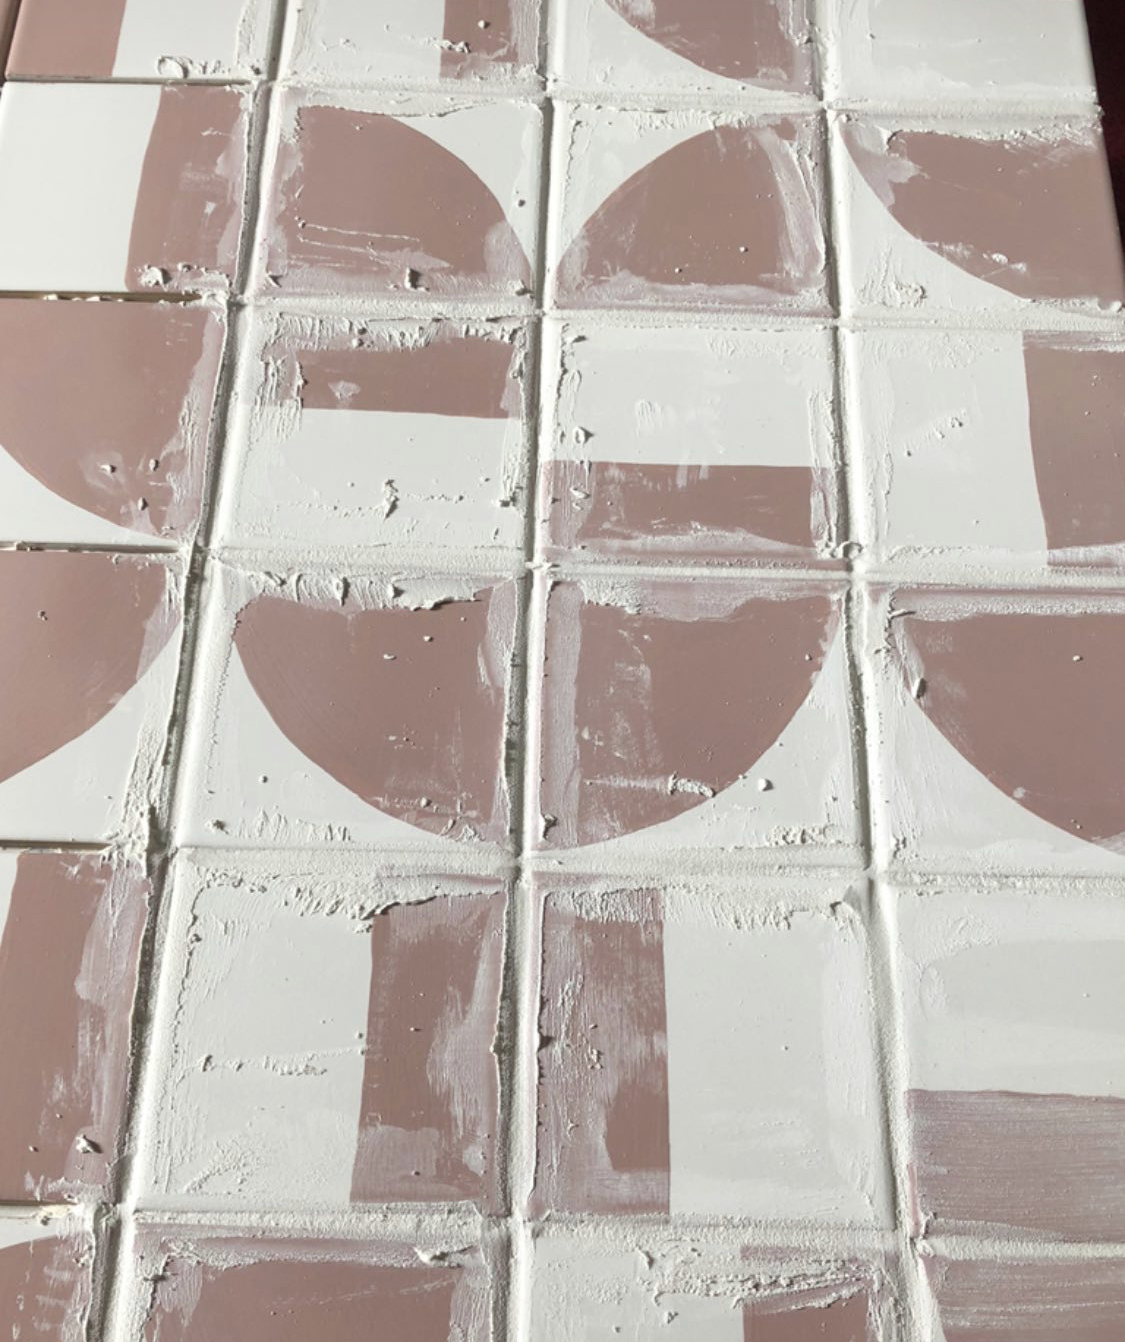
I was very cautious to begin with but it’s a tricky balance – in general, if it says it’s quick-drying ie within 30 minutes, it will be! I just about managed to get the whole table done before the grout became completely rock solid and unable to use. You’ll need to sponge off the excess using some clean water.
6) Finishing Touches
Once the table was grouted and dried, I then went over it brushing the sealant on. It’s quite a watery consistency but brushes on easily. I then took some of my grey Urban Slate and just went round the edge of the tiles with a tiny paint brush to cover up any bits on the edge of the table where I’d been a bit messy with the adhesive. JOB DONE! Honestly, there were times where I really wanted to quit but I also knew I could do it and make it look fantastic. Now it’s done and although we’re heading into autumn, it’s ready for some last summer sun and those early spring warmth days in 2021 so I really am glad I persevered and I would do it all again. It’s easier than I made it look/seem on Instagram so please do have a go, or maybe tile something else. Transforming/upcycling furniture we already have or things that have been rescued is so much fun!
PIN FOR LATER:
Follow me on Facebook | Instagram | Pinterest | Twitter


I love this! It turned out so great – such a nice way to upcycle old tiles!
Jenna ♥
Stay in touch? Life of an Earth Muffin
Author
Thank you so much Jenna, I’m so happy with it x
Peel and stick tiles is also an easy option
Author
Most definitely, I couldn’t find ones I liked though 🙂
How did you make the edges look finished?
Author
Hi Alexis, I’m sorry for the late reply I’m finding a whole load of unanswered questions on my blog. I used some of the Urban Slate paint and a small paint brush just to edge them in grey to match the rest of the table
Love this and am so inspired!! Do you think this IKEA table could hold the weight?? Thanks so much for sharing these details
https://www.ikea.com/au/en/p/aepplaroe-table-outdoor-brown-stained-50419788/
Author
Hi Amy, thanks for your comment and sorry for the late reply. I wouldn’t recommend it to be honest unless you have somewhere you can store it over winter and it will be VERY heavy – alas after two winters of me being very lazy and not moving it back inside when I should have done, most of the grout has cracked and the tiles come away. I’ve decided not to retile it but am going to paint the same pattern onto the board underneath so it still looks like the tiled effect just hopefully more manageable!