Sometimes you can stare at a problem for a very long time before you work out a way to fix it. When an opportunity came around to give our dining room a makeover, I knew it would be one of my typical all-or-nothing jobs because what’s the point in just doing half the work? Our dining room had long been looking tired and neglected but especially our 1930’s fireplace which has been transformed from ugly duckling to a rather more pretty swan.
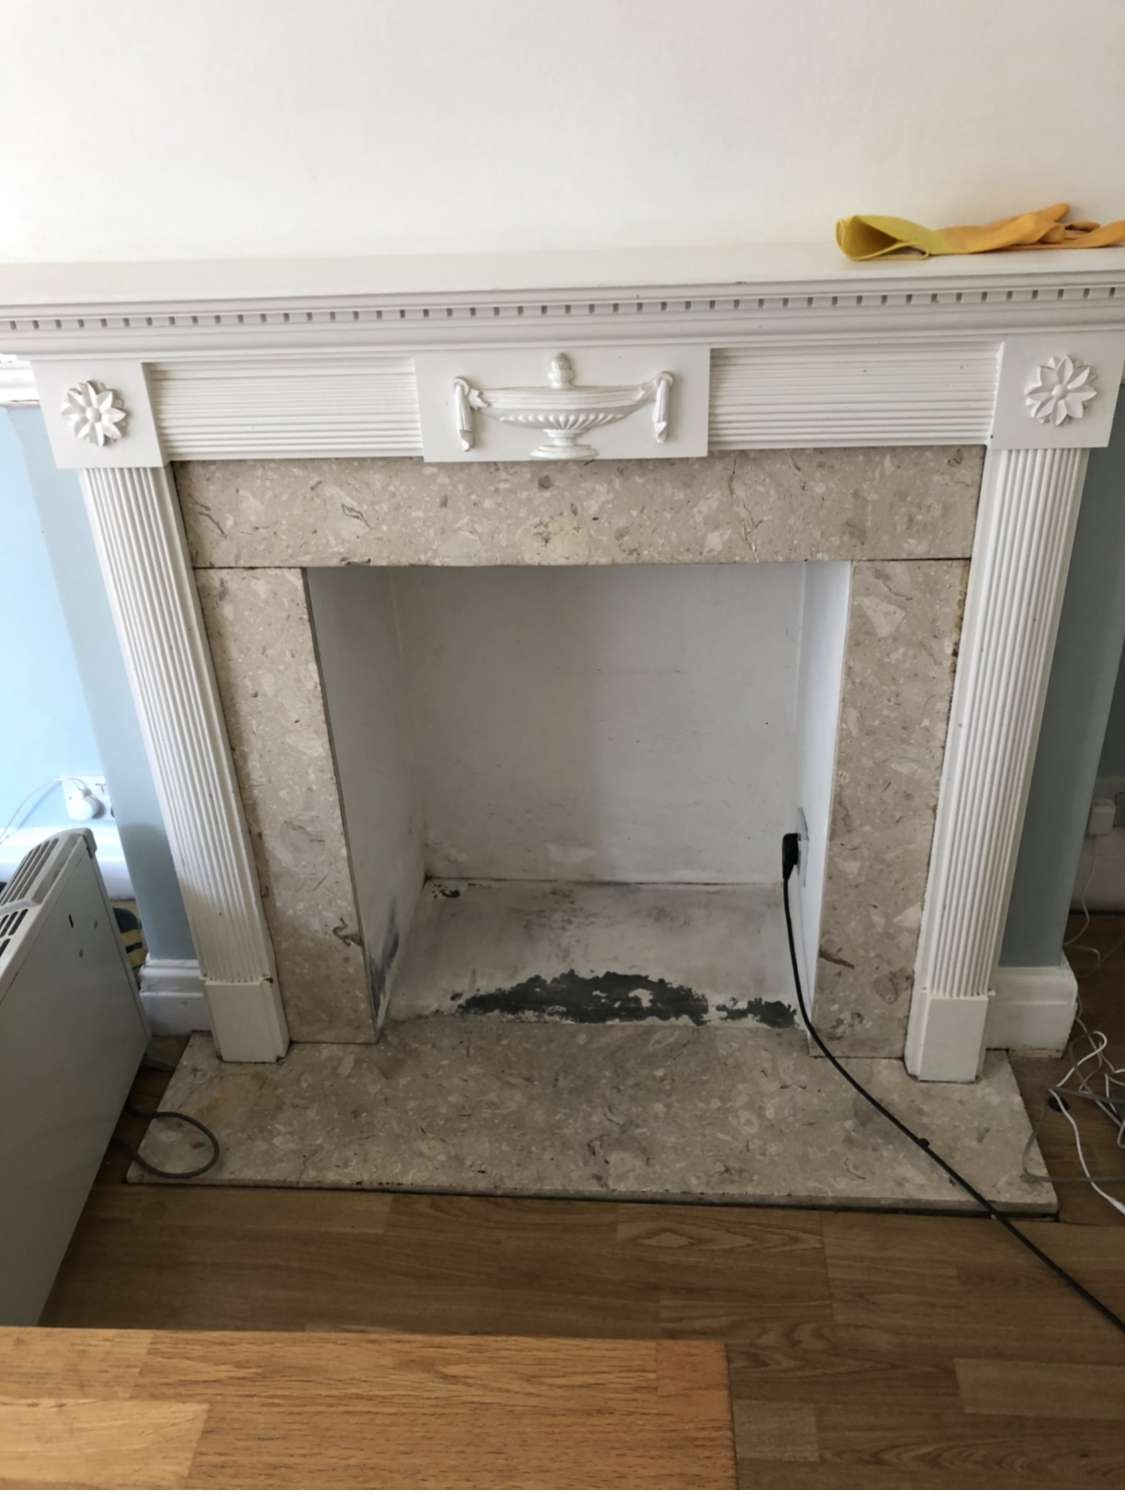
Now I say 1930’s fireplace in the loosest possible sense as I doubt there’s much that still remains from the era and instead it’s compiled of various amendments throughout the decades. My goodness though, it was an eyesore and in order to try and detract from its woeful look we just stuck a log basket in it and hoped for the best.
I knew I had to get creative with the space though once I started wallpapering. It would have really let everything down to leave it just as it was. At the same time, I didn’t want to spend a huge amount of money since this has been very much an attempt to do a big makeover on a relatively small budget and all the little things quickly add up.
Here’s a quick reference guide to the items used:
- Fireplace outer surround and mantel: Frenchic Al Fresco paint in Colour ‘Swankypants’
- Hearth, inner surround and inside the fireplace: B&Q Good Home range masonry paint
- Inner surround and hearth stencilled: Dizzy Duck Designs terrazzo stencil
- Top sealant coat for inner surround and hearth: Polyvine Decorator’s Varnish in satin finish
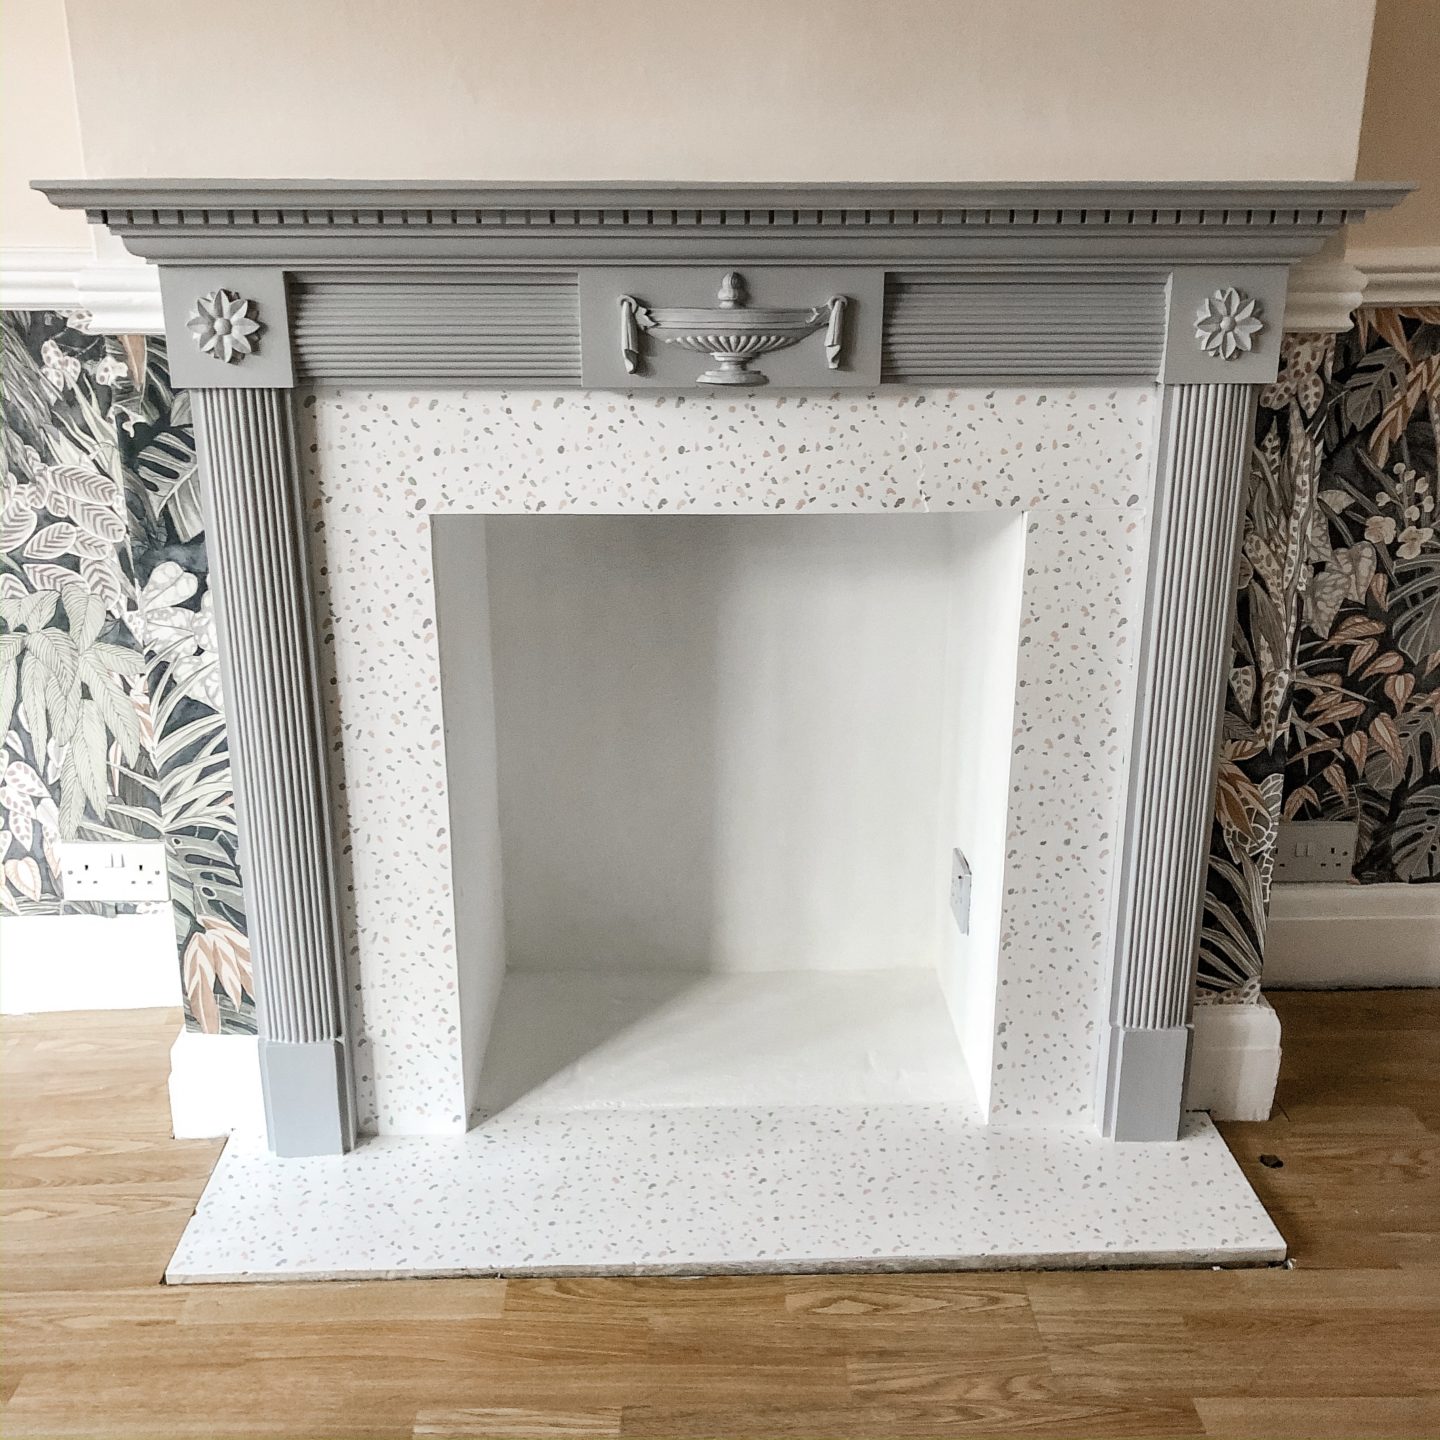
As the wallpaper went up and we decided on a pinky/peachy blush colour to go above the dado rail, it felt logical to pick out a soft grey from the wallpaper for the outer fire surround. We inherited a cream gloss finish and with such intricate detailing there was absolutely no way I was even going to attempt to sand or peel it off so as a quick measure, painting over the top would have to do. This is ultimately only a temporary makeover and whatever we eventually end up doing to this room for keeps, the fireplace will definitely change as part of that.
After a bit of a wobble with a mismatch between tester and main paint from B&Q, I turned to trusty Frenchic Al Fresco paint because basically, with this stuff you can paint anything and our 1930’s fireplace makeover had begun. I gave the exterior surround a quick coat of primer but to be honest with the Al Fresco range you don’t really need it. I was able to get two coats done in one afternoon and did a third coat the next morning just for good measure. Ironically, it turned out to be just the grey I was looking for all along.
The hearth and inner surround of our 1930’s fireplace have proved to be a bit more tricky to tackle. The surface of both was a fake creamy mottled marble and I had an idea I wanted to create a terrazzo effect using a stencil, so I knew I had to get the base completely smooth and white. To be honest I’ve lost count of the amount of coats I did, at least 5 I think but it was an exterior masonry paint that I’d used outdoors in the summer that ended up being the winner for this part of the project.
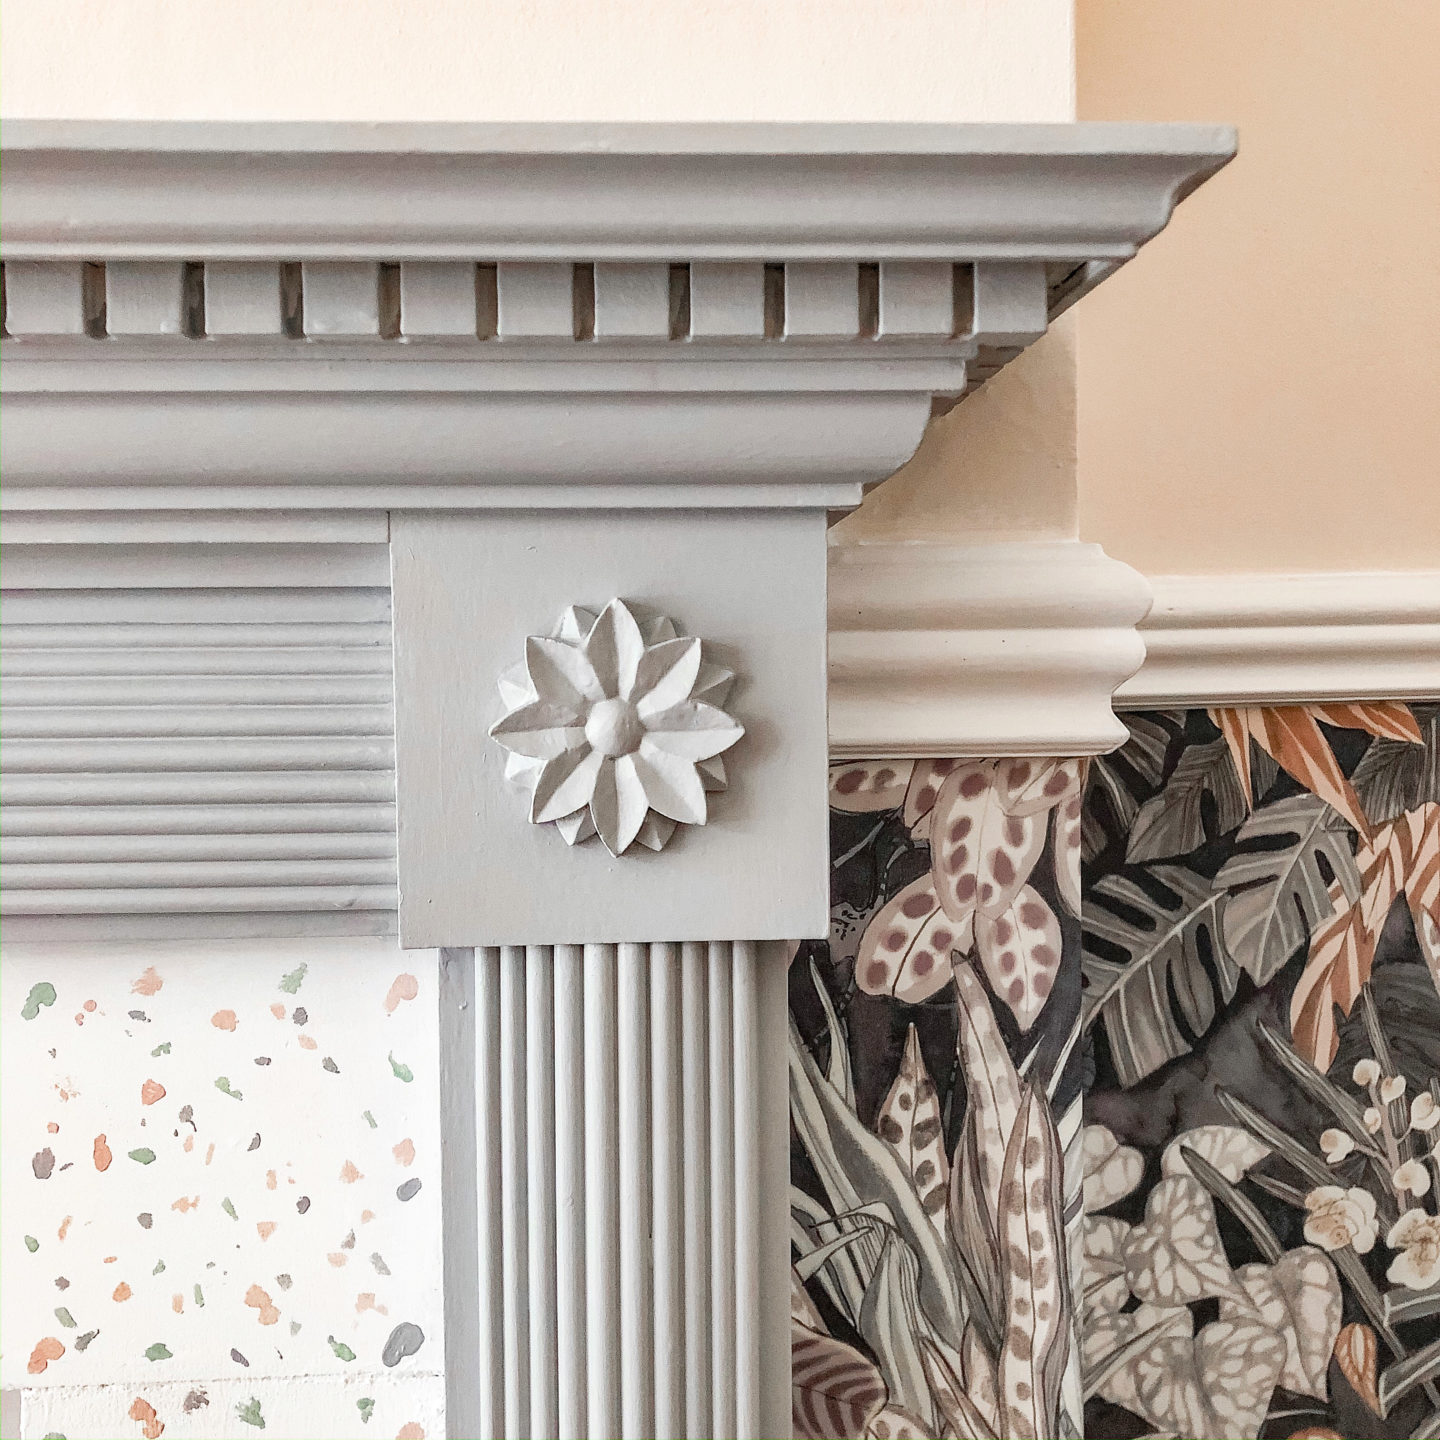
Once the base was ready I could then use a stencil I’d ordered from Dizzy Duck Designs to add the terrazzo effect. Patience is definitely key to this part as it’s small and fiddly work but I love the end result. I chose 3 colours, again all from leftover paints we had lying around in a pink, green and grey, to tie in the with the colours of the wallpaper. To finish and add a sealant coat I used Polyvine Decorators Varnish in satin – it means that your surface is then wipeable in case any pesky paw prints find their way on.
Last but by no means least, the interior of the fireplace. Once I hoovered everything out it became apparent that the surface was essentially render which hadn’t been painted over properly as the paint was powdery and flaky in a lot of areas. So I sanded back what I could and then used the same exterior masonry paint, a good few coats to get it looking bright and smart again.
There is actually a plug socket inside the fireplace and I think the previous owners used to have an electric stove in here which we may replicate. These days you can get some pretty stylish ones and we always have a little heater on in the room at this time of the year for the animals anyway.
So there we are! I’d love to say this was a quick process and to be fair if I wasn’t juggling a few other tasks at the same time it probably would have been. It’s such a huge transformation of our 1930’s fireplace though with very little cost and I’m thrilled at how it’s looking so far. Here’s to all the fun parts like styling and decorating for Christmas…although knowing how fast I work it will be next Christmas at this rate…
Follow me on Facebook | Instagram | Pinterest | Twitter

